Quellen: Internet Bildersuche
English Version
Das Fahren ohne Dach hat gewisse Reize. Im Fall meines Toyota FJ40 gleich zwei. Die aufwändigen Arbeiten im Innenraum würden durch das Dach teilweise verborgen. Ein Absenken des Schwerpunktes wird auch das Fahrverhalten im Gelände verbessert. Das alles hat mich zu einem Versuch inspiriert. Anstelle des schweren und hoch aufragenden Dachaufbaus etwas Luftiges aus Stoff zu gestalten. Also Optik und Fahrdynamik vereint.
Zuvor wurde ich aber mit zwei Problemstellen konfrontiert. Der eigentlich durch das Dach geschützte Überrollbügel aus Kunststoff und der nur eingesteckte Rahmen der Frontscheibe waren Hindernis und Risiko zugleich. Ein Sonnendach würde am oberen Scheibenrahmen eingehängt und über den Überrollbügel in den rückwärtigen Bereich abgespannt worden. So jedenfalls die gängige Praxis. Hätte ich das auch so umgesetzt, wären Scheibenrahmen und Bügel permanent unter Zugspannung. Bei geöffneten Türen sogar noch verstärkt.
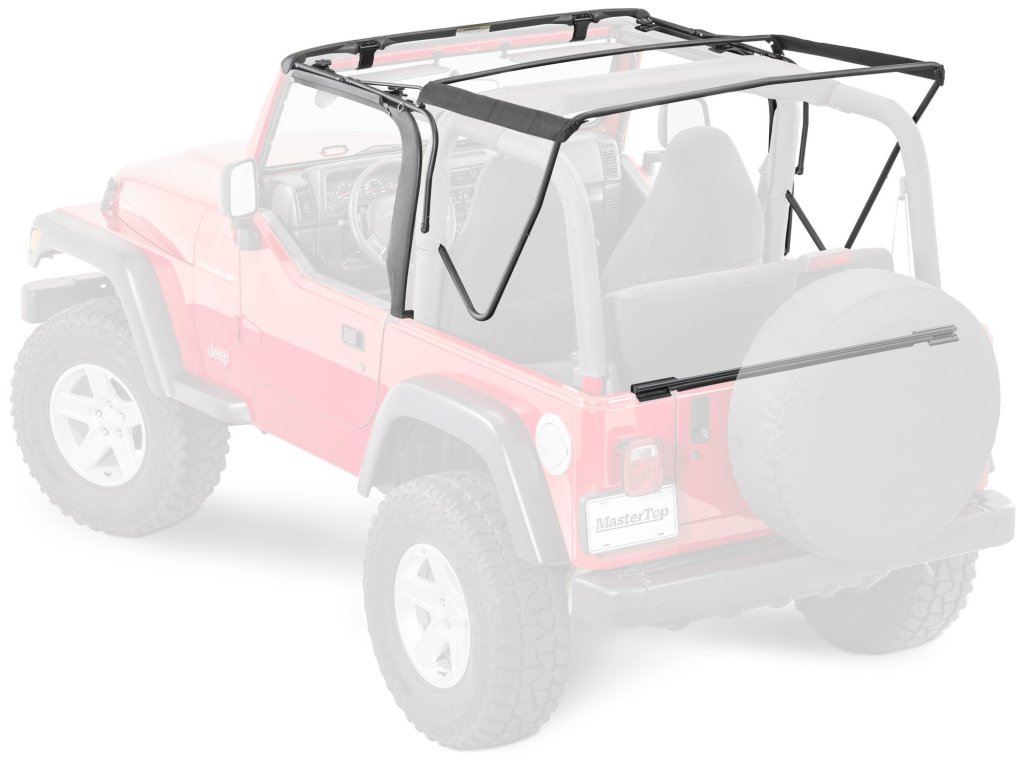
Mein Lösungsansatz: eine Hilfskonstruktion. Teile der Konstruktion sind an diversen Aufbauten zu finden. Für den Jeep Wrangler TJ beispielsweise sieht das so aus und daran habe ich mich grob orientiert. Nur wird der Bereich der Ladefläche beim Toyota frei bleiben und nur der Fahrer beschattet.
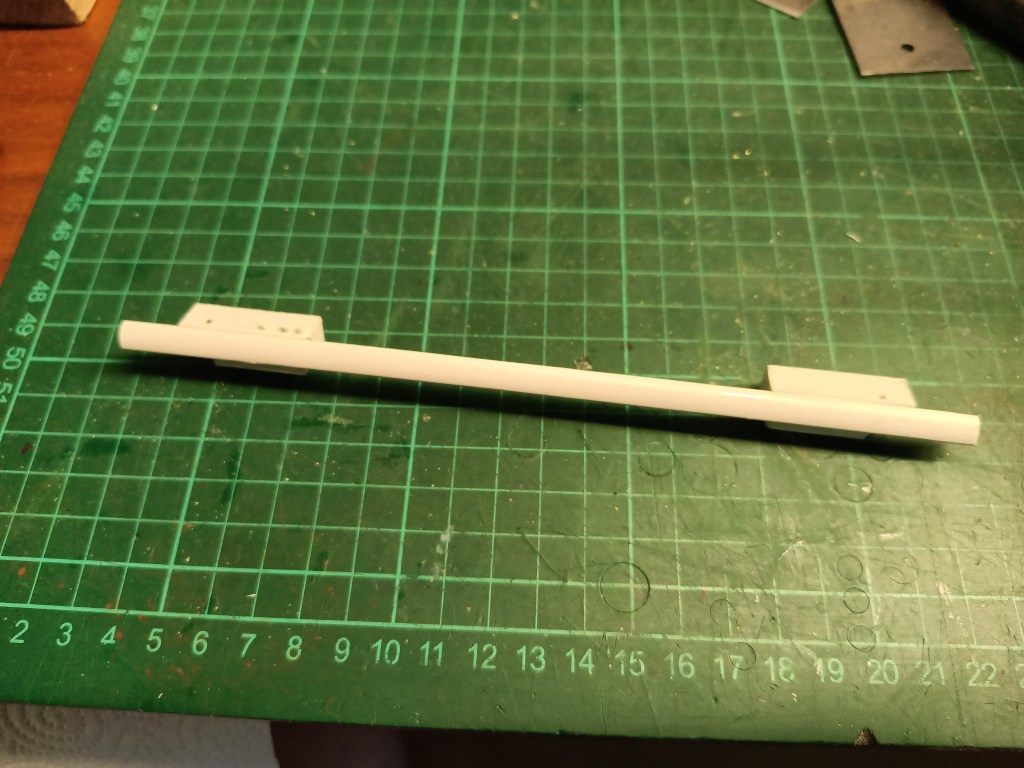
Am Scheibenrahmen habe ich mit der Baustelle begonnen. Zwei modifizierte Teile wurden in vorhandene Bohrungen mit Silberstahldraht gesteckt. Ein Viertelkreis-Kunststoffprofil verbindet beide Teile zu einem Bauteil. An die Vorderseite kommen ggf. noch Haken, in denen der Stoff eingehängt wird.
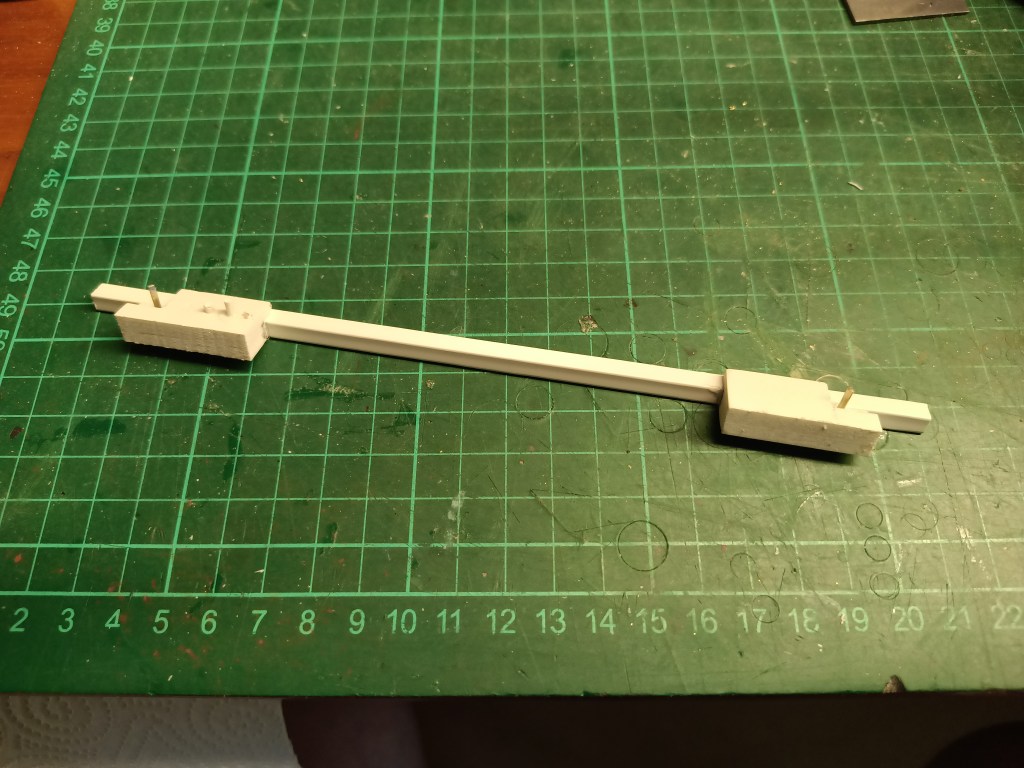
In zwei vorhandenen Bohrungen der ausgebauten Sitzbänke im Laderaum sitzen nun zwei Halter. Dort hinein wird der hintere Stützbügel gesteckt. Das Rohrstück wird von unten verschraubt und die Platte erhält für die Optik je vier Schraubenköpfe.
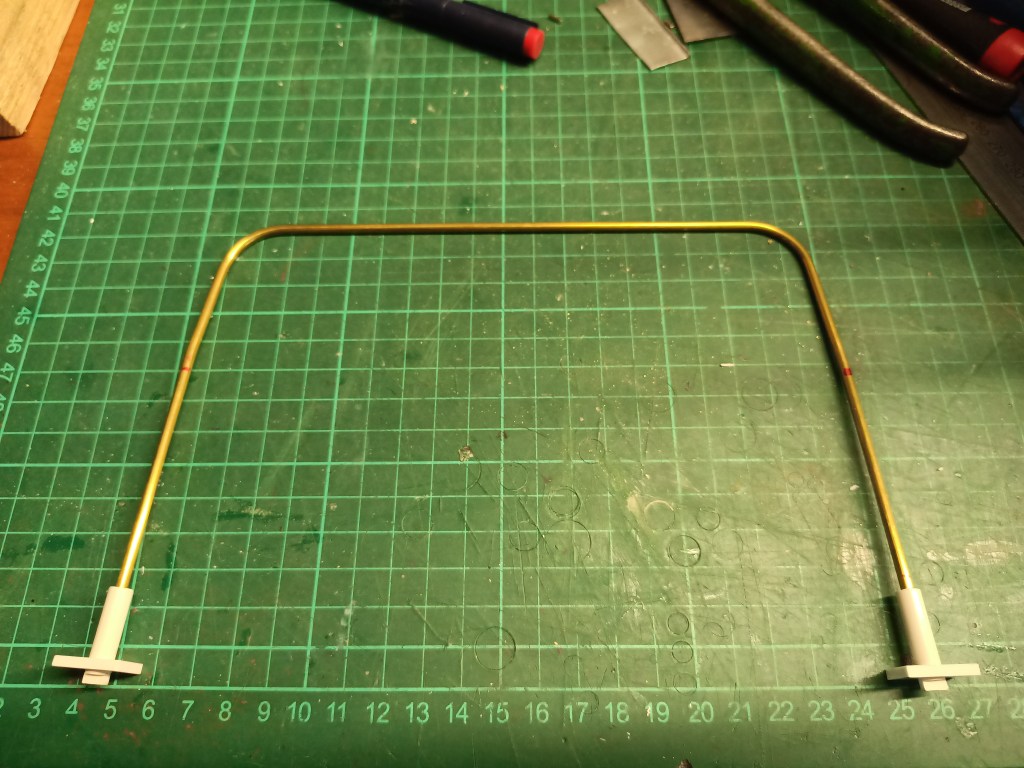
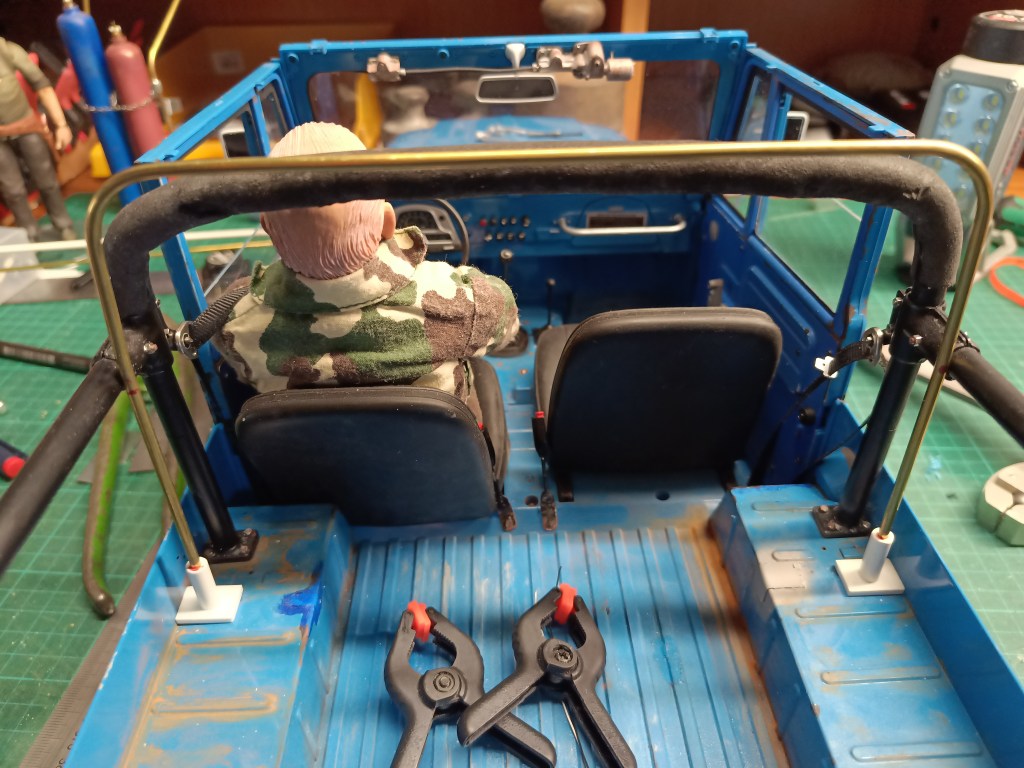
Zwei parallele Messingrohre verbinden den Scheibenrahmen mit dem hinteren Bügel. Drei Silberstahlstäbe verbinden diese wiederum untereinander. Sie haben unterschiedliche Höhen und sind im Sitzbereich erhöht, hinten und vorne hingegen leicht abfallend gebogen.
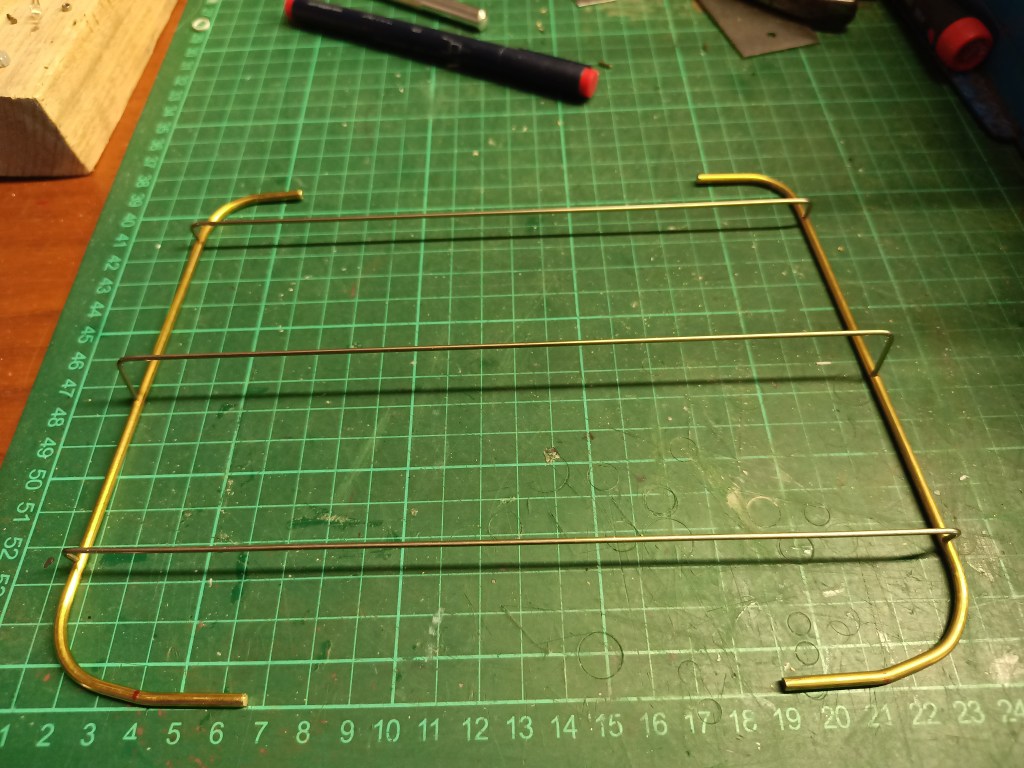

Nach dem Verlöten sieht das Gestell dann so aus.
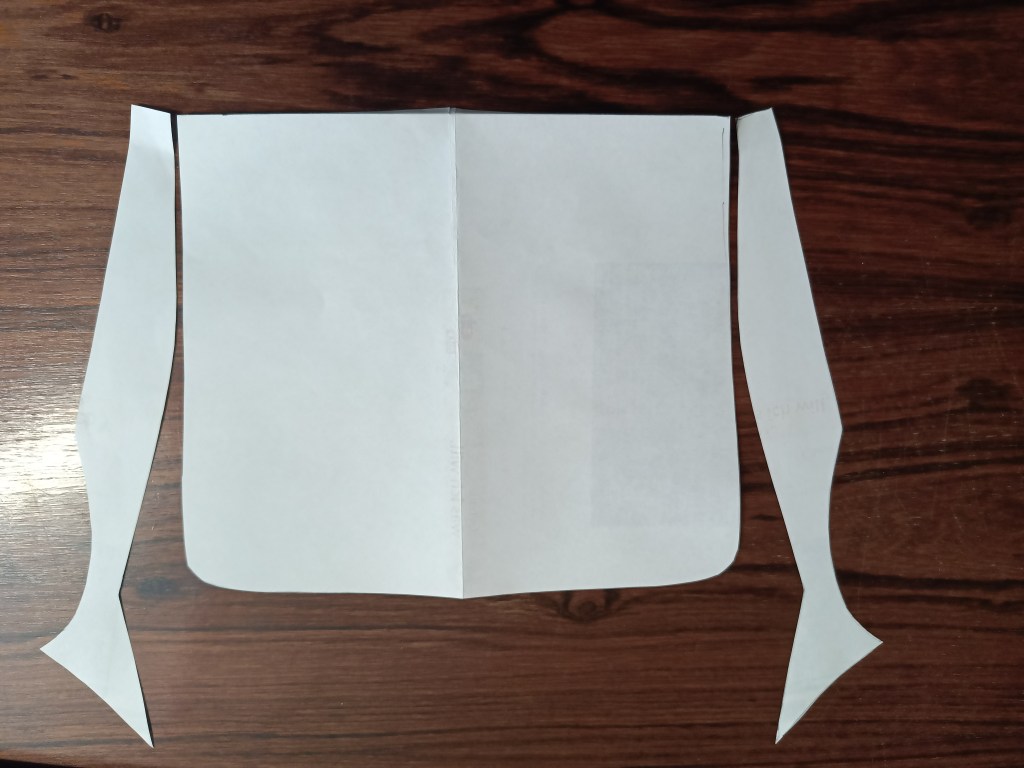
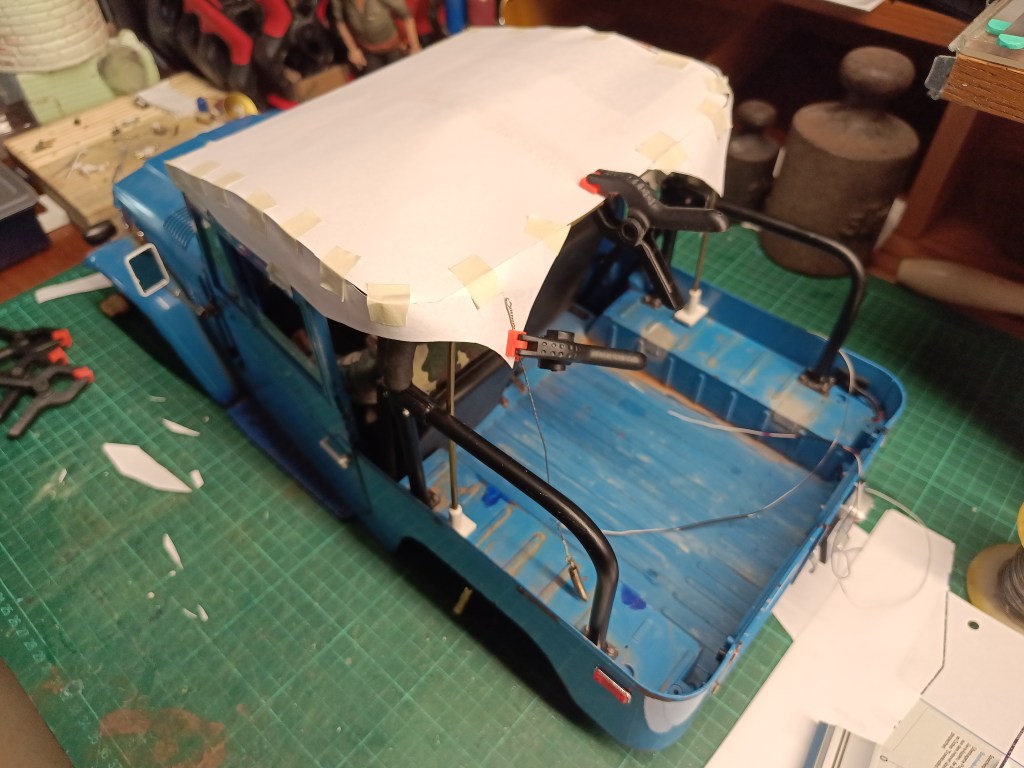
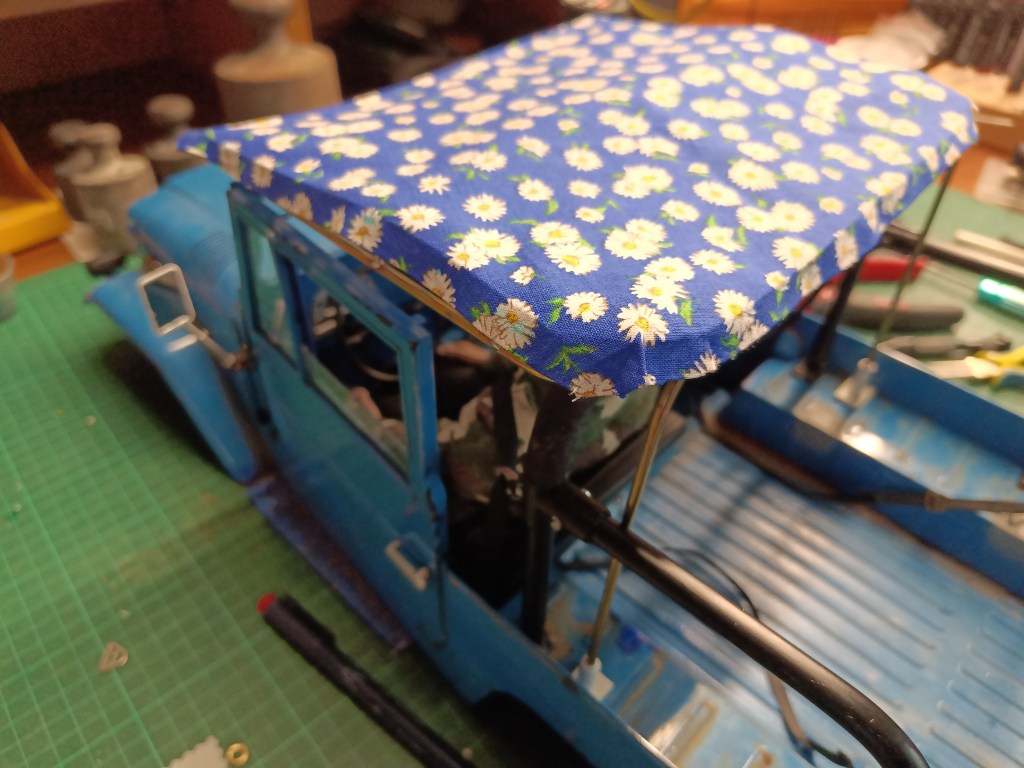
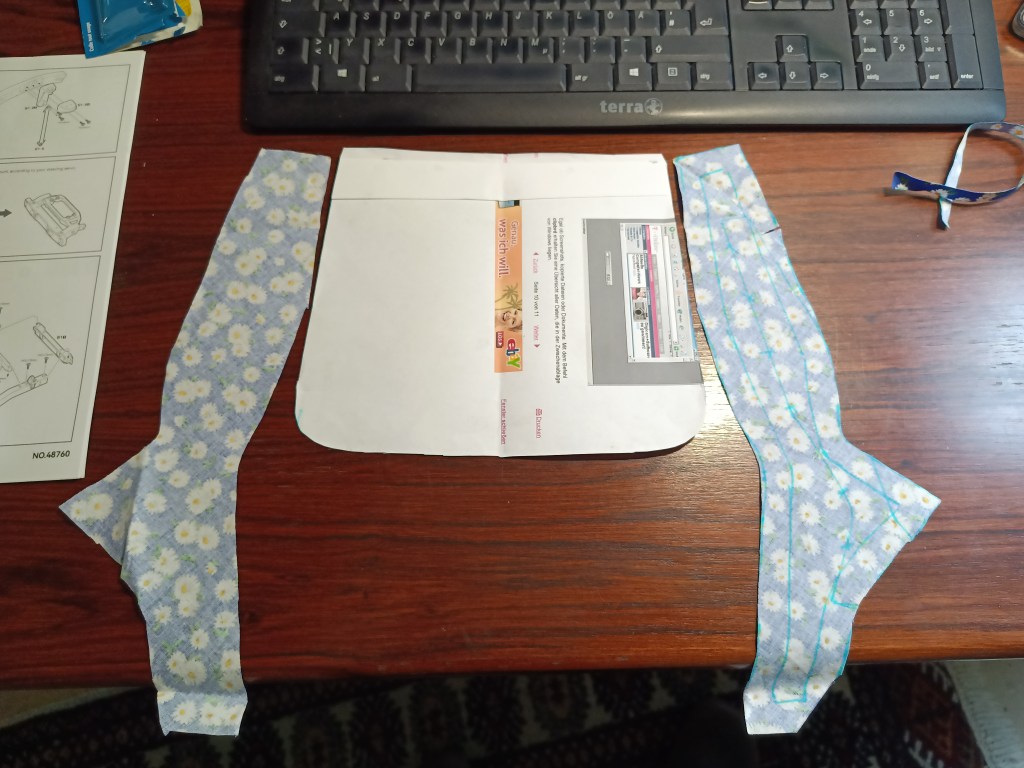
Für die Dachbespannung hatte ich zunächst Frust, weil erstmals völlig ratlos. Mit Unterstützung u.a. meiner Tochter ergab sich dann aber ein Lösungsansatz. Nach mehreren Stunden Papier schneiden und anpassen ein erstes Schnittmuster.
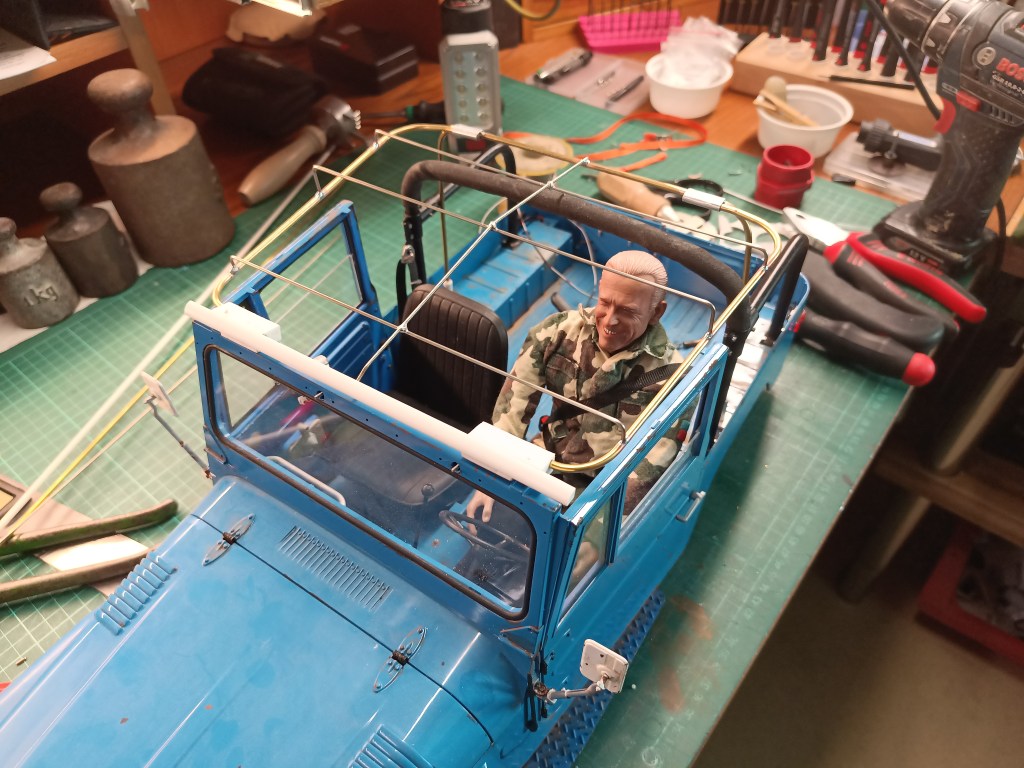
Mit Kreppband vorläufig fixiert, konnte das Schnittmuster schliesslich auf dem Gestell befestigt werden. Mit Papier sieht es noch etwas eckig aus, mit Stoff wird das sicher harmonischer werden.
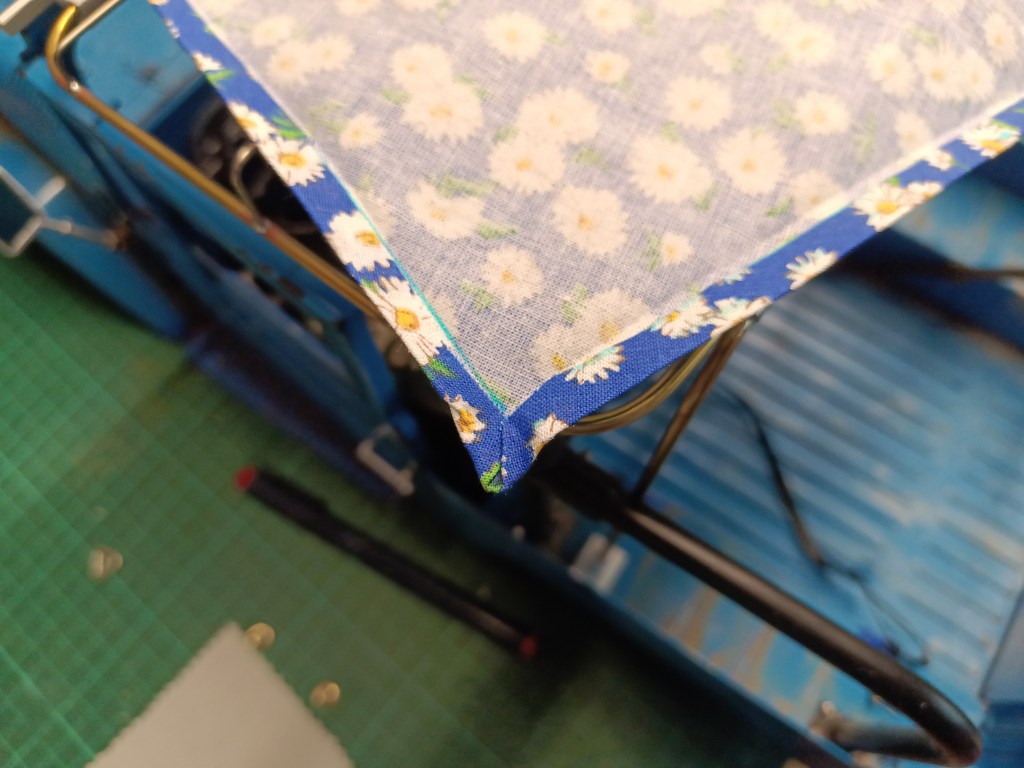
Und das folgt auch gleich im Anschluss. Gleich vorweg, der gezeigte Stoff ist ein Reststück, dass nur bei meinem allerersten Versuch, etwas mit Stoff zu machen, Verwendung findet. 😏
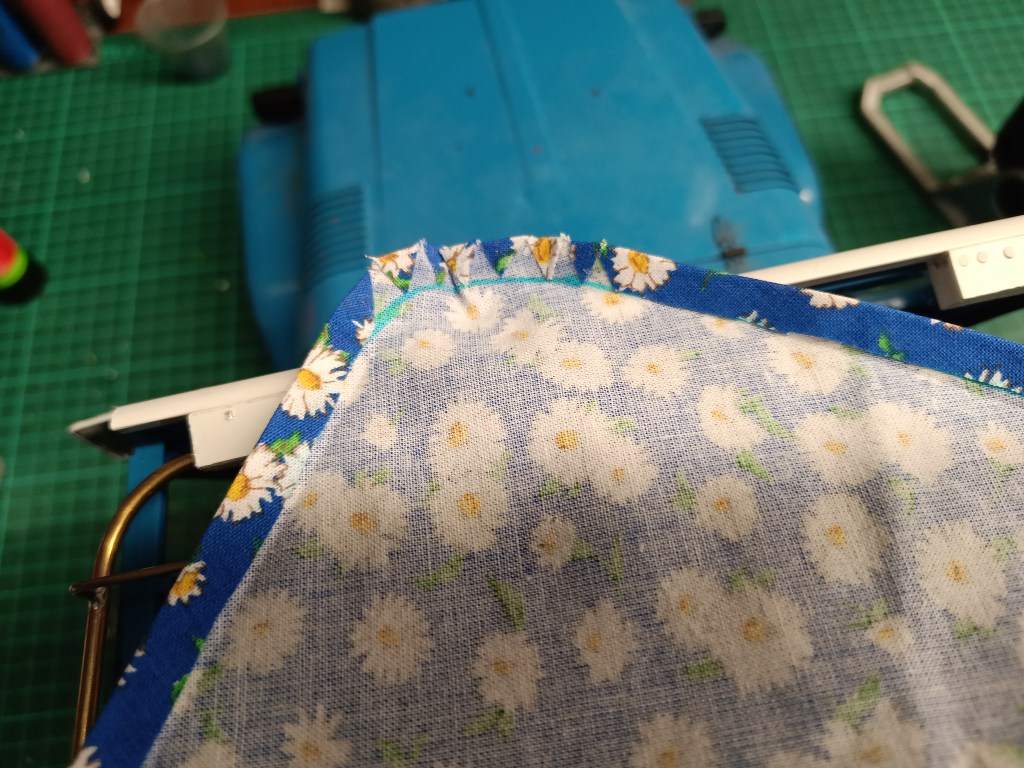
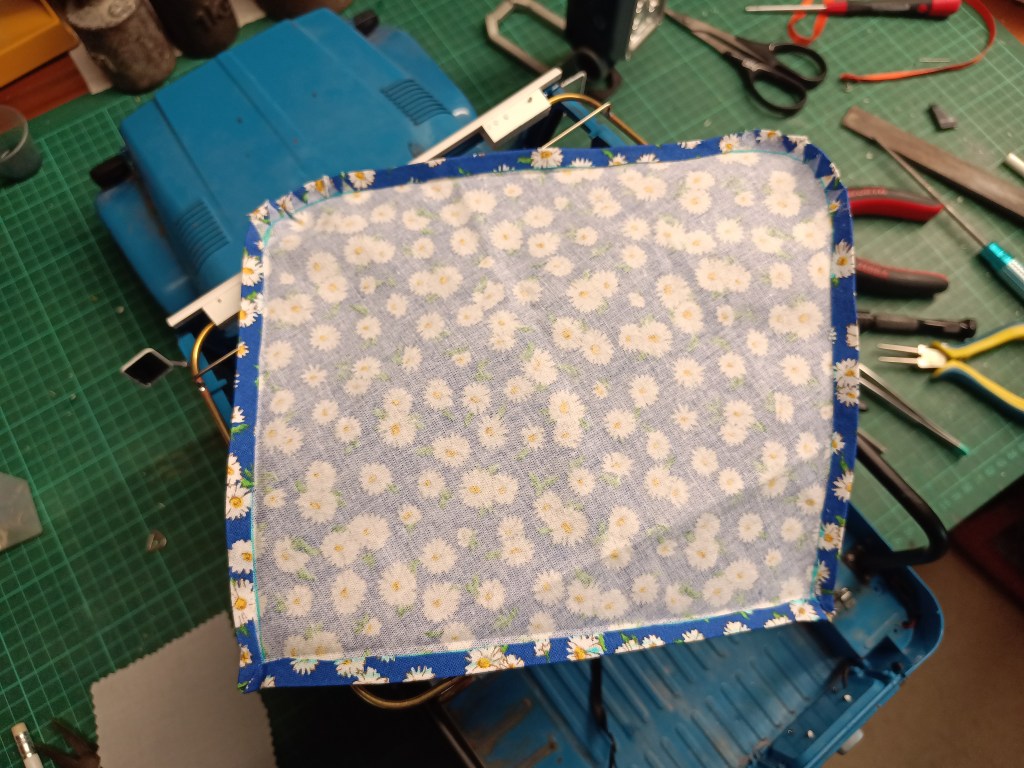
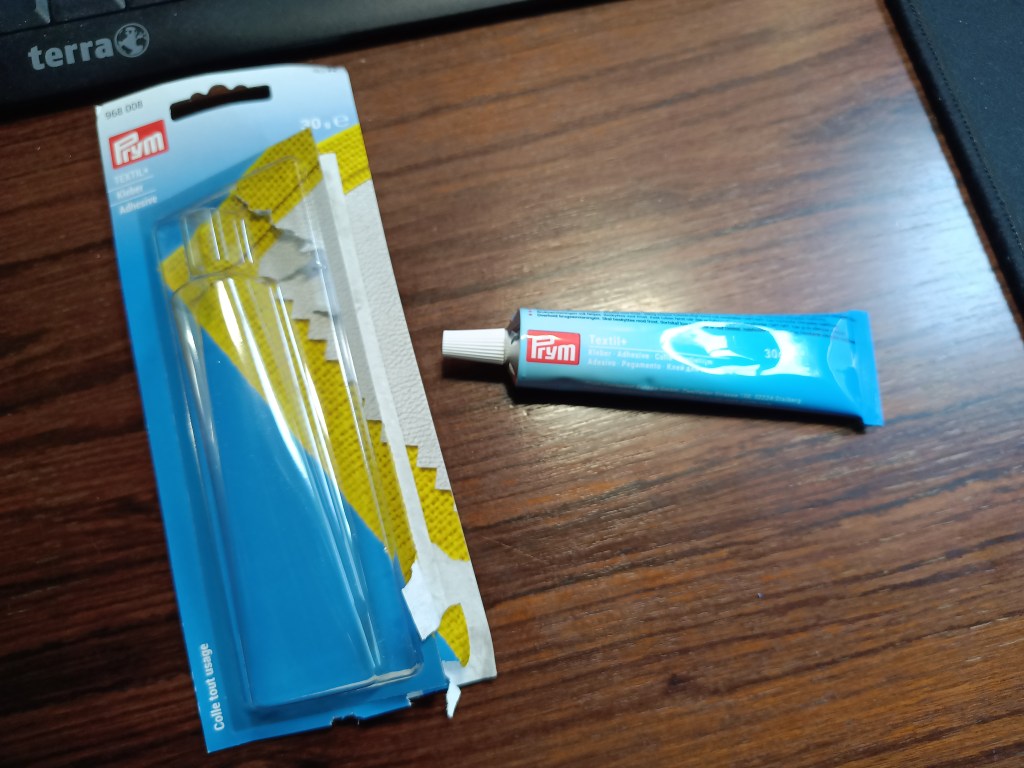
Wie das Dach, entstanden auch die beiden Seitenteile nach einer Papiervorlage. Da ich bisher keinerlei Näherfahrungen besitze, wurden nach dem Schneiden nichts umgenäht, sondern verklebt. Als Zuschlag habe ich 1,5 cm angenommen, gebügelt und anschließend verklebt.
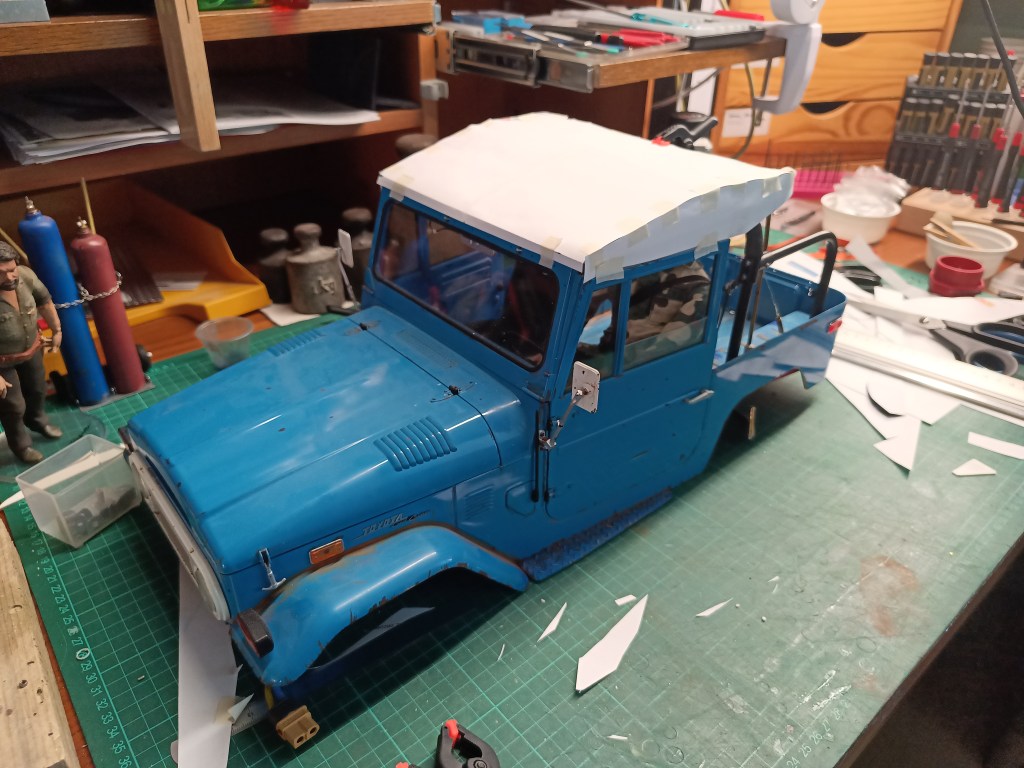
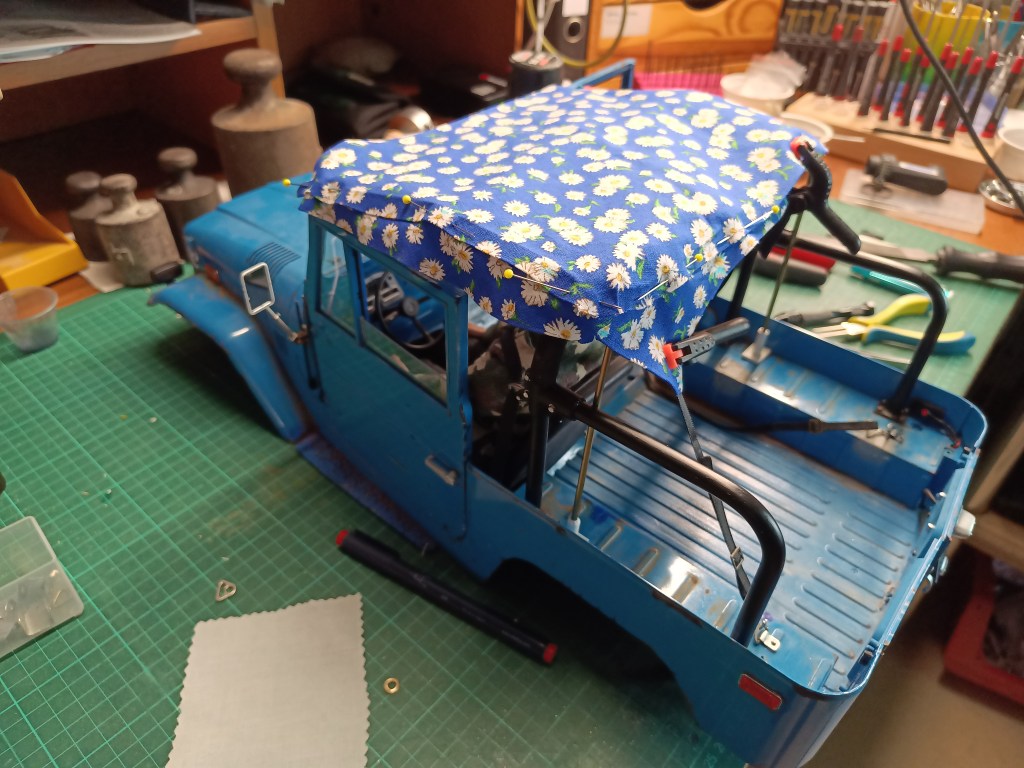
Das so entstandene Ergebnis sieht ziemlich blumig, aber doch insgesamt erfreulich aus. Auch die Spanngurte ergänzen das positive Bild. Aktuell läuft die Stoffbeschaffung für das finale Sonnendach.
Das fertige Ergebnis stelle ich in einem der folgenden Beiträge vor. Wird also schnellstmöglich fortgesetzt…
English Version
Building a sunroof for the FJ40
Sources: Internet picture search
Driving without a roof has certain charms. In the case of my Toyota FJ40, it has two. The roof partially conceals the complex work in the interior. Lowering the center of gravity also improves off-road handling. All this inspired me to try something new. To design something airy made of fabric instead of the heavy and towering roof structure. So optics and driving dynamics combined.
But first I was confronted with two problem areas. The plastic roll bar, which was actually protected by the roof, and the windshield frame, which was only inserted, were both an obstacle and a risk. A sunroof would have been attached to the upper windshield frame and tensioned over the roll bar into the rear area. At least that was standard practice. If I had implemented it in the same way, the windshield frame and bar would have been under permanent tension. Even more so when the doors are open.
My solution approach, an auxiliary construction. Parts of the design can be found on various bodies. For the Jeep Wrangler TJ, for example, it looks like this and I have roughly oriented myself on this. The only difference is that the loading area of the Toyota remains free and only the driver is shaded.
I started work on the windshield frame. Two modified parts were inserted into existing holes with silver steel wire. A quarter-circle plastic profile connects the two parts to form a single component. Hooks may be added to the front to hang the fabric in.
Two holders are now fitted in two existing holes in the removed bench seats in the load compartment. The rear support bar is inserted into these. The piece of tubing is screwed into place from below and the plate is fitted with four screw heads each for the look.
Two parallel brass tubes connect the windshield frame to the rear bracket. Three silver steel rods connect these to each other. They have different heights and are raised in the seat area, but are slightly curved at the back and front.
After soldering, the frame looks like this.
I was initially frustrated with the roof covering because I was completely at a loss for the first time. However, with the help of my daughter and others, a solution was found. After several hours of cutting and adapting paper, a first pattern was created.
Fixed temporarily with masking tape, the pattern could finally be attached to the frame. With paper it still looks a bit angular, but with fabric it will certainly be more harmonious.
And that’s what follows next. First of all, the fabric shown is a leftover piece that will only be used in my very first attempt to make something with fabric. 😏
Like the roof, the two side parts were also made from a paper template. As I have no sewing experience, I didn’t sew around anything after cutting, but glued them together. I took 1.5 cm as an allowance, ironed it and then glued it.
The result looks rather flowery, but still pleasing overall. The tension belts also add to the positive picture. The fabric for the final sun canopy is currently being procured.
I will present the finished result in one of the following posts. So it will be continued as soon as possible…
Translation, with the kind support of deepl.com
