Auf einem ausgedienten Besprechungstisch, im Format 2 x 1 m, habe ich meine Baustelle begonnen.
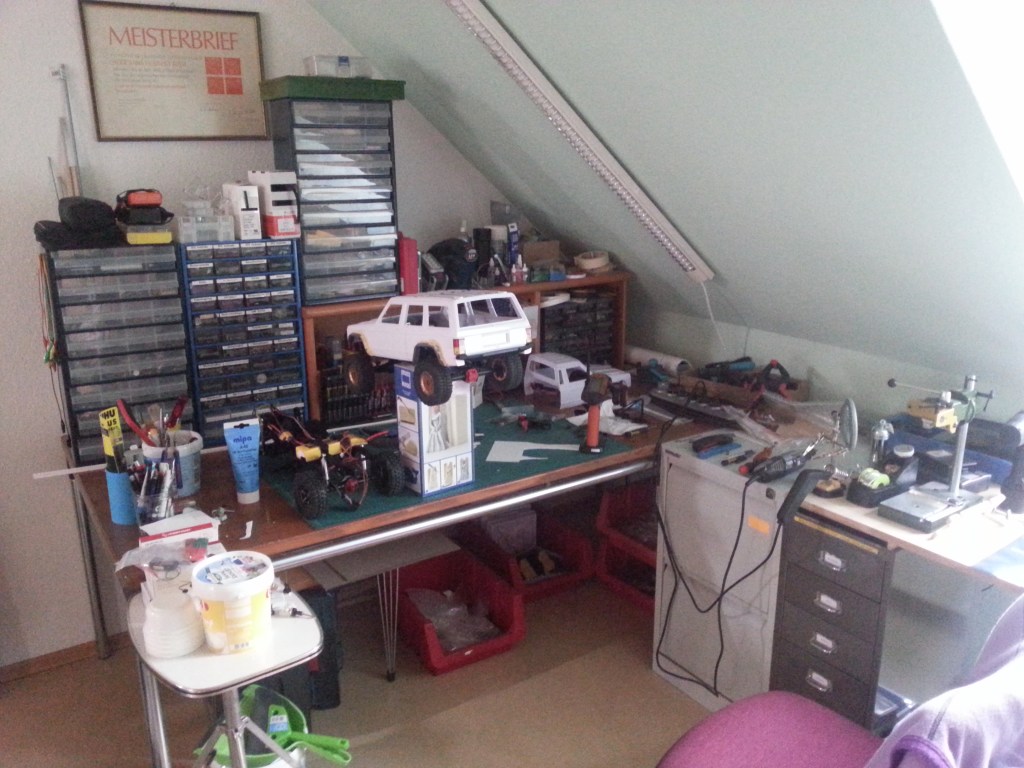
Handarbeit, einige wenige Werkzeuge und ein Dremel 4000, hatten mir für den ersten Comanche noch gereicht.

Der Wunsch die eigenen Arbeitsergebnisse zu verbesseren, sollten in erster Linie durch einen 3D-Drucker erfolgen. Mich haben aber bei den in Frage kommenden Modellen, die Druckergebnisse nicht wirklich überzeugt. Das hat schliesslich zur Anschaffung eines Koordinatentisch geführt. Damit habe ich mehr Einfluss auf das Ergebnis. Da kenne ich auch wenig Kompromisse.
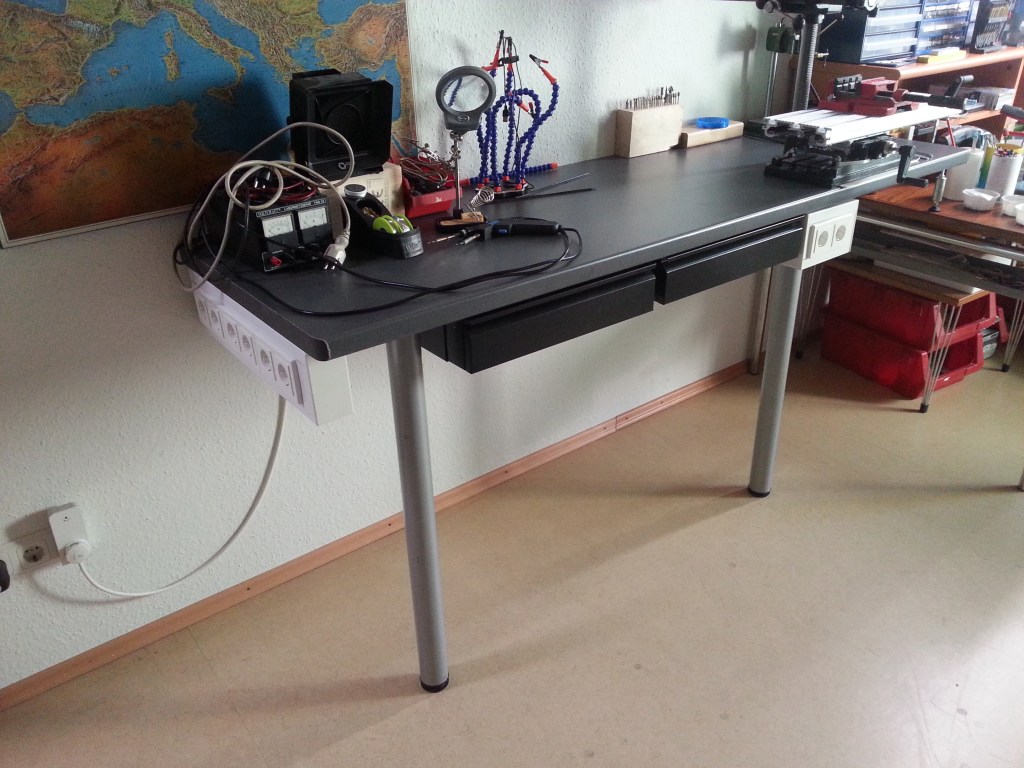
Auf einer vorübergehenden Flächenerweiterung, fand der Koordinatentisch seinen Platz. Im Bereich des Fensters und der dortigen Dachschräge, aber kein optimaler Standort. Somit ein Provisorium, mit Verfallsdatum. Daher wurde der Rest einer Küchenarbeitsplatte, im Anschluss an den Arbeitstisch montiert. Auf knapp zwei Metern fanden dort der Koordinatentisch und ein Elektroarbeitsplatz ihre neue Heimat. Dazwischen verbleibt ein zusätzlicher Bereich, für eine zusätzliche Arbeitsfläche. Die neugeschaffene Fläche ruht auf einem stabilen Balken an der Wand und zwei robusten Füßen an der Vorderseite. Mit einer Arbeitshöhe von 90 cm, bei 60 cm Tiefe, ist hier ein sehr rückenschonendes Arbeiten möglich. Hätte ich mir die Arbeitsplatte gekauft, wäre ich dabei sicher auf eine Tiefe von mindestens 80 cm gegangen. So ist aber bis auf weiteres genügend Potenzial verfügbar.
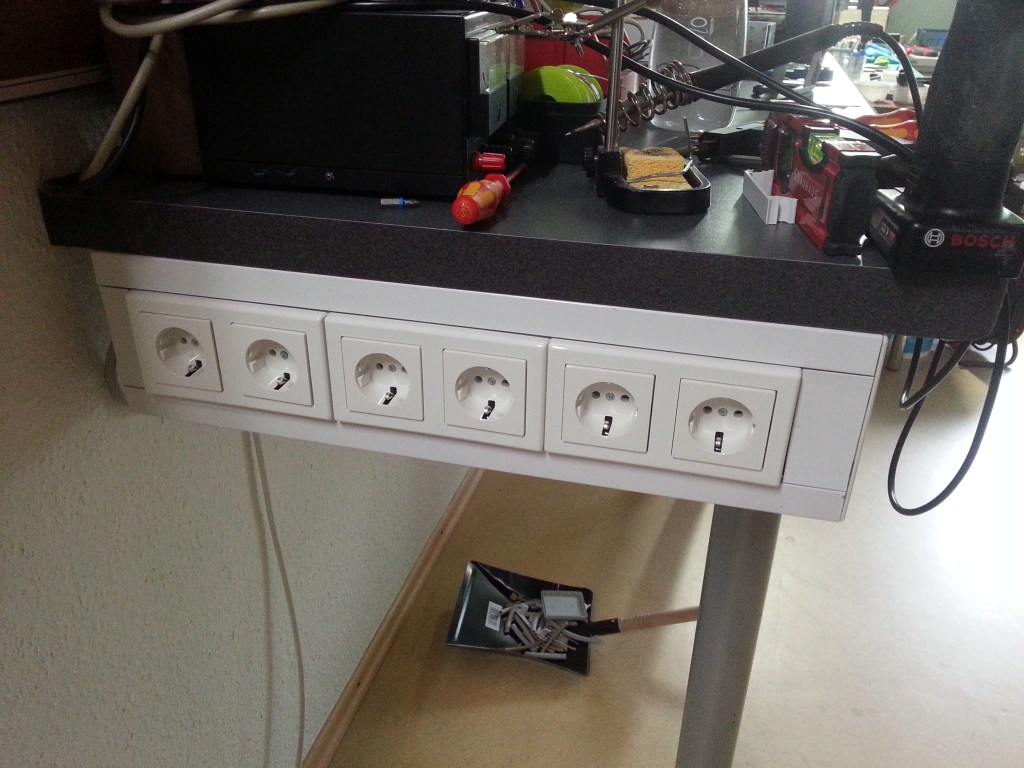
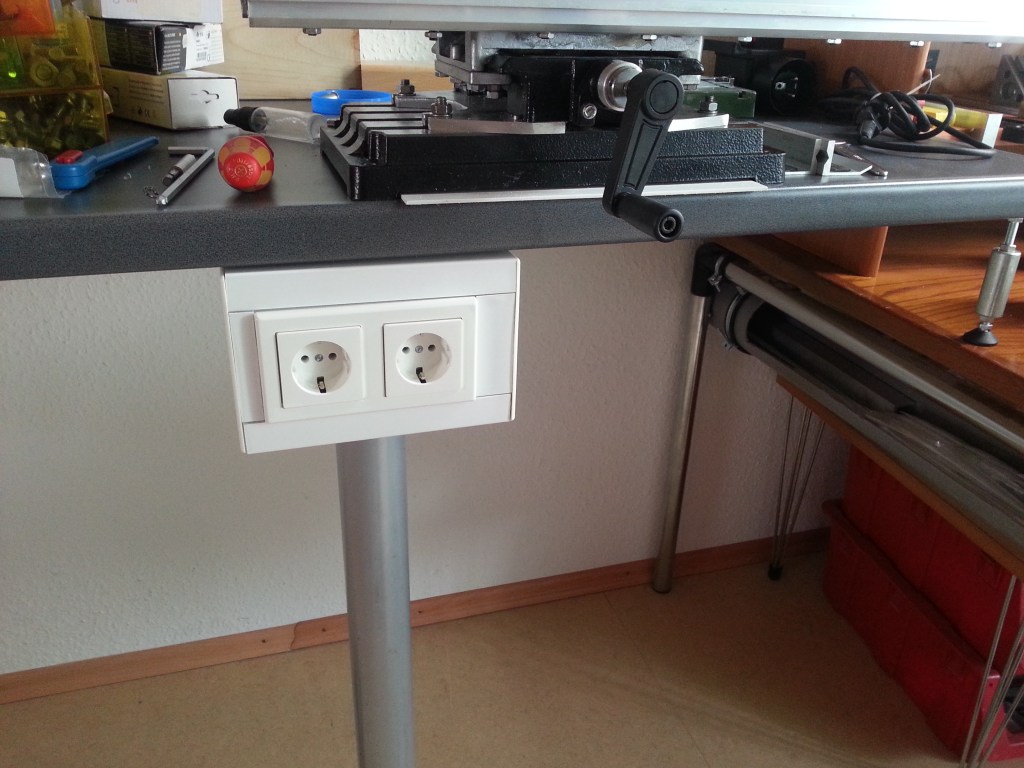
Natürlich sollte dann auch alles möglichst optimal strukturiert sein. Was kann also noch optimiert werden? Zunächst die Stromversorgung. Bisher hatte eine Mehrfachsteckdose, die verschiedenen Geräte mit Energie versorgt. Geht natürlich, das Durcheinander der diversen Kabel hat mich aber immer gestört. Das wollte ich jetzt vermeiden. Nach einer umfangreichen Suche in meinem Materiallager, fand ich eine Lösung. Das Reststück eines Brüstungskanals war noch vorhanden. Auf der linken Seite des Elektroarbeitsplatzes wurden darin sechs Steckdosen montiert.
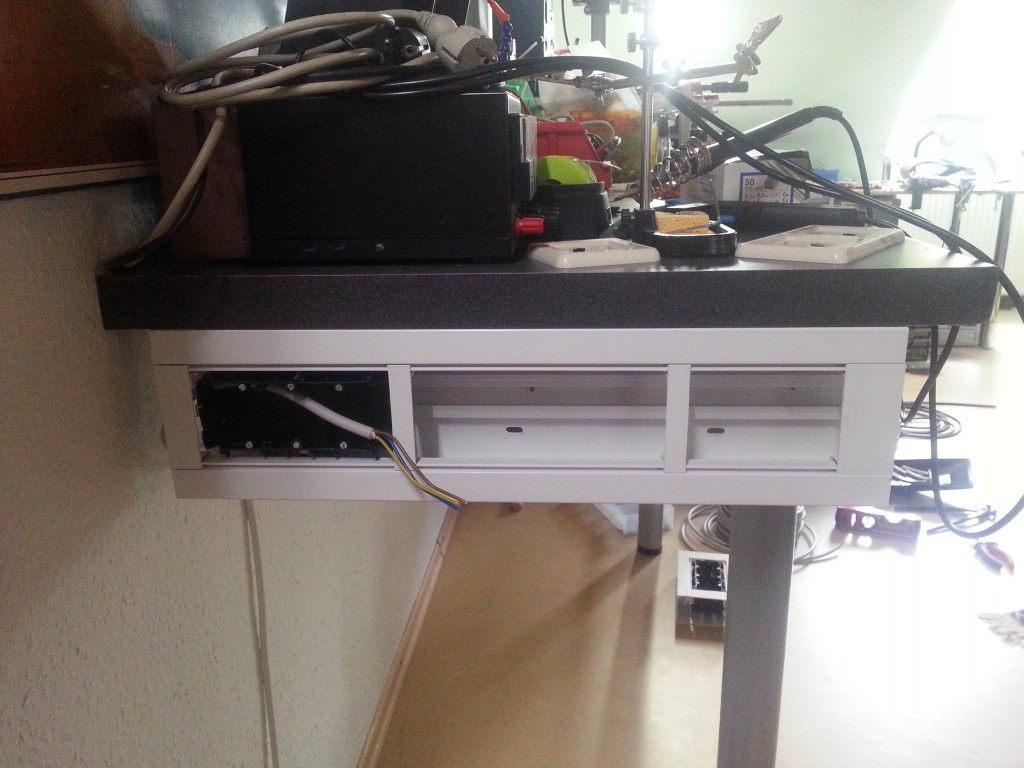
Zwei weitere auf der linken Seite, damit auch Fräsmotor, Bohrmaschine oder andere Gerätschaften angeschlossen werden können.
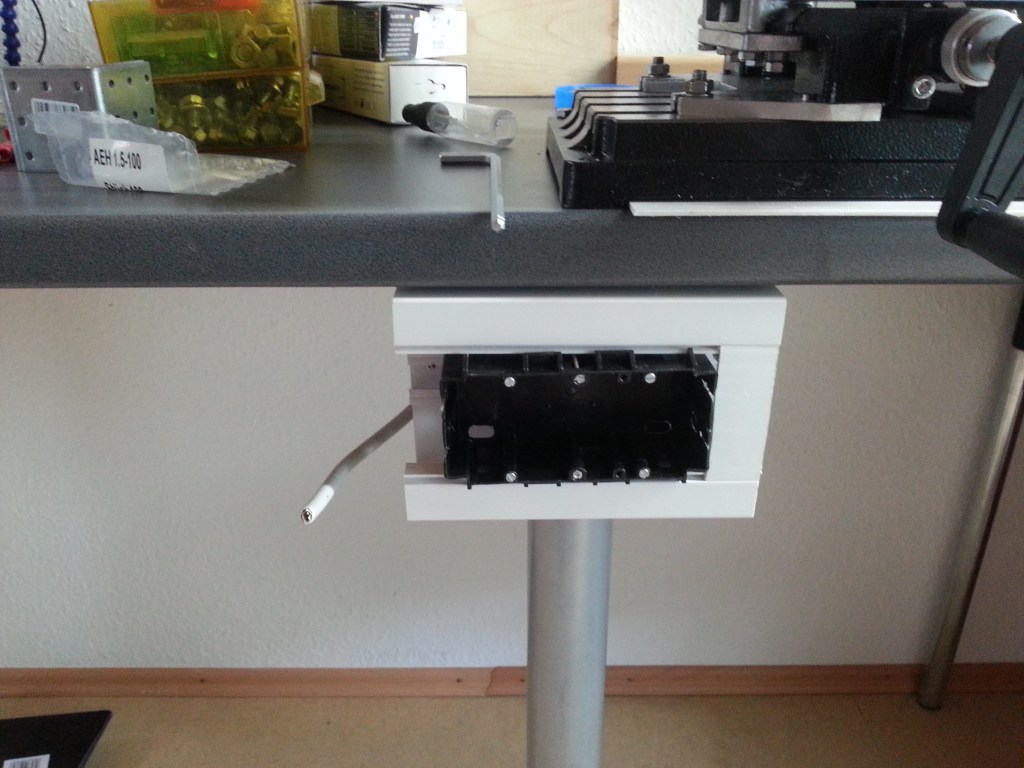
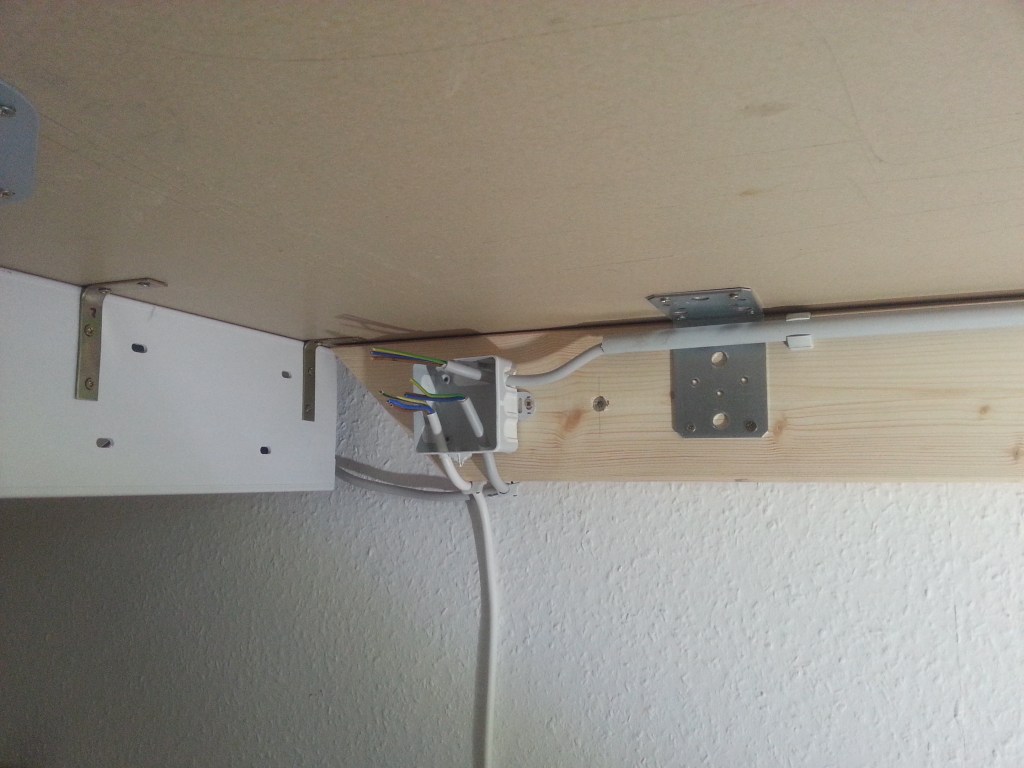
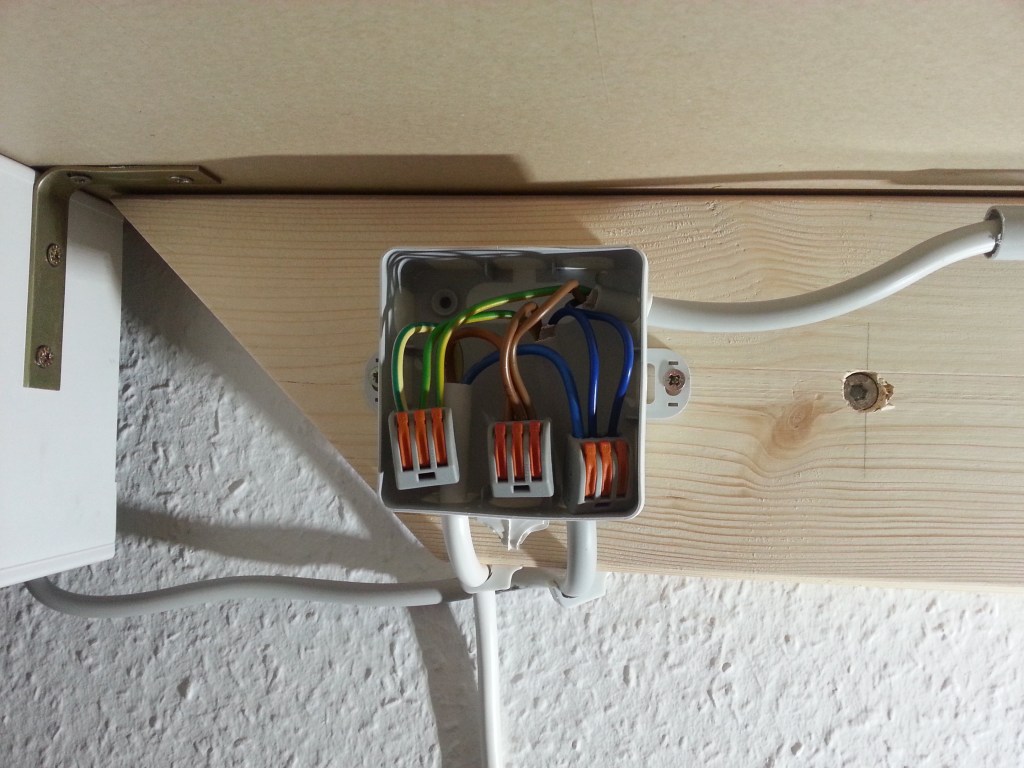
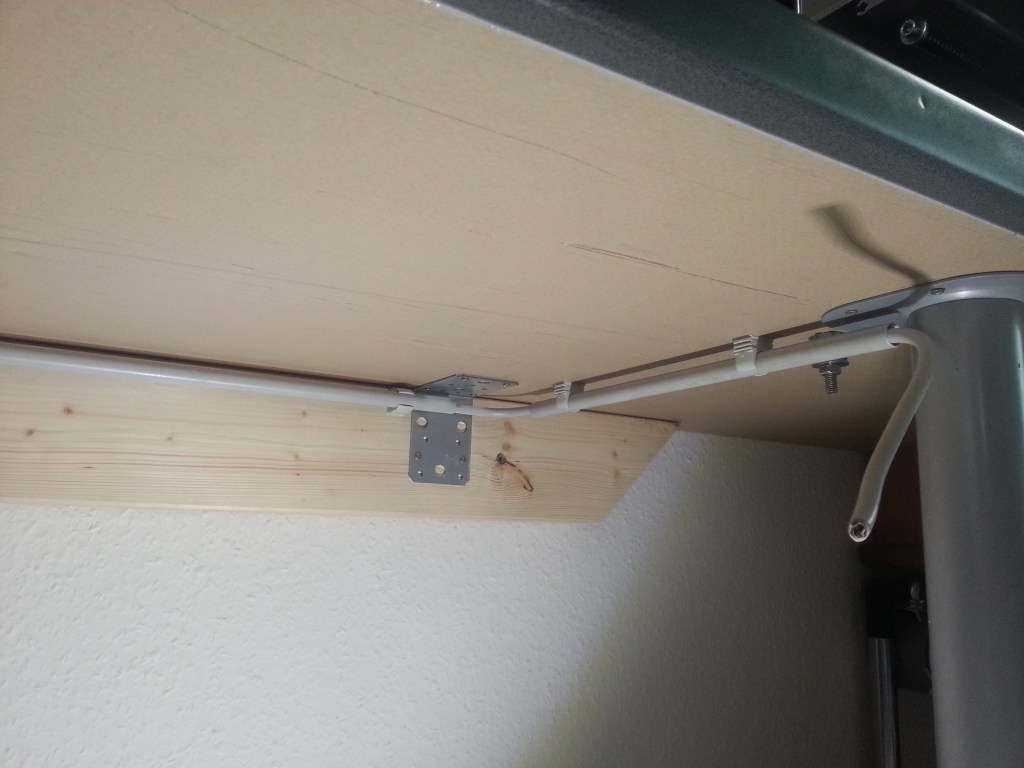
Die Stromversorgung erfolgte unter dem Tisch, mit Einspeisung aus einer benachbarten Steckdose. Aus der Verteilerdose wird die Stromversorgung auf die beiden Steckdosenblöcke weiter verteilt.
Nach der Spannungsprüfung sind die Steckdosen einsatzbereit. Zwei Fertigschubladen wurden noch dazugekauft und montiert. Messgeräte sind darin untergebracht. Rechts unter dem Koordinatentisch verbleibt sogar noch eine Erweiterungsfläche für eine dritte Schublade. Um die nutzbare Arbeitsfläche zu maximieren, werde ich noch mindestens ein Regalbrett, 30 cm oberhalb der Arbeitsfläche montieren. Dann sind auch das Netzteil, Lötrauchabsaugung, Messkabel und Lötzinn aus dem Arbeitsbereich verbannt. Zwei zusätzliche Halterungen für die Lötkolben runden die finale Aufräumaktion ab. Im schlechtesten Fall muss die Europakarte ausziehen. Ein kleines Buchenreststück habe ich auch noch gefunden. Darin werde ich Löcher für die Fräser bohren und einsortieren. Meine aktuelle Lösung gefällt mir nicht!
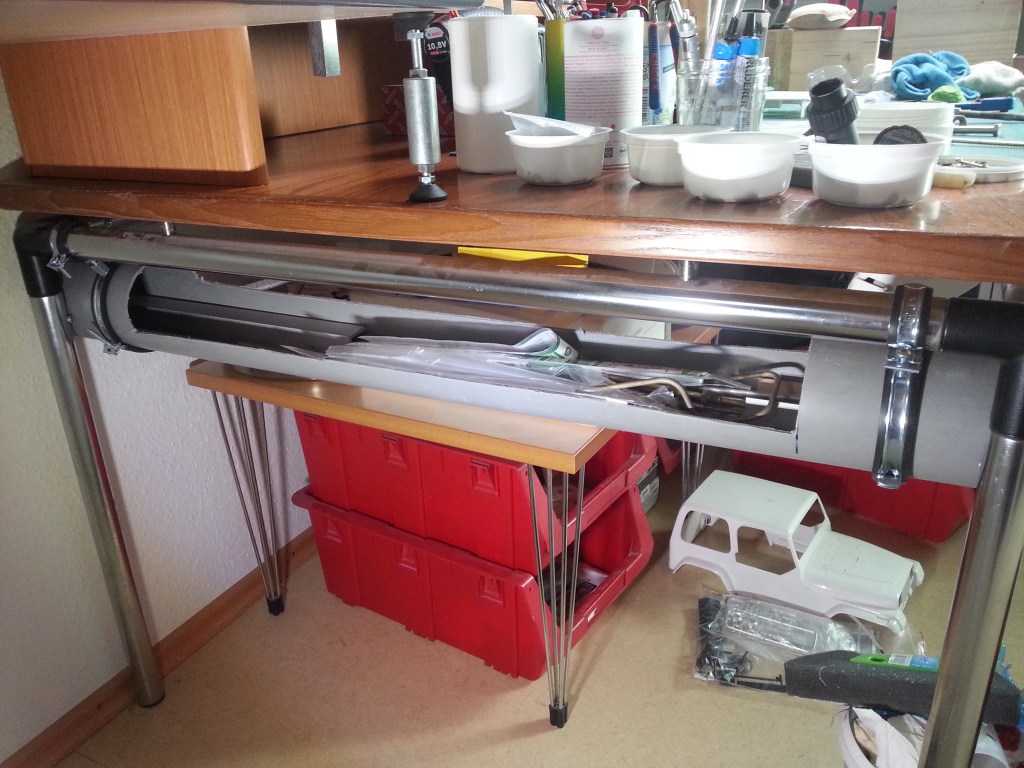
Lange Bauteile,aus Kunststoff oder Metall, werden häufig im Modellbau eingesetzt. Deren Sperrigkeit ist besonders bei der Lagerung ein Problem. Hier wurden sie einfach in einem alten Kunststoff-Abflussrohr abgelegt. Mit vier Rohrschellen wurden das Teil am Arbeitstisch verschraubt. Durch die großzügige Aussparung ist so auch der Zugriff auf kürzere Bauteile möglich.

Papier für die Handreinigung und als Schleifunterlage, sind ein weiterer Bestandteil meiner Werkstatt. Die Küchenrolle lag leider immer irgendwo im Weg, verschmutzte dabei und wurde somit ungenutzt zu Abfall. Kein guter Ansatz. Etwas nachdenken und dazu einige praktische Ausführungsbeispiele studiert. Mittels Resteverarbeitung einiger ungenutzter PS-Platten, entstand ein Rollenhalter für eine Untertisch-Montage. Wie beim „Abflussrohr“, wurde auch hier das untergebaute Rohrgestell integriert, als Ablaufrolle.
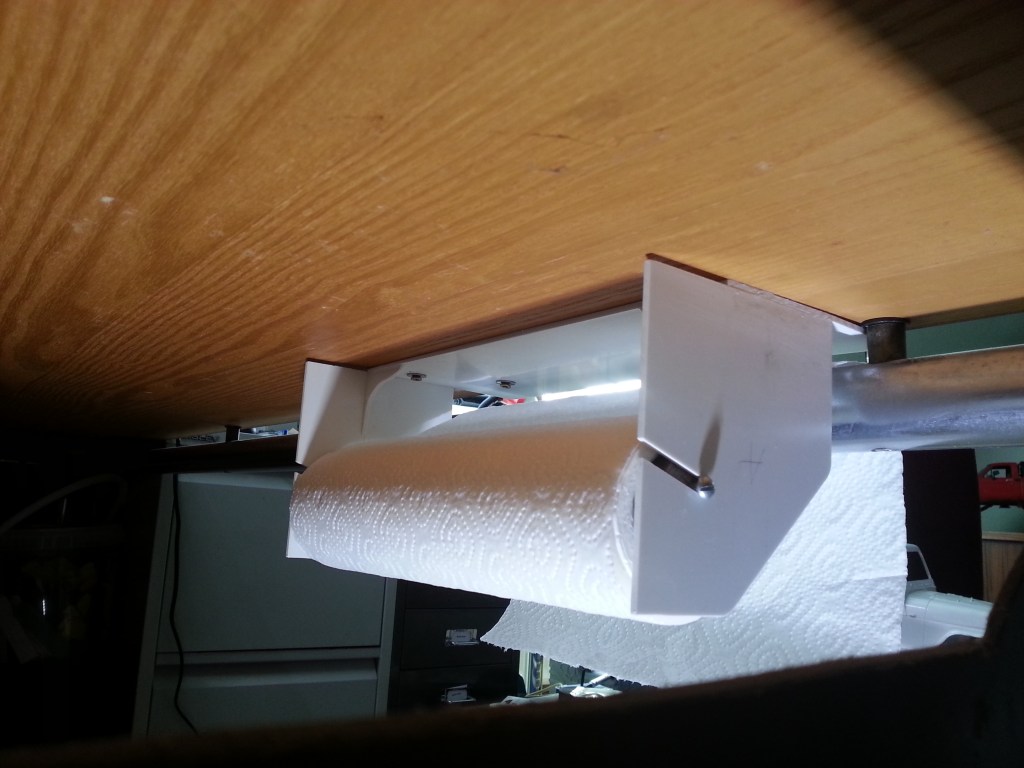
Am Überstand gab es auch gleich noch eine in den Halter integrierte Abrisskante.

Die bisherige Nutzung des Papierspenders ist weitgehend zufriedenstellend. Während der Nutzung hat sich aber bereits Verbesserungspotential ergeben. Nähert sich die Rolle dem Ende, ist eine einhändige Nutzung nur erschwert möglich. Es muss also noch eine Art Bremse eingebaut werden. Dafür habe ich auch schon eine Idee… 😉
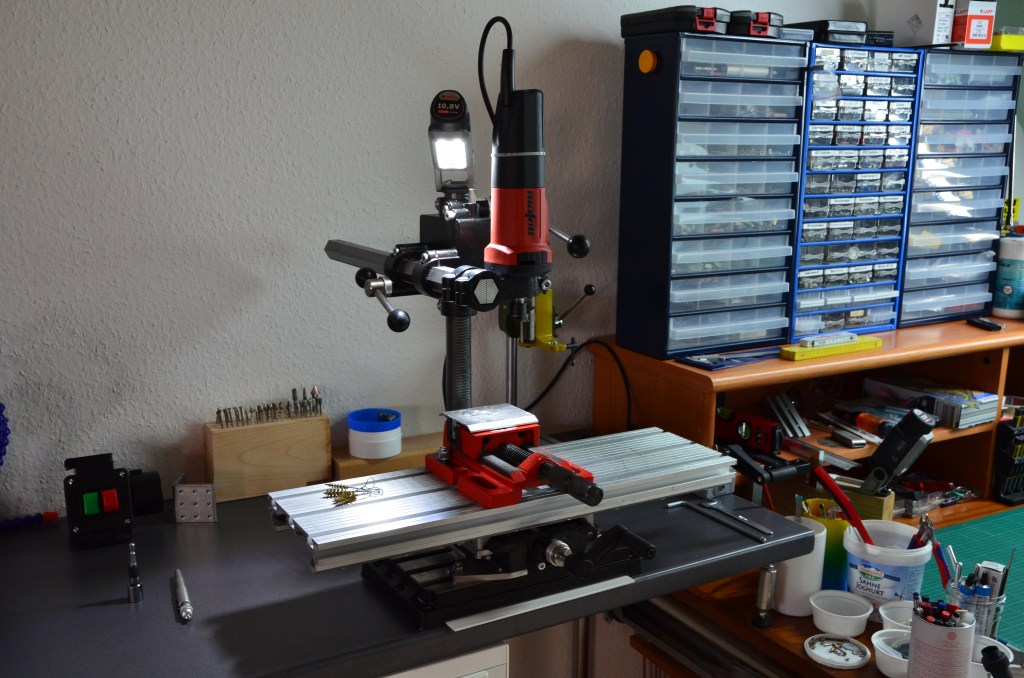
Auf der Werkbank hat auch der neue Mafell-Fräsmotor seinen Platz eingenommen. Gebohrt wird weiterhin mit meiner Handbohrmaschine. Der Umbau dauert durch die 43 mm Aufnahme nur wenige Sekunden.
Wird schnellstmöglich fortgesetzt…
English Version
The model workshop is expanding!
I started my construction site on a worn-out conference table, 2 x 1 m in size.
Manual labor, a few tools and a Dremel 4000 were enough for the first Comanche.
The desire to improve one’s own work results should be primarily through a 3D printer. But I was not really convinced by the print results of the models in question. That eventually led to the purchase of a coordinate table. This gives me more influence on the result. I also know little about compromises.
On a temporary surface extension, the coordinate table found its place. In the area of the window and the pitch of the roof there, but not an optimal location. Thus a provisional solution with an expiry date. Therefore, the rest of a kitchen worktop was installed next to the work table. The coordinate table and an electrical workstation found their new home there at a height of just under two metres. In between there remains an additional area for an additional work surface. The newly created area rests on a stable beam on the wall and two robust feet at the front. With a working height of 90 cm, at a depth of 60 cm, it is possible to work here in a way that is very easy on the back. If I would have bought the worktop, I would certainly have gone to a depth of at least 80 cm. But for the time being there is enough potential available.
Of course, everything should then be structured as optimally as possible. So what else can be optimized? First the power supply. Up to now, a multiple socket was used to supply various devices with power. Of course it works, but the mess of the various cables always bothered me. I wanted to avoid that now. After an extensive search in my material store, I found a solution. The rest of a parapet duct was still there. On the left side of the electrical workstation, six sockets were installed in it.
Two more on the left side, so that also milling motor, drill or other equipment can be connected.
The power supply was under the table, with feed from an adjacent socket. From the distribution box, the power supply is further distributed to the two socket blocks.
After the voltage check the sockets are ready for use. Two ready-made drawers were purchased and installed. Measuring instruments are placed in them. On the right below the coordinate table there is even an extension area for a third drawer. To maximize the usable working area, I will mount at least one more shelf, 30 cm above the working area. Then also the power supply, solder fume extraction, measuring cable and solder are banned from the working area. Two additional holders for the soldering irons complete the final tidying up action. In the worst case, the euroboard has to pull out. I also found a small piece of beech wood. In it I will drill holes for the Milling cutters and sort them. I do not like my current solution!
Long components, made of plastic or metal, are often used in model making. Their bulkiness is a problem, especially during storage. Here they were simply placed in an old plastic drain pipe. With four pipe clamps the part was screwed to the working table. Due to the generous recess it is also possible to access shorter parts.
Paper for hand cleaning and as a sanding base, are another part of my workshop. The kitchen roll was unfortunately always somewhere in the way, got dirty and became waste. Not a good approach. Thinking a bit and studying some practical examples. By processing some unused PS-plates, I created a roll holder for an under table assembly. As with the „drain pipe“, the tube frame underneath was also integrated here, as a drain roller.
At the protrusion there was also a tear-off edge integrated in the holder.
The use of the paper dispenser so far is largely satisfactory. However, during its use there has already been potential for improvement. If the roll is nearing the end, one-handed use is only possible with difficulty. A kind of brake must therefore still be installed. I already have an idea for that…😉
The new Mafell milling motor has also taken its place on the workbench. Drilling is still done with my hand drill. The conversion takes only a few seconds due to the 43 mm mount.
Will continue as soon as possible…

Aber Schränke in meine Abstellkammer einpassen willste nicht! 😉
LikeLike
Kein Problem, Termin nach Absprache. Verstärkung und Werkzeug bringe ich auch gleich mit! 😃
LikeLike