Quellen: Internet Bildersuche
English Version
Neben dem Bau der Amazonashütte sind ja hier und da immer wieder einmal kleine Teile entstanden, die auch in einem Haushalt gebraucht werden. Essen und Kochen sind als Thema inzwischen geschafft.
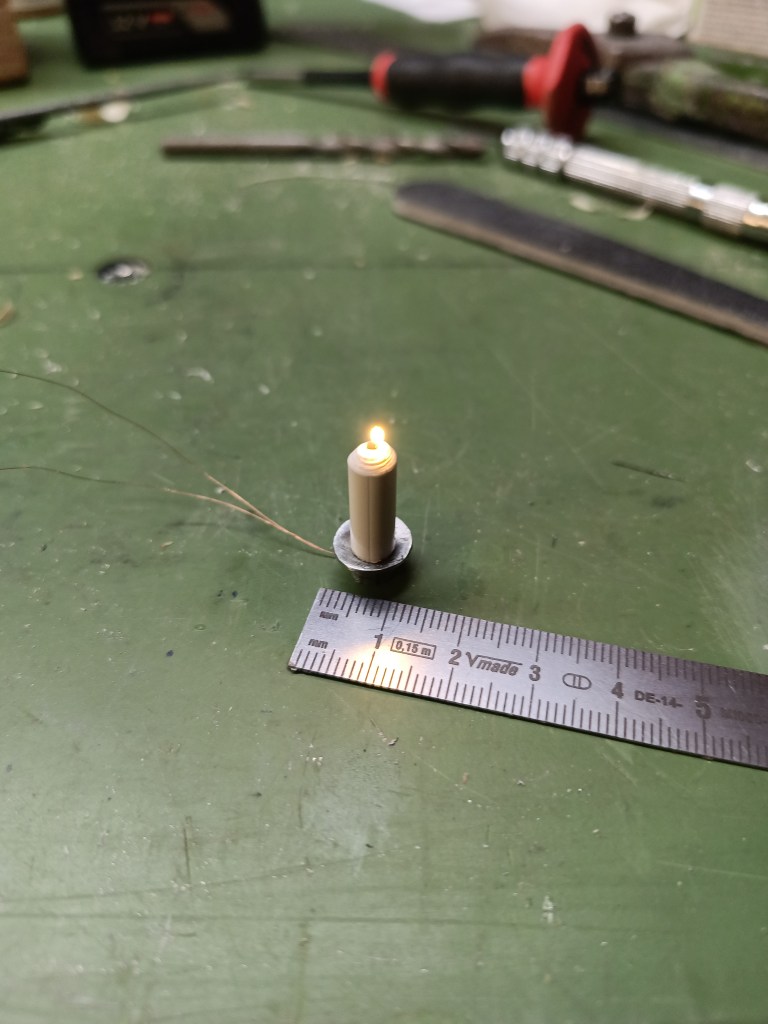
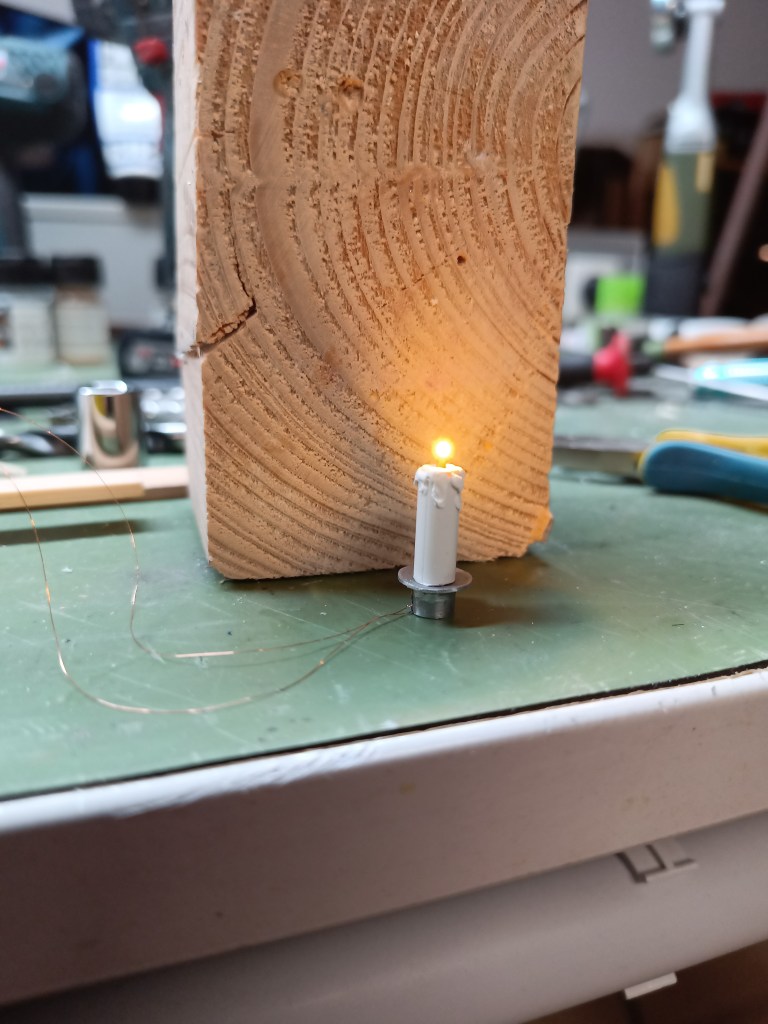
Leben findet auch immer im Dunkeln statt, daher wäre Licht das nächste Thema. Der erste Versuch begann mit einem 5 mm Kunststoffstab. Am oberen Rand wurde mit Feinspachtel ein Wachsrand und Tropfen aufgetragen. Eine zentrale Bohrung für das Kabel der SMD-LED. Auf einem Sockel wurde eine leicht gewölbte Platte aufgelötet. Das so entstandene Ergebnis wie folgt.

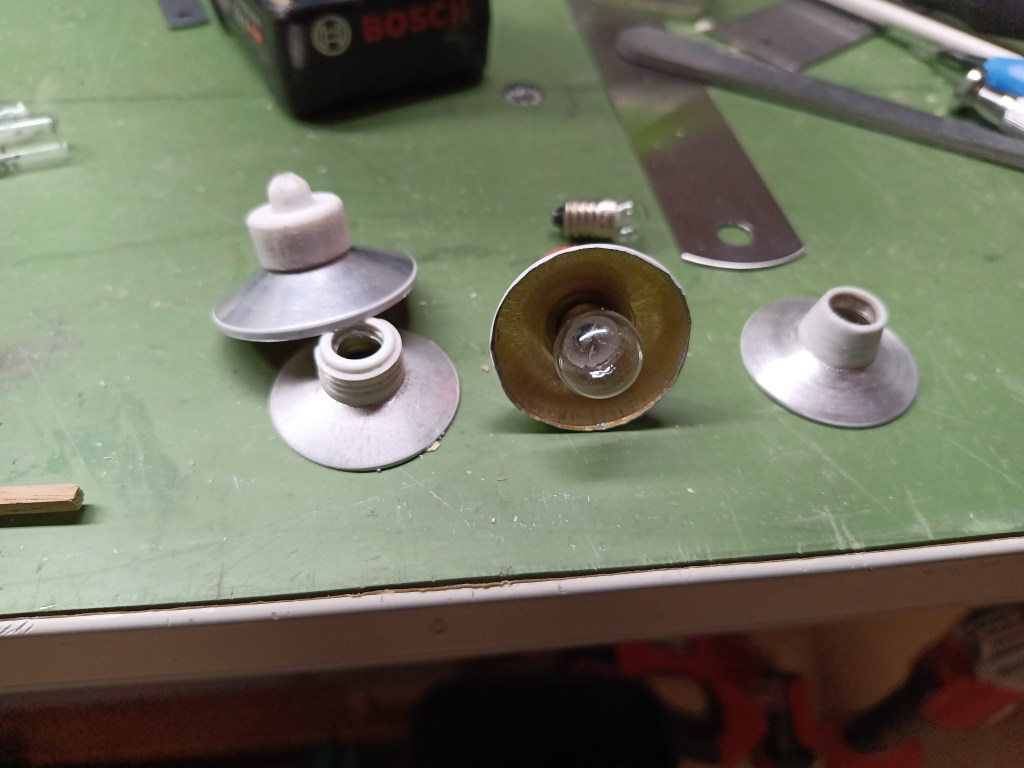
Für die zentrale Raumbeleuchtung dachte ich an eine klassische Lampenform. Zu diesem Zweck sind geleerten Zahnpasta- und Tomatenmarktuben nicht vollständig in den Müll gewandert. Die Tubenverschlüsse samt Unterteilen wurden vom Rest getrennt. Im Bild sieht man einige Varianten, wie die Verschlüsse als oberer Abschluss weiterverwendet werden könnte.
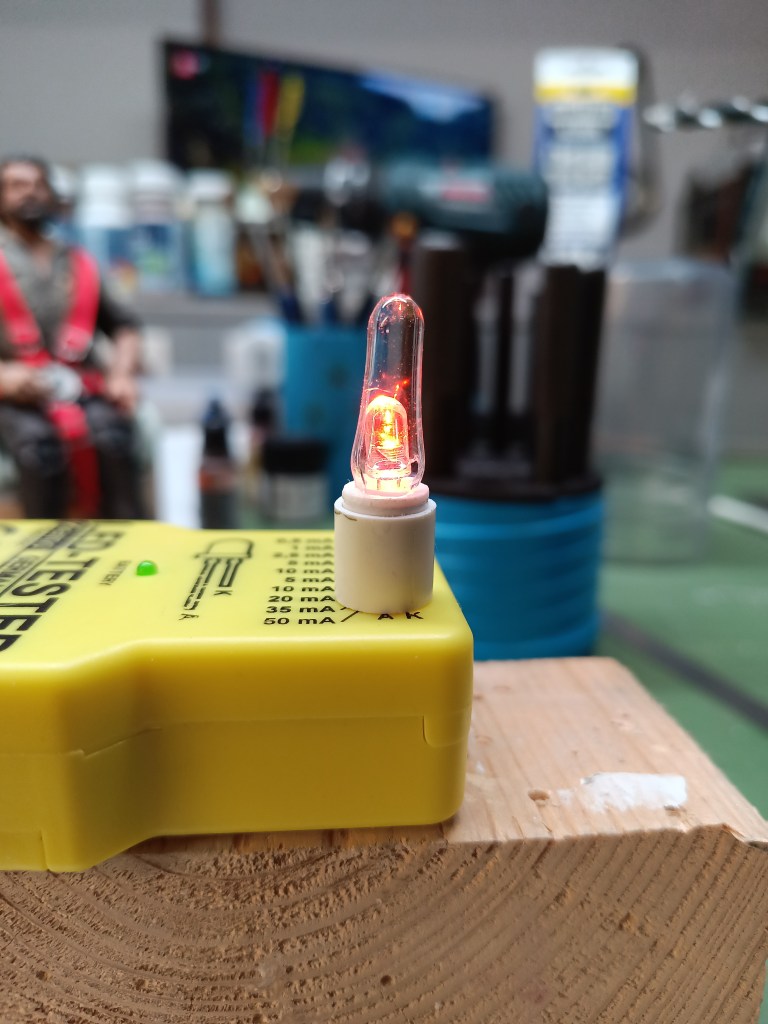
Bisher also keine Herausforderung, die nun aber eine neue Stufe erreichen sollte. Das war zunächst als einfache Baustelle angedacht. Etwas Kunststoffrohr und eine LED umschlossen von der Spitze einer Kosmetikampulle.
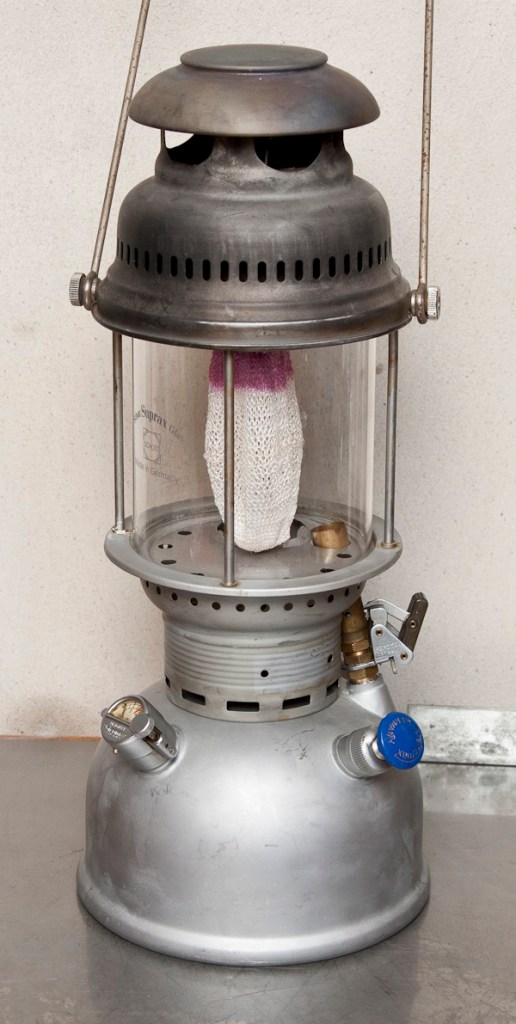
Das gefiel mir aber nicht und ich wählte ein weltbekanntes Produkt als neue Vorlage. Eine Petromax HK 500.
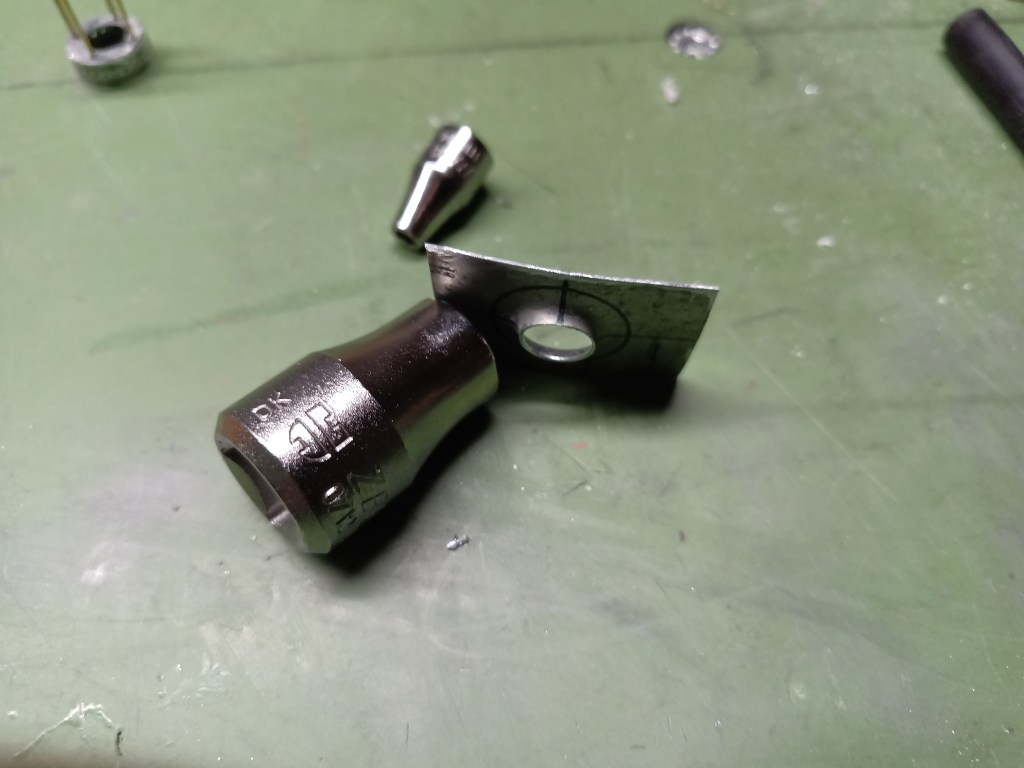
Das Tankgehäuse wurde aus einem Streifen Zinkblech gerundet. Die Rundung wurde aus einem gebohrten und ausgeschnittenen Stück hergestellt. Ein Schleifstein wurde ins gebohrte Zentrum gesteckt und in eine Stecknuss getrieben. Verlötet ist der Tank schon fast fertig. Darin will ich eine Knopfzelle verstecken, die eine LED zum Leuchten bringt.
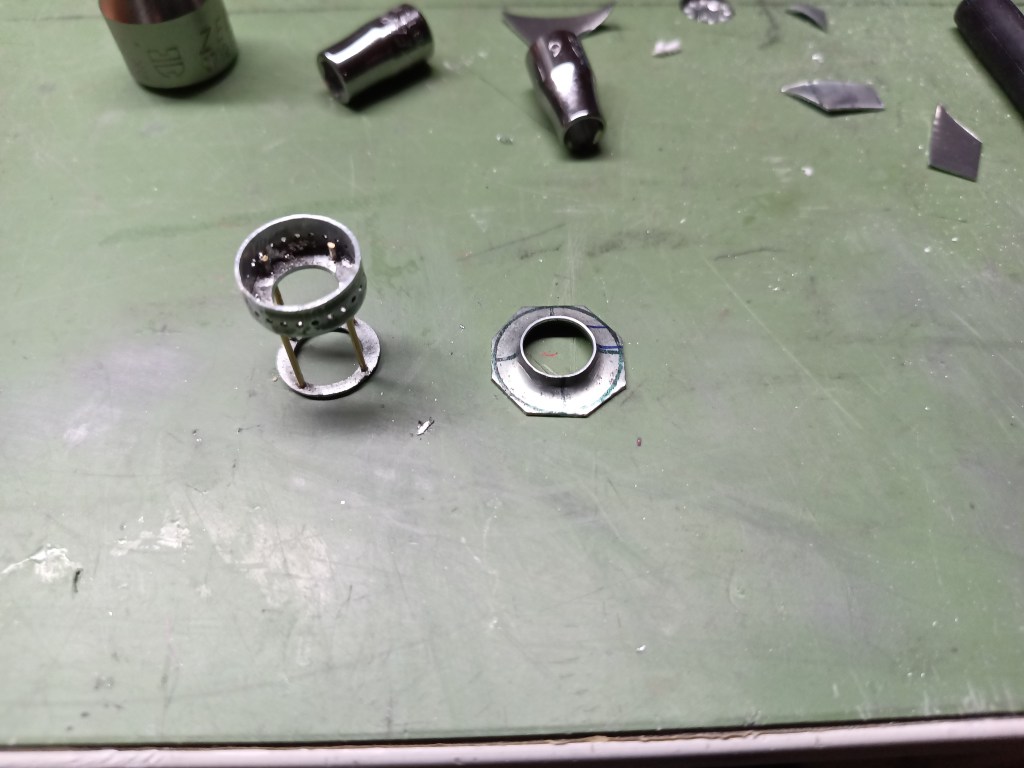
Weiter ging es mit dem Mischrohr, auf dem später auch das Glas sitzt. Hier wird die nötige Verbrennungsluft angesaugt, um das aufsteigende Petroleum zu entzünden.
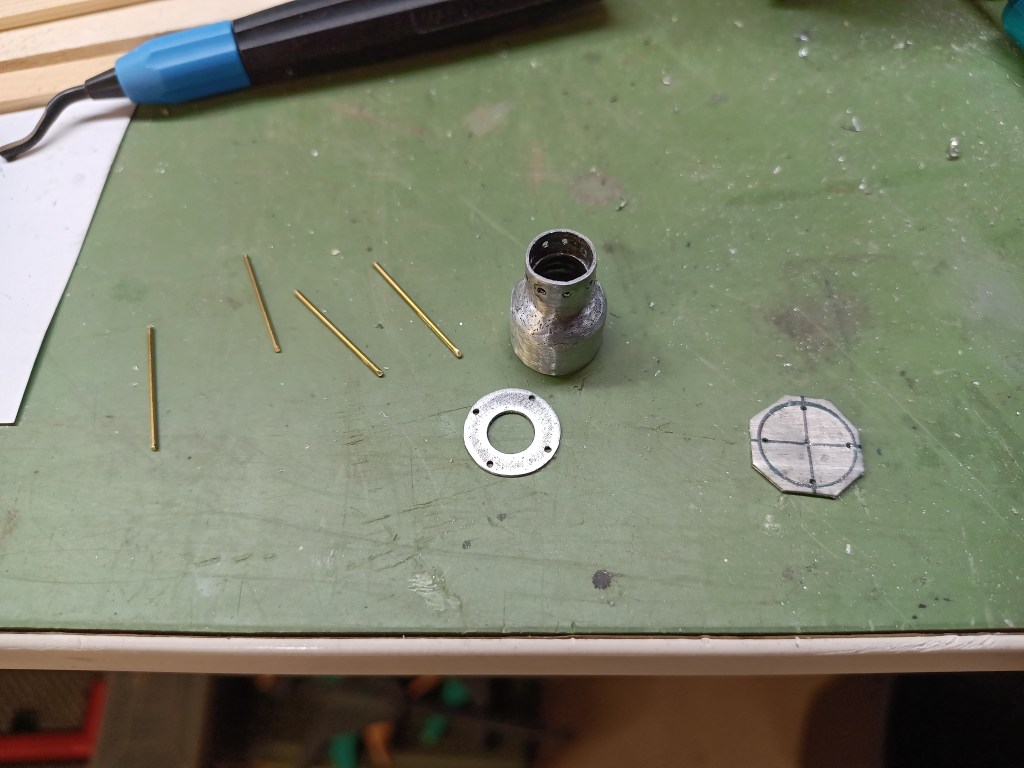
Zwei Scheiben und 4 Messingstifte umschließen die Brennkammer.
Das sieht dann so aus.

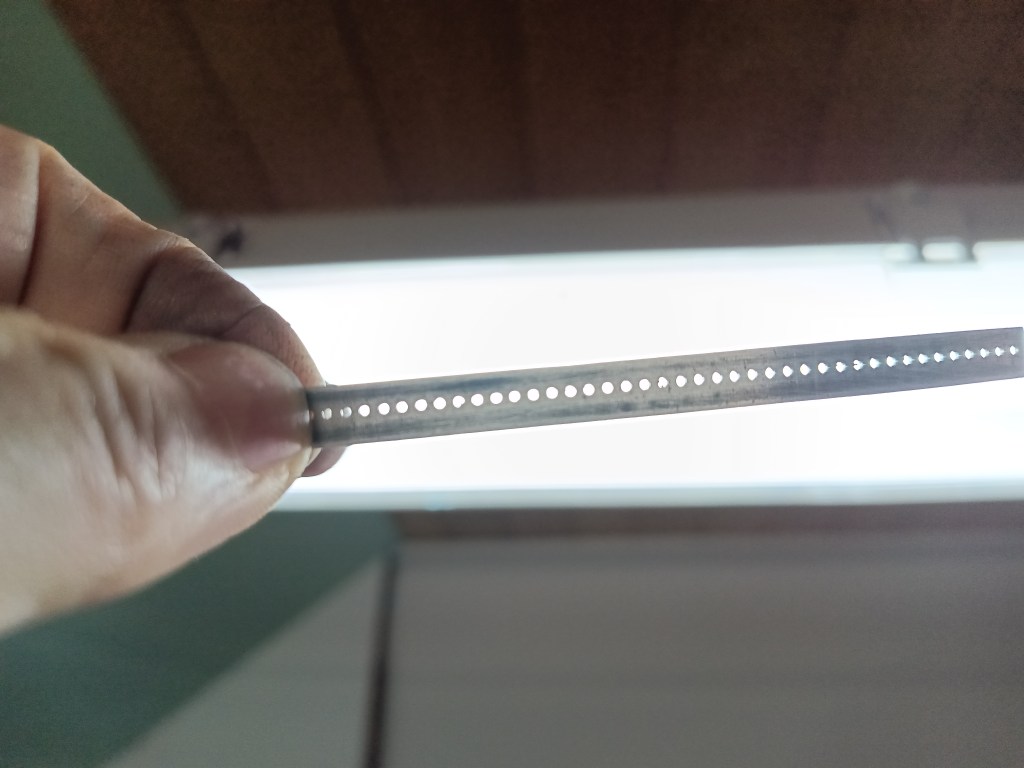
Die oberen Abluftöffnungen war eine feine Bohrarbeit auf dem Koordinatentisch.

Das Ergebnis gefällt mir.
Gerundet und als Abschluss aufgesetzt.
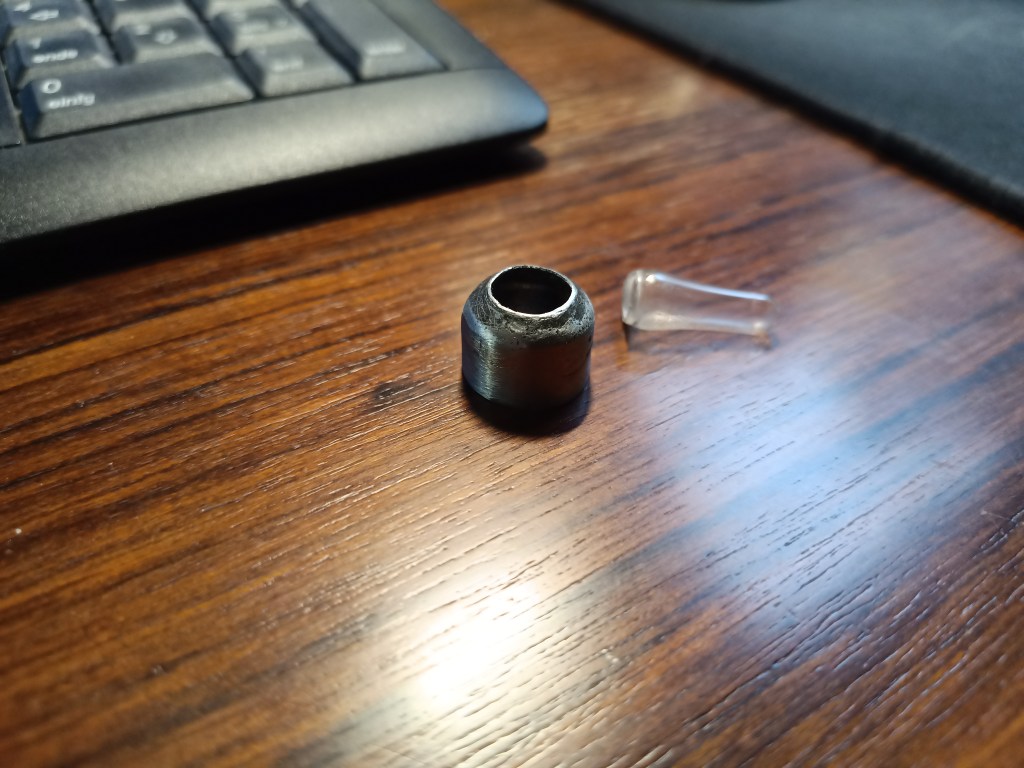
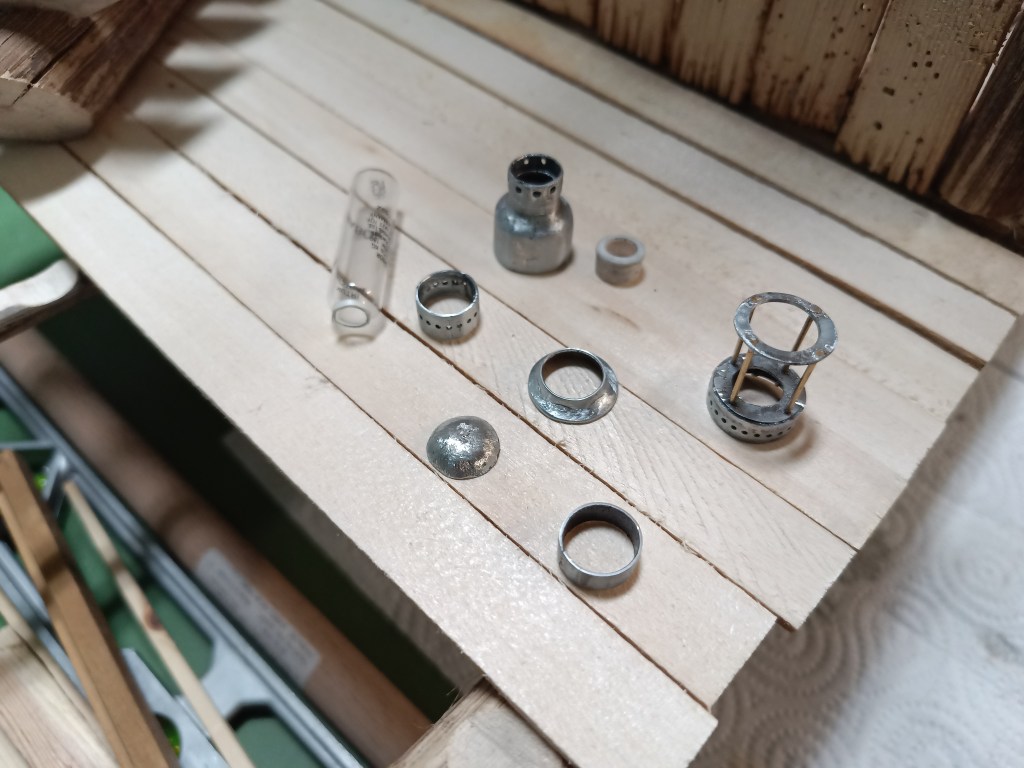
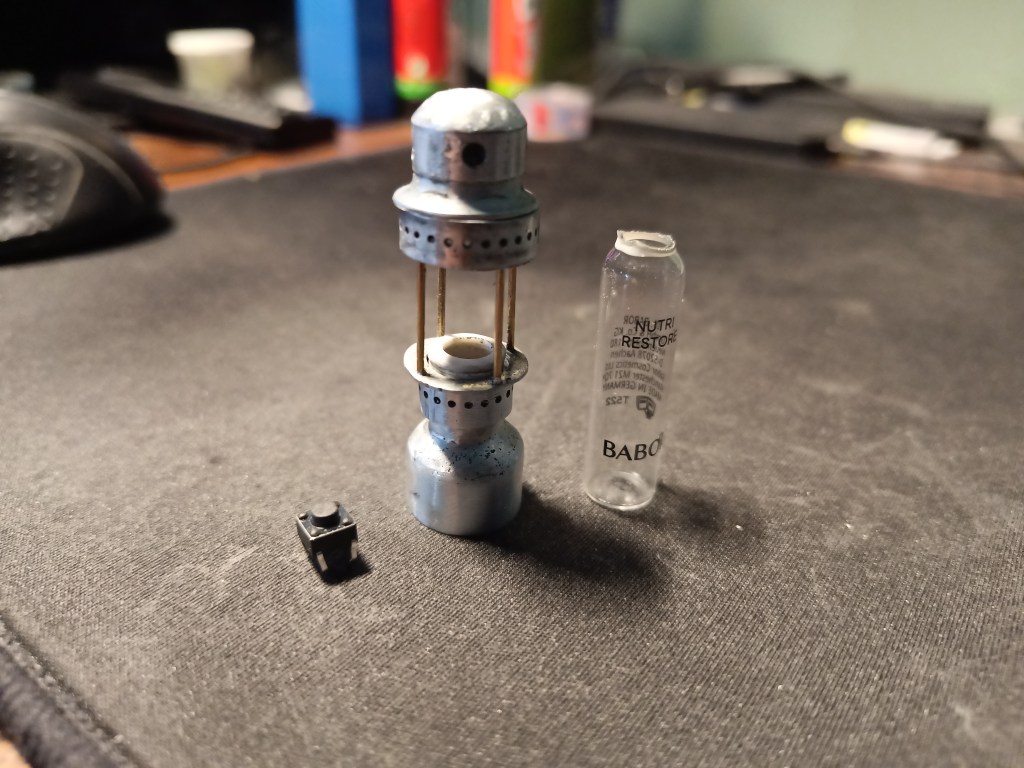
Während des Bauens kommt mir immer wieder einmal eine noch bessere Idee. Einerseits ist das einem unerwarteten Problem geschuldet oder ein angedachter Weg stellt sich als falsch heraus. So nahm auch diese Baustelle einen andere Weg. Die Spitze der Ampulle wird vor der Nutzung vom restlichen Glaskörper abgebrochen. Das Material der Spitze ist so dünn, dass schon geringsten Belastungen zum Bruch führen. Daher wurde zunächst ein Kunststoffrohr, im Bild rechts vom Tank dargestellt, mit einer auf die LED abgestimmten Scheibe verklebt. Nachfolgend die für den Aufbau gebauten Hauptbestandteile.
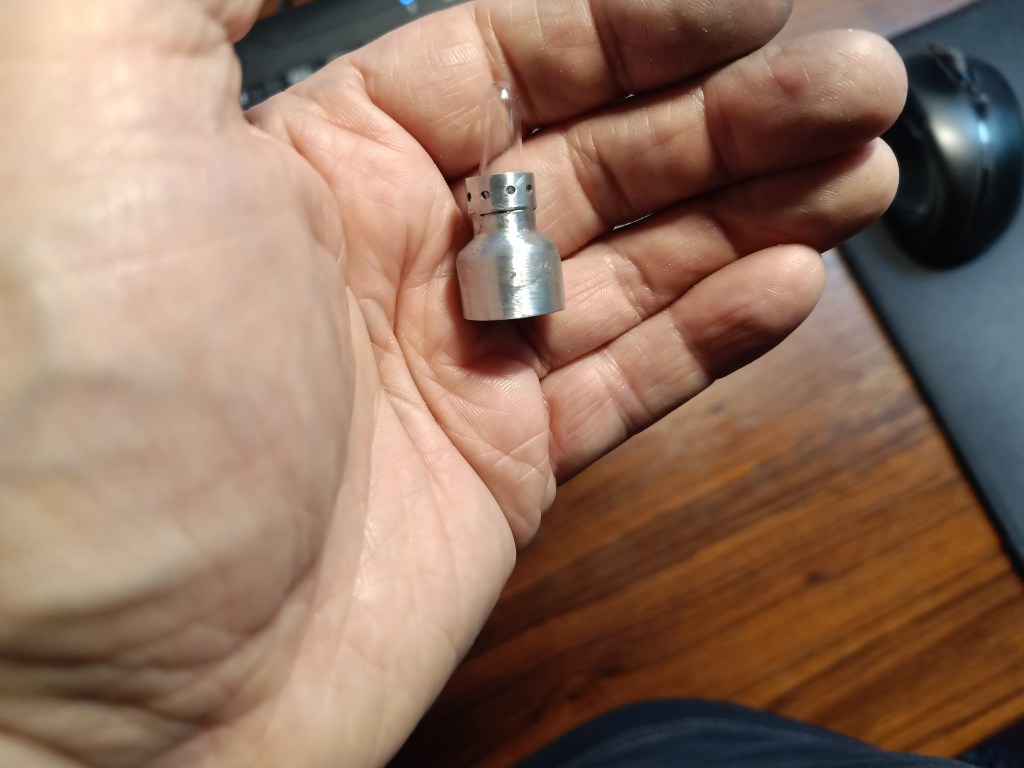
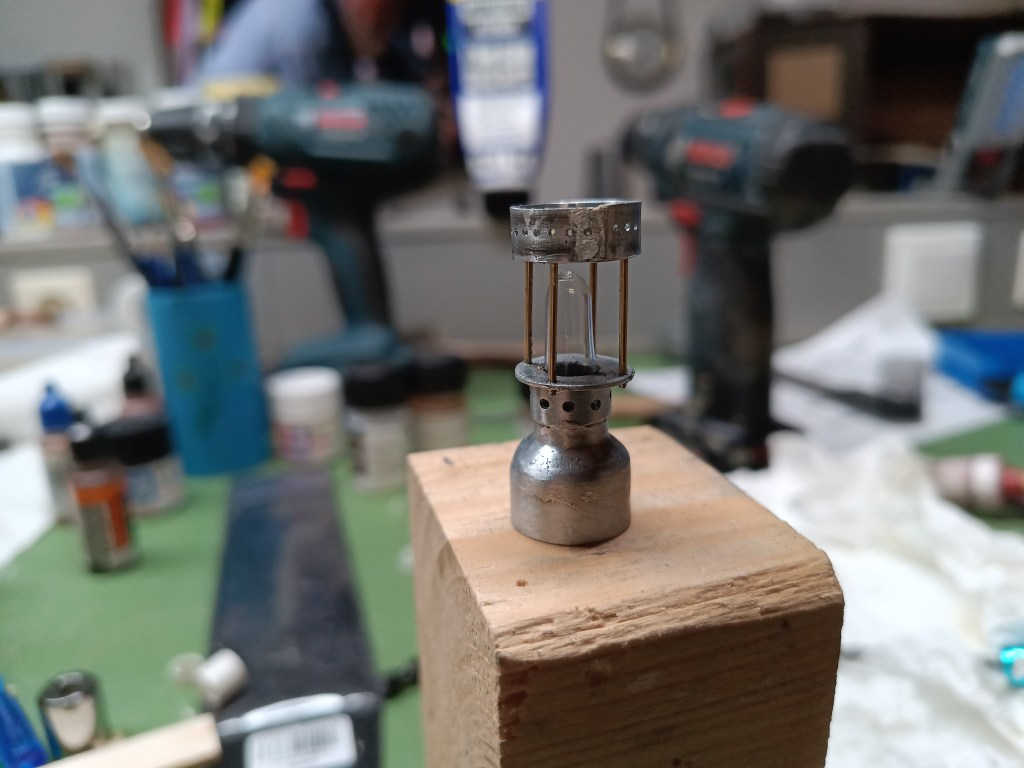
Aufeinander gestapelt sieht es im Moment so aus. An den Proportionen muss ich noch etwas arbeiten. Als Glasscheibe will ich nun die eigentliche Ampulle verwenden. Sie wird mit einer diamantbeschichteten Scheibe noch auf die Länge angepasst.
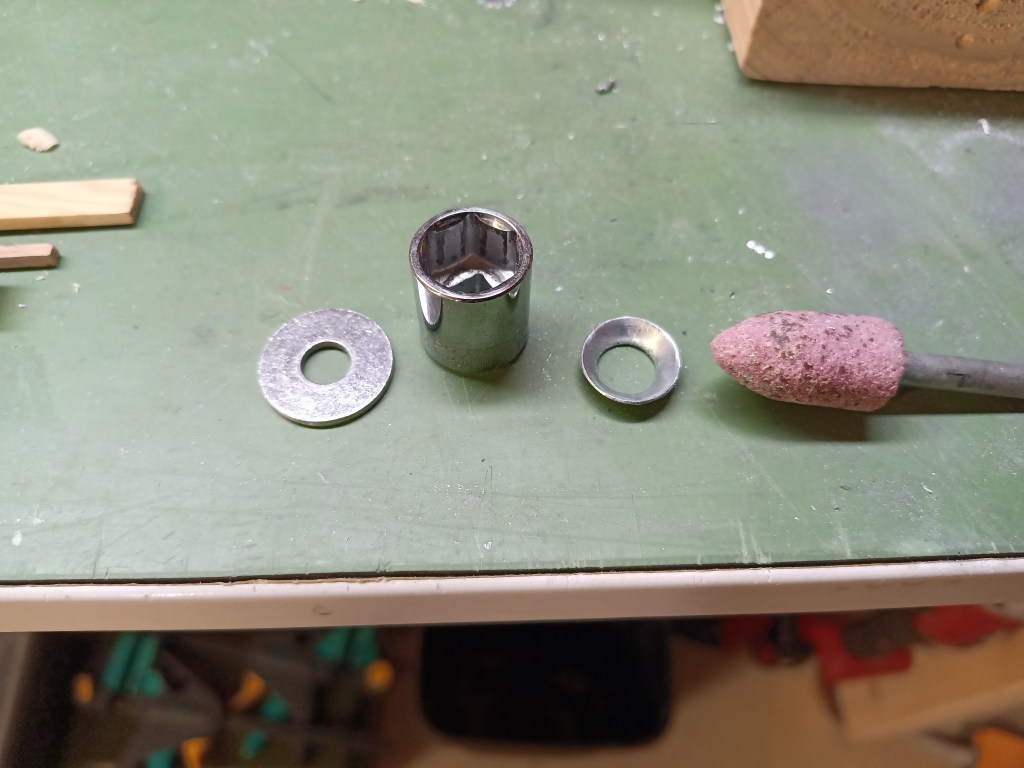
Bevor es weiter geht, einmal meine Schritte, die ich zum Formen der Blechrundungen angewendet habe. Ein auf das Maß einer Stecknuss vorgebohrtes Blech, wird im Schraubstock in eine weitere deutlich größere Stecknuss gepresst.

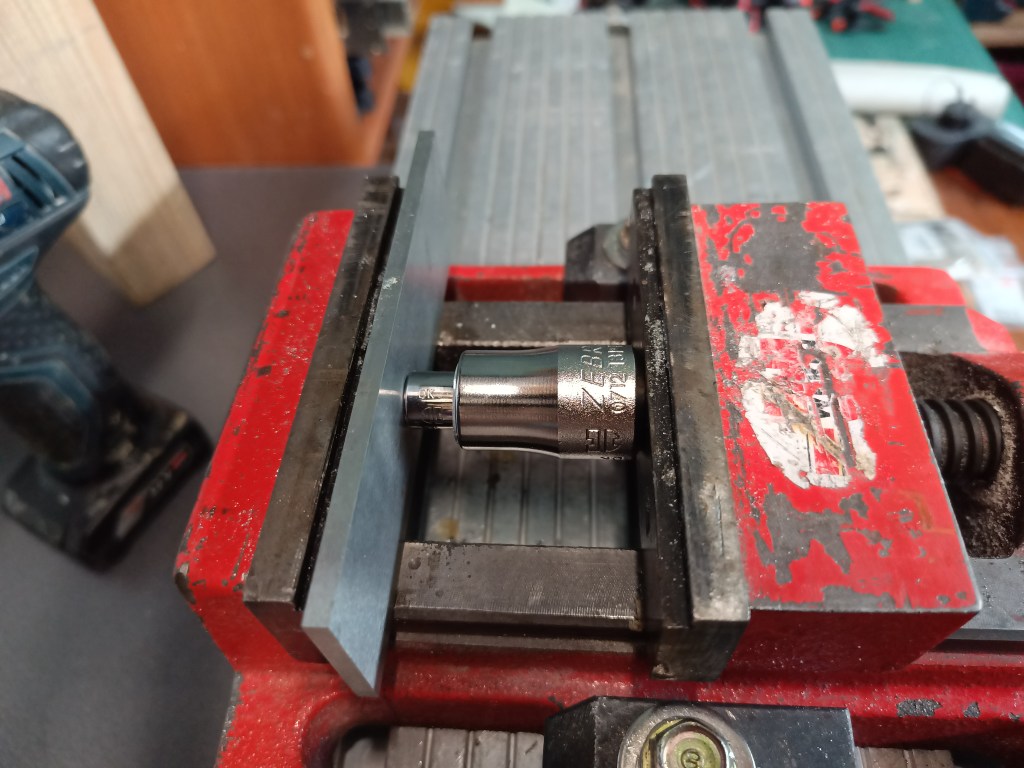
Das Ergebnis sieht endbearbeitet dann so aus.

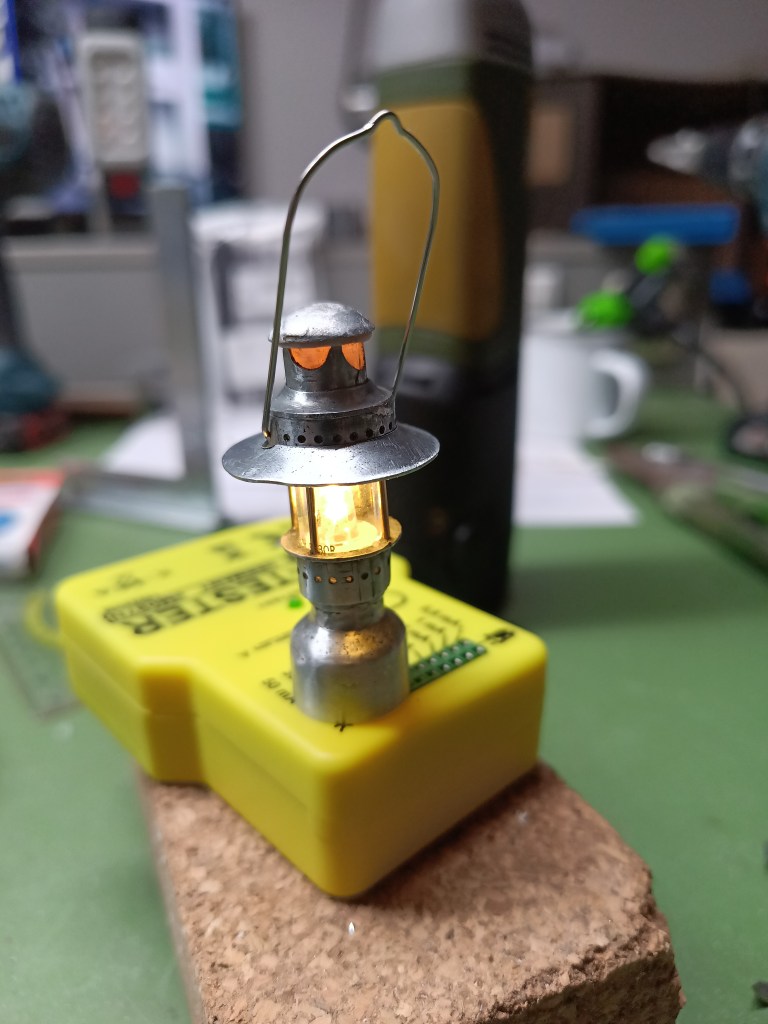
Nach weiteren Modifikationen hat sich die Leuchte final verändert.
Aktuell arbeite ich daran eine Knopfzelle in der Tankattrappe unterzubringen. Am Tankstutzen, der Druckpumpe und dem Manometer versuche ich mich dann auch noch. Falles es mir gelingt werde ich das in einem der weiteren Beiträge vorstellen. 😏
Wird schnellstmöglich fortgesetzt…
English Version
Light even for the smallest hut
Sources: Internet image search
In addition to building the Amazon hut, small items that are also needed in a household have been created here and there. Food and cooking have now been covered.
Life also takes place in the dark, so light would be the next topic. The first attempt began with a 5 mm plastic rod. A wax rim and drops were applied to the upper edge with a fine spatula. A central hole was drilled for the SMD LED cable. A slightly curved plate was soldered onto a base. The result was as follows.
For the central room lighting, I thought of a classic lamp shape. For this purpose, empty toothpaste and tomato paste tubes were not completely thrown away. The tube caps and bases were separated from the rest. The picture shows a few variations on how the caps could be reused as the top closure.
So far, no challenge, but now it was time to take it to the next level. Initially, this was intended to be a simple construction project. Some plastic tubing and an LED enclosed by the tip of a cosmetic ampoule.
But I didn’t like that, so I chose a world-famous product as a new template. A Petromax HK 500.
The tank housing was rounded from a strip of zinc sheet. The curve was made from a drilled and cut-out piece. A grinding stone was inserted into the drilled center and driven into a socket nut. The tank is almost finished being soldered. I want to hide a button cell battery in it that lights up an LED.
I continued with the mixing tube, on which the glass will later sit. This is where the necessary combustion air is drawn in to ignite the rising petroleum.
Two discs and four brass pins enclose the combustion chamber.
This is what it looks like.
The upper exhaust openings required some fine drilling work on the coordinate table.
I like the result.
Rounded and attached as a finish.
While building, I often come up with even better ideas. On the one hand, this is due to an unexpected problem or a planned approach turning out to be wrong. So this construction site also took a different path. The tip of the ampoule is broken off from the rest of the glass body before use. The material of the tip is so thin that even the slightest stress can cause it to break. Therefore, a plastic tube, shown to the right of the tank in the picture, was first glued to a disc matched to the LED. Below are the main components built for the assembly.
Stacked on top of each other, it looks like this at the moment. I still need to work on the proportions a little. I now want to use the actual ampoule as the glass pane. It will be adjusted to the correct length using a diamond-coated disc.
Before I continue, here are the steps I took to shape the sheet metal curves. A sheet of metal pre-drilled to the size of a socket is pressed into a significantly larger socket in a vise.

The finished result looks like this.
After further modifications, the light has finally changed.
I am currently working on fitting a button cell into the dummy tank. I am also trying my hand at the tank filler neck, the pressure pump, and the pressure gauge. If I succeed, I will present it in one of my next posts. 😏
Will be continued as soon as possible…
Translation, with the kind support of deepl.com
