English Version
Ein stabiles Fundament ist die Basis eines Hauses. Wird der Aufbau zerstört, lässt sich immer wieder auf einem Fundament etwas Neues aufbauen. Besonders wenn der Aufbau aus Holz besteht. Schon vor Monaten hatte ich erste Tests mit der Gestaltung von Naturstein-Strukturen durchgeführt. Auf diesem Weg sind bereits ein Brunnen und ein Kamin entstanden.
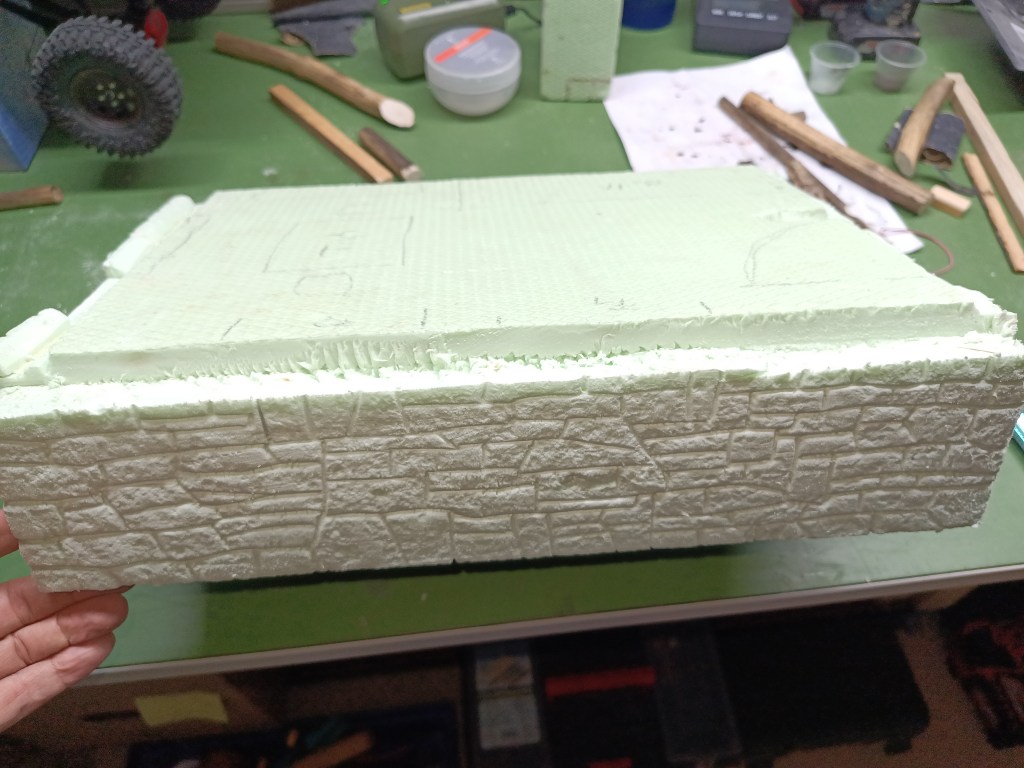
Bevor es los geht, ein kleiner Rückblick auf die damalige Baustelle und die bis heute andauernde Entwicklung. Auf einem Reststück Styrodur hatte ich seinerzeit die Struktur herausgearbeitet.
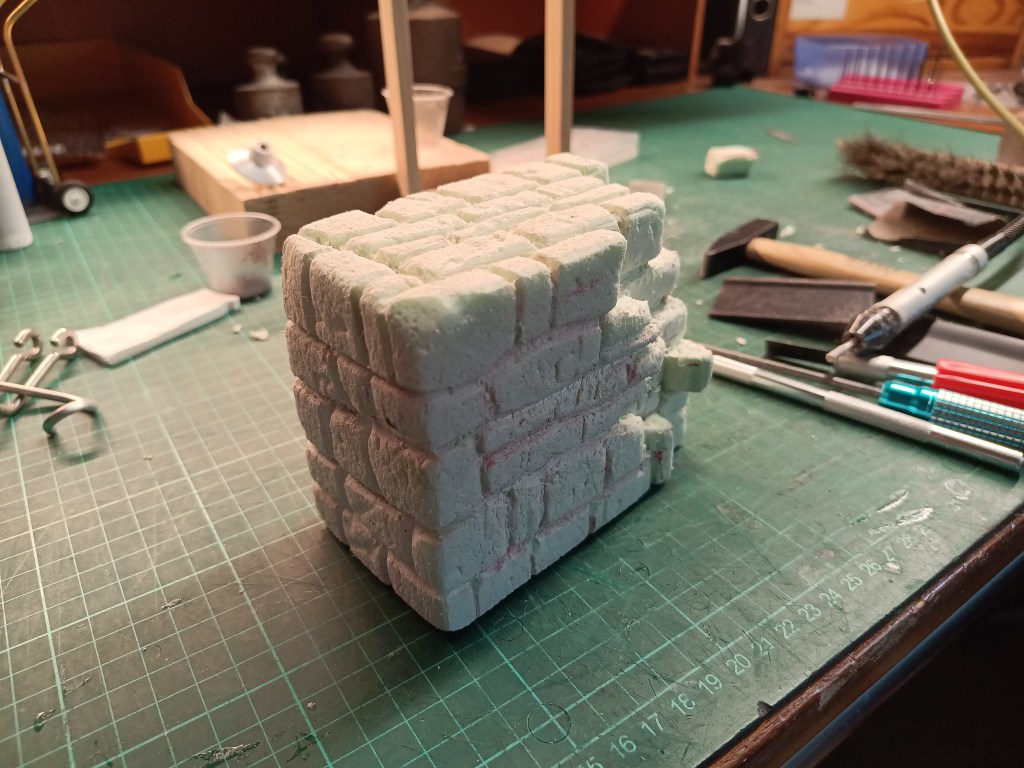
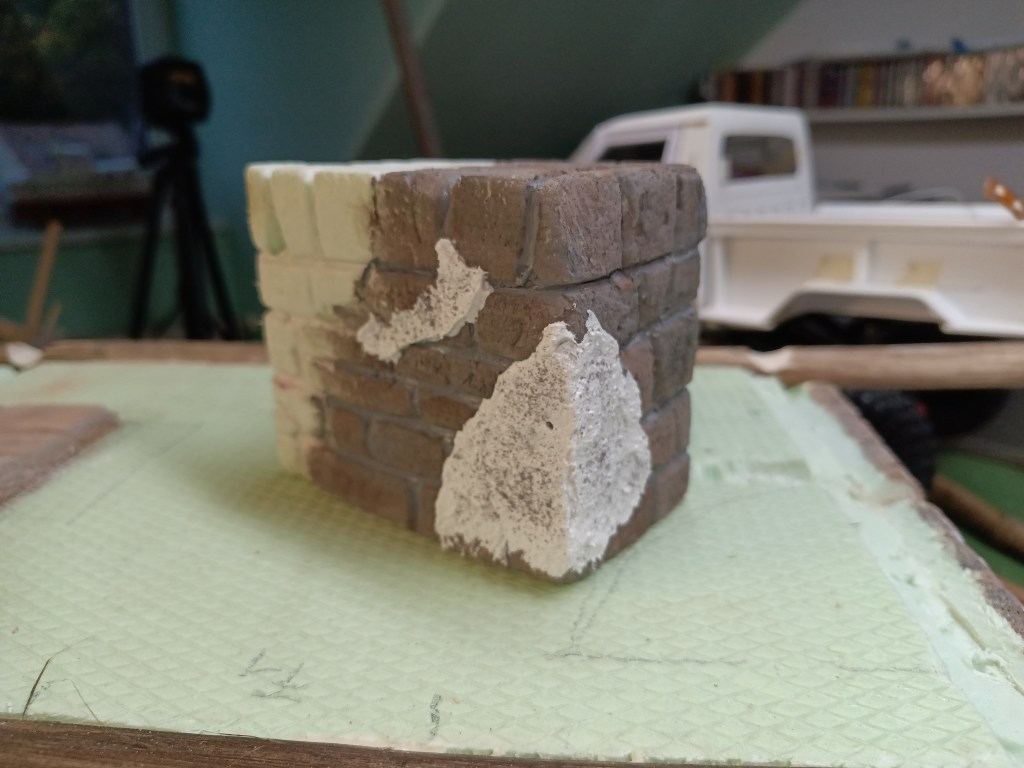
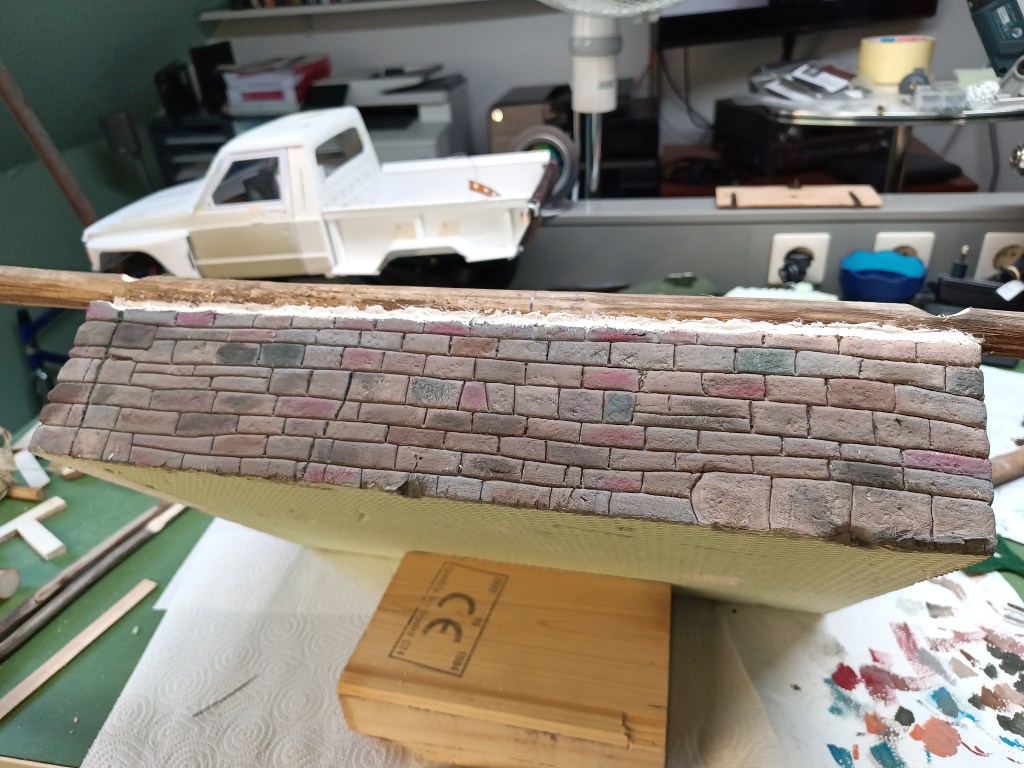
Im Laufe der vergangenen Tage habe ich daran verschiedene Veränderungen vorgenommen. Sie sollen später auf das Hausfundament übertragen werden. Direkt am Fundament testen wollte ich das, aus wahrscheinlich nachvollziehbaren Gründen, nicht. So war wieder die bunte Mischung verschiedenster Farben die Grundlage. Dieses Mal aber im Vordergrund, die weitere Gestaltung von Putzflächen aus Reparaturversuchen und der Bewuchs von Flechten.
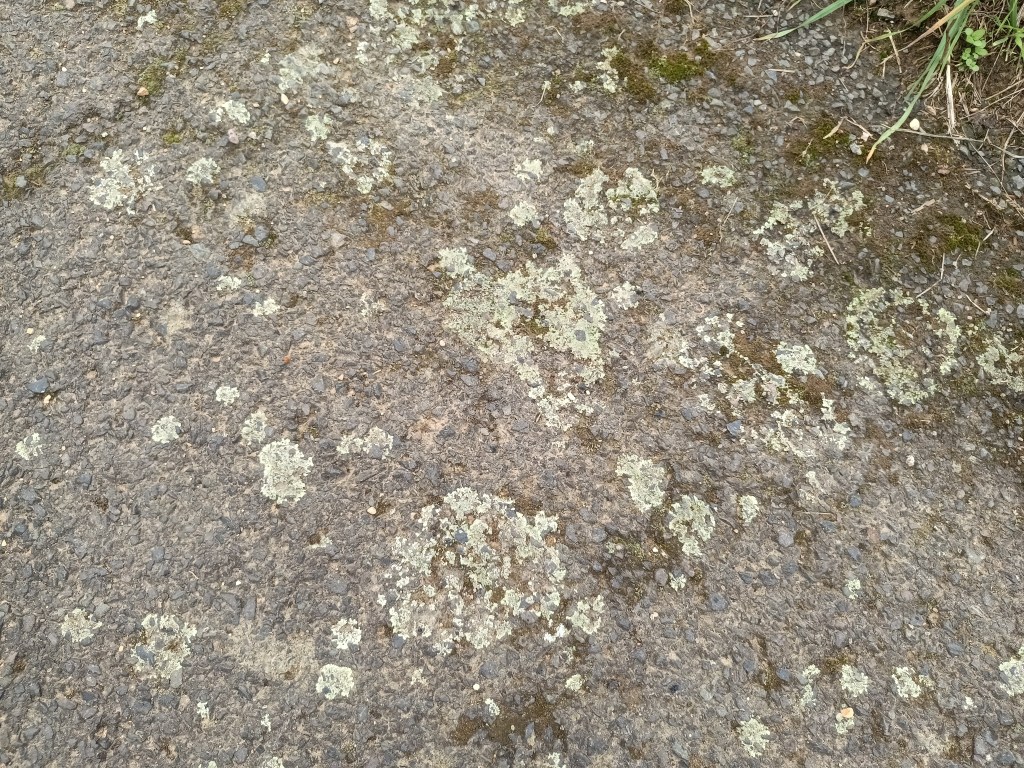
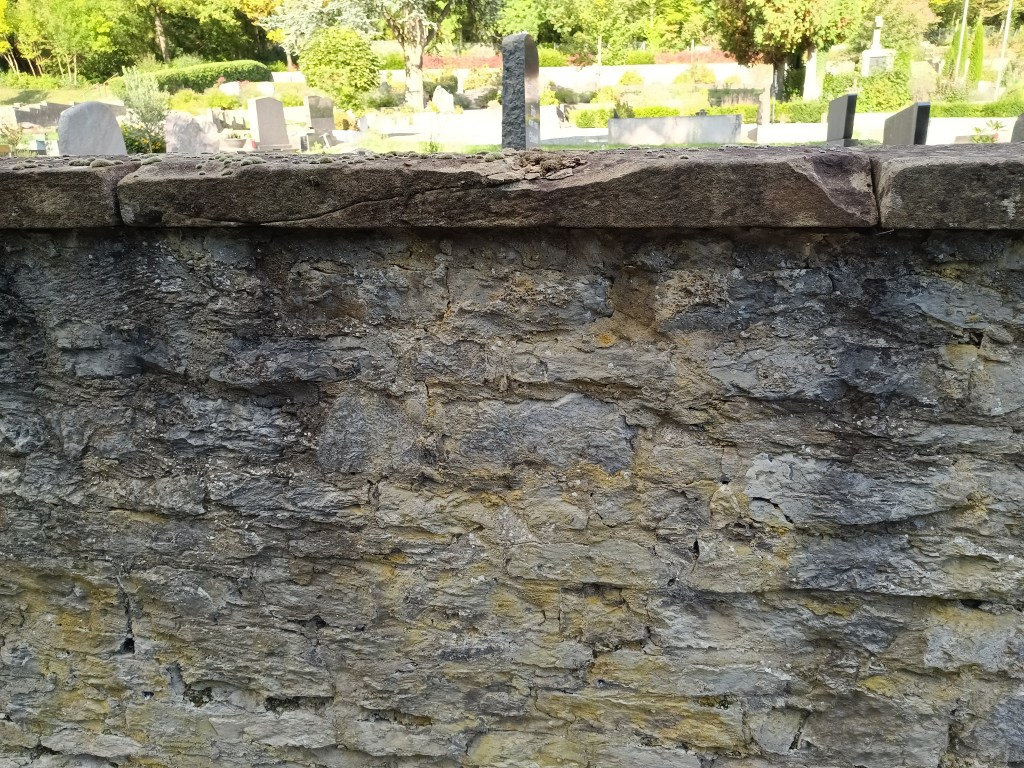
Flechten hatte ich mir in unserem Umfeld näher angeschaut und Muster auf Fotos festgehalten.
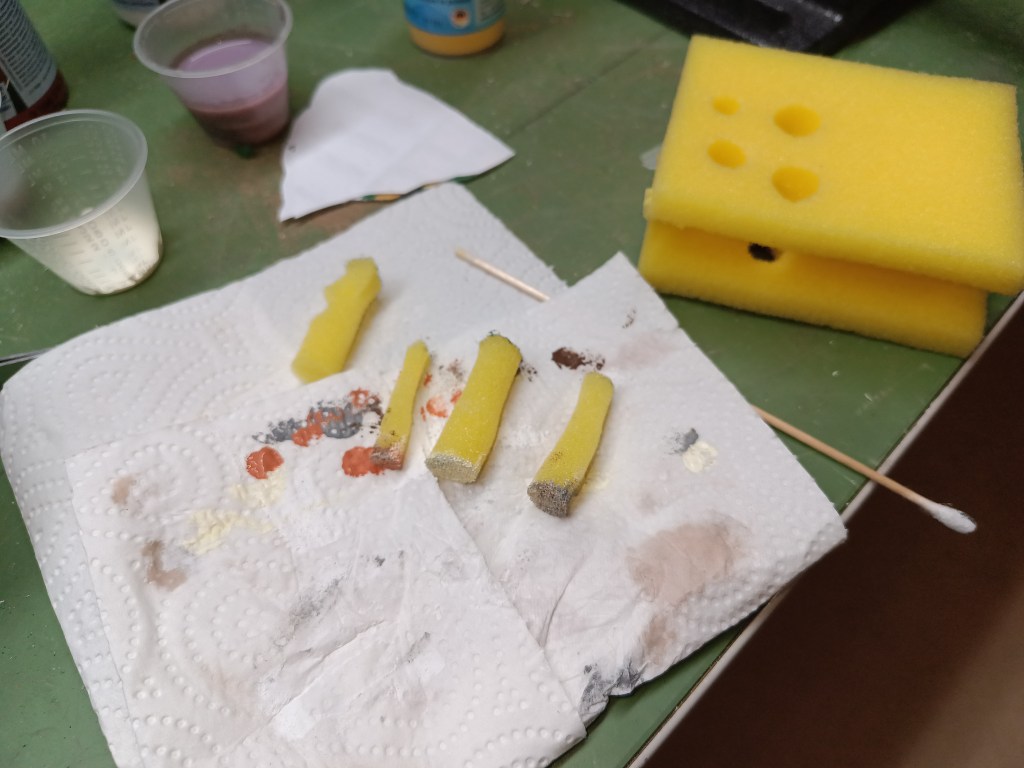
Aus einem Küchenschwamm hatte ich dazu verschiedene Durchmesser ausgestanzt. Sie sollen die Struktur der Bodenflechten nachbilden. Dazu in Farbe tupfen und so lange auf Papier die überschüssige Farbe abtupfen, bis eine dem Original entsprechende, den Untergrund durchschimmernde Oberfläche entsteht. Mit der Schere kann auch noch der Rand etwas auf- und abgeschnitten werden, um die Form etwas aufzulockern. Ganz nach persönlichem Belieben. Das Stempeln geht auch mit einer weiteren Farbe um einen Farbverlauf zu zeigen. Hier beispielsweise weiss und gelb und ocker.
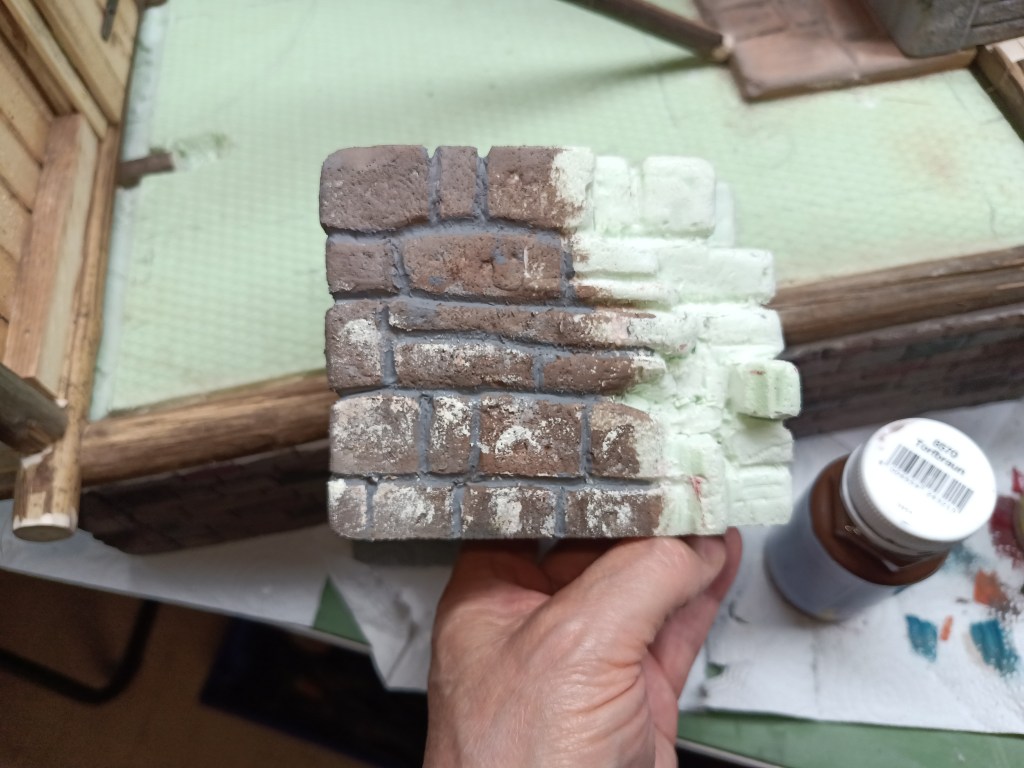
Nachfolgend die so entstandenen Ergebnisse.
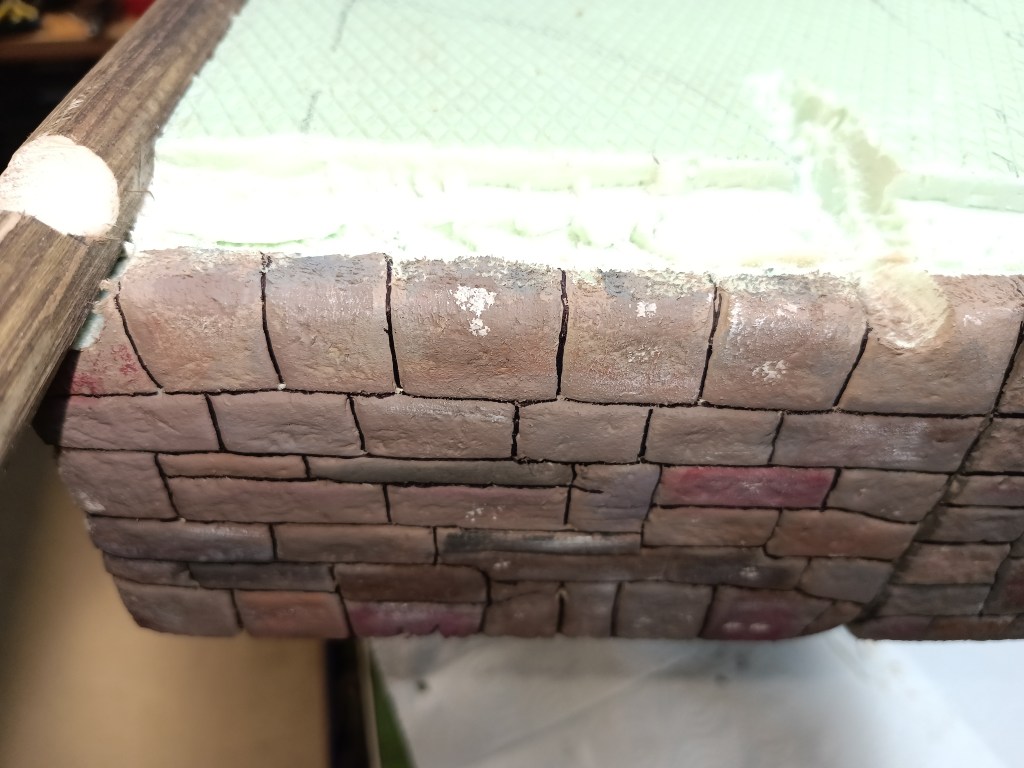
Vor der Farbe steht aber die Struktur. Hier habe ich wieder mit der dünnen Rundfeile die Fugen eingedrückt. So lassen sich auch abgesprungene Ecken einprägen.
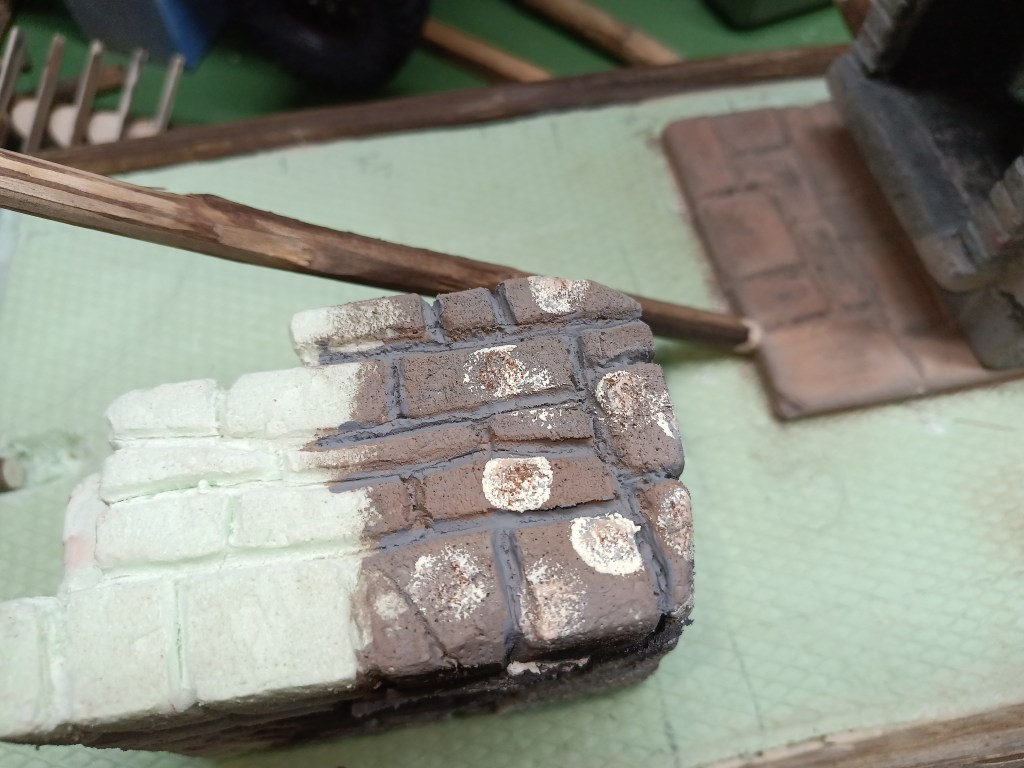
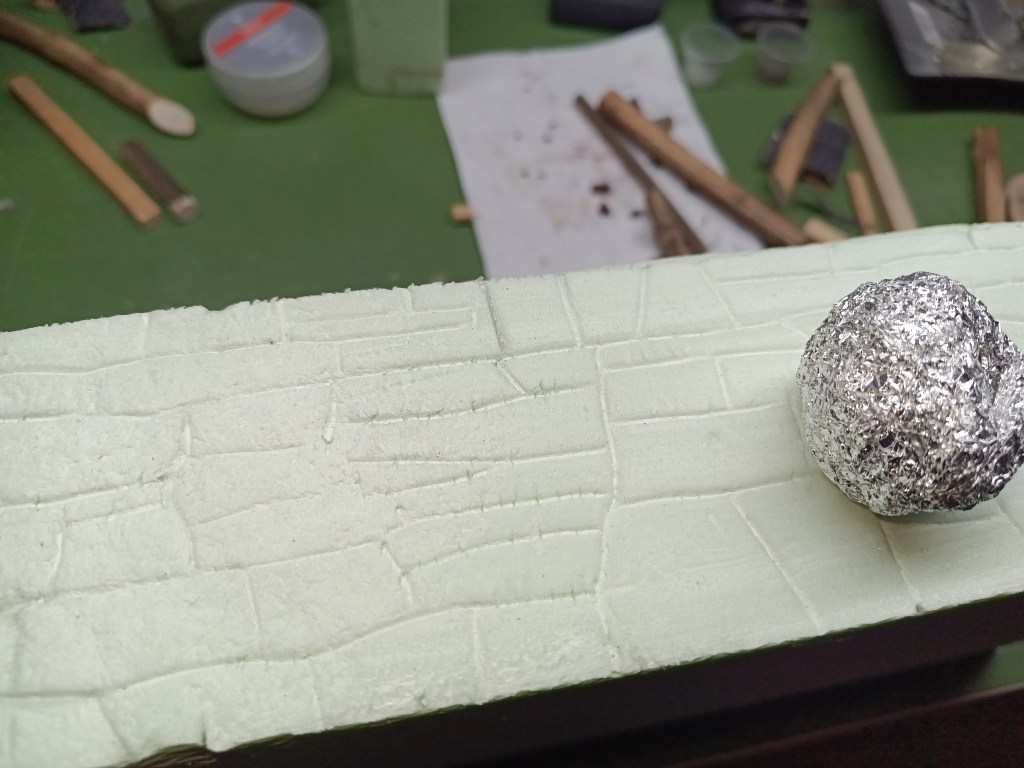
Nachfolgend die Struktur aus der Nähe. Links schon mit ersten Spuren der zusammengeknüllten Alufolie. Durch Rollen und Aufdrücken, entsteht schließlich das vorherige Bild. Die Struktur von behauenen Steinen. Da beide Schritte, dass Prägen von Fugen und Struktur, die Oberfläche verändern, muss bei Bedarf die Fuge noch einmal nachgearbeitet werden. Die Ausführung ist schwer zu beschreiben, die Optik muss einfach nur gefallen.
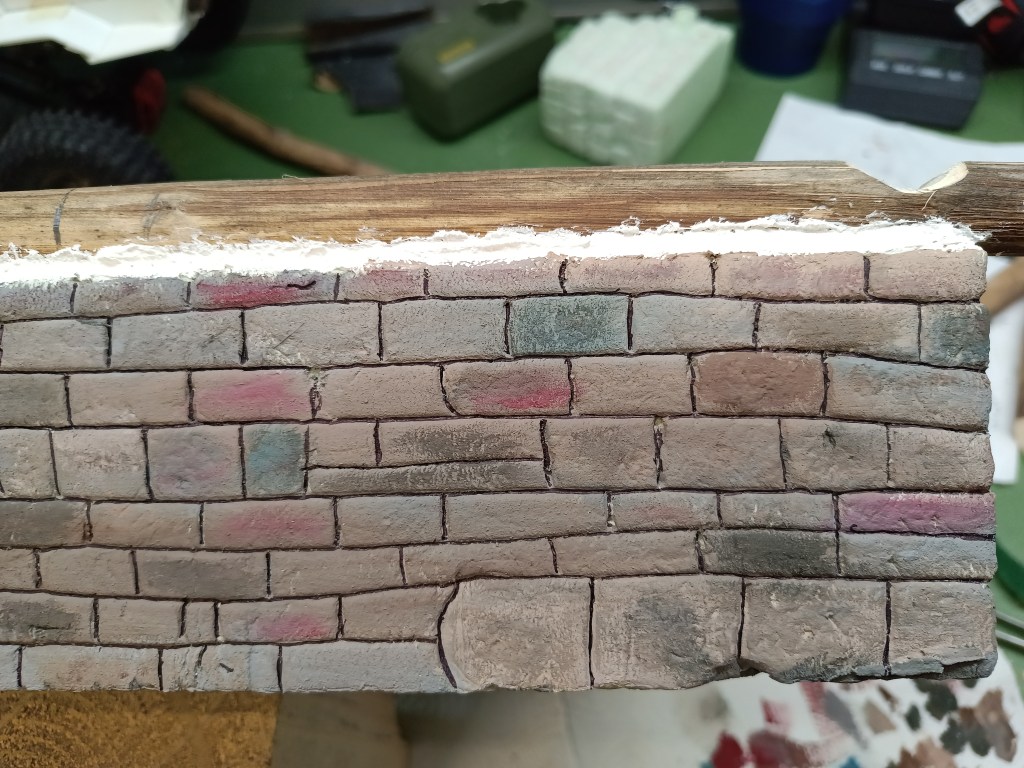
Mit einem Cuttermesser habe ich auch Risse und Steinbeschädigungen heraus geschnitzt. Den Umfang muss auch jeder für sich selbst entscheiden. Die Fugen sind am Hausfundament nicht mit Zement ausgefüllt, sondern als Trockenbau-Fundament ausgebildet. Also ohne Mörtel aufgesetzt. Dementsprechend mit einem feinen Faserstift nur schwarz ausgemalt, um die Schattenfuge anzudeuten. So werden, wie auch bei mir geschehen, Fugenfehler endgültig sichtbar. Das erfordert schon Geduld, sonst leidet womöglich das Ergebnis.
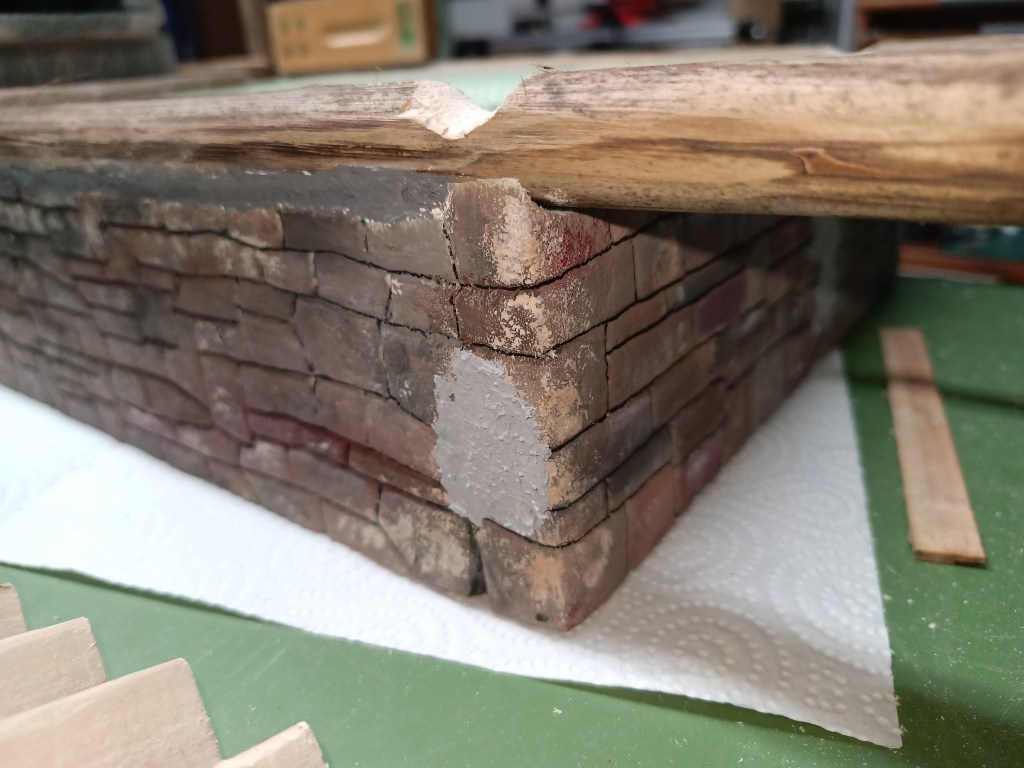
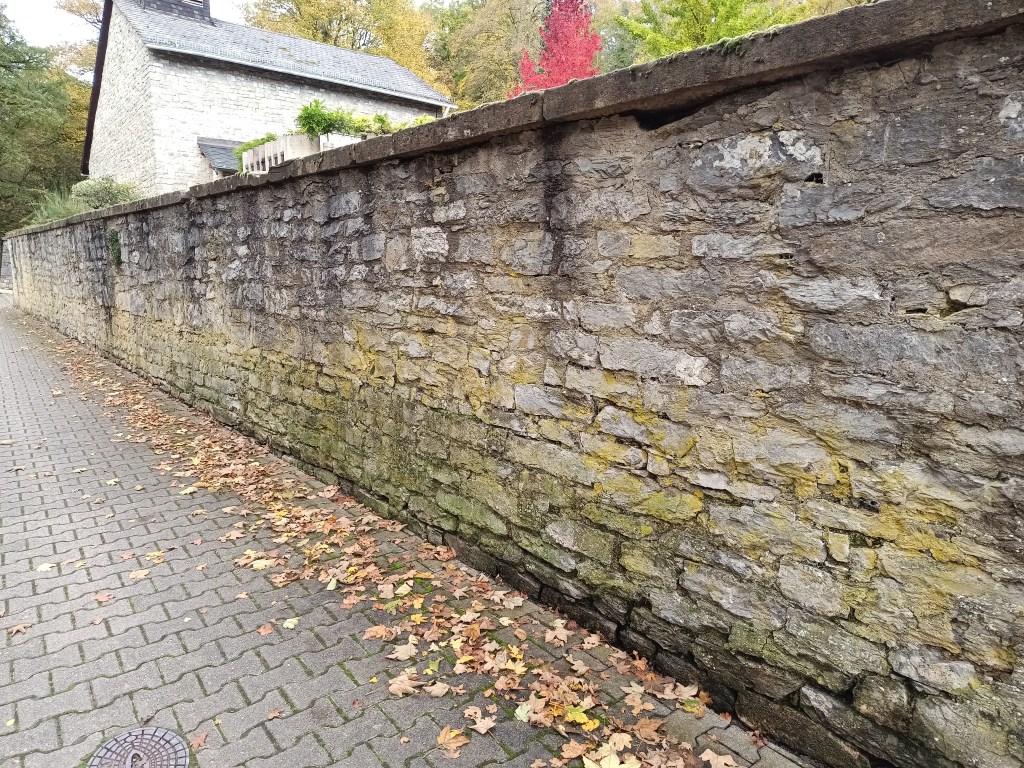
Am Fundament werde ich jetzt schrittweise versuchen die Alterung und eine Urwaldoptik, mit Moos und Bewuchs, nachzubilden. Davon werde ich zu gegebener Zeit berichten.
Wird schnellstmöglich fortgesetzt…
English Version
How the wall structure of the foundation is created.
A stable foundation is the basis of a house. If the structure is destroyed, something new can always be built on the foundation. Especially if the structure is made of wood. Months ago, I conducted initial tests with the design of natural stone structures. This has already resulted in a fountain and a fireplace.
Before we begin, here is a brief review of the construction site at that time and the ongoing development to date. At that time, I had worked out the structure on a piece of Styrodur.
Over the past few days, I have made various changes to it. These will later be transferred to the house foundation. For obvious reasons, I didn’t want to test it directly on the foundation. So, once again, the colorful mixture of different colors was the basis. This time, however, the focus was on the further design of plaster surfaces from repair attempts and the growth of lichens.
I had taken a closer look at lichens in our environment and captured patterns in photos.
I punched out different diameters from a kitchen sponge. These are intended to replicate the structure of the ground lichen. Dab them in paint and dab off the excess paint on paper until you have a surface that corresponds to the original and allows the background to shine through. You can also use scissors to cut the edges up and down a little to loosen up the shape. This is entirely up to personal preference. Stamping can also be done with another color to show a color gradient. Here, for example, white, yellow, and ocher.
Below are the results.
However, the structure comes before the color. Here, I used the thin round file again to press in the joints. This also allows you to imprint chipped corners.
Below is a close-up of the texture. On the left, you can already see the first traces of the crumpled aluminum foil. Rolling and pressing ultimately creates the previous image. The texture of hewn stones. Since both steps, embossing the joints and creating the texture, change the surface, the joint may need to be reworked if necessary. The execution is difficult to describe; the look just has to be pleasing.
I also carved out cracks and stone damage with a craft knife. Everyone has to decide for themselves how much to do. The joints in the house foundation are not filled with cement, but are designed as a drywall foundation. In other words, they are laid without mortar. Accordingly, I painted them black with a fine fiber pen to indicate the shadow joint. This makes joint errors permanently visible, as was the case with me. This requires patience, otherwise the result may suffer.
I will now try to gradually recreate the aging and jungle look, with moss and vegetation, on the foundation. I will report on this in due course.
Will be continued as soon as possible…
Translation, with the kind support of deepl.com
