English Version
Nachdem die Tragkonstruktion der Giebelwand bereits gebaut ist, nun auch die weiteren Fortschritte.
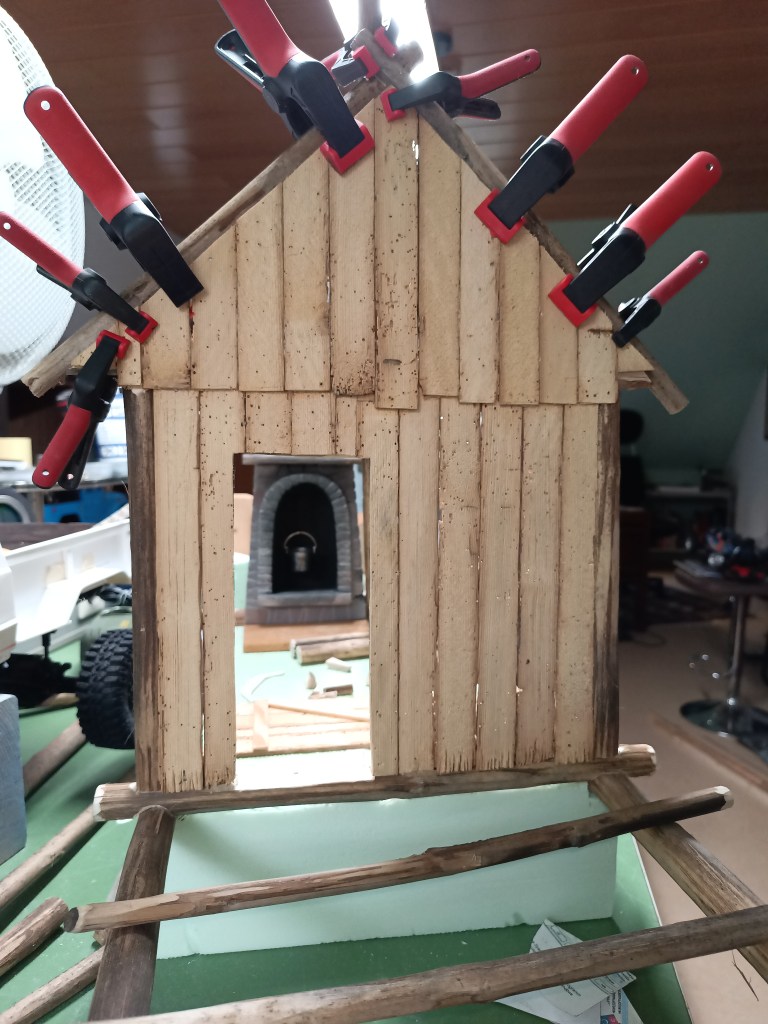
Vierkantholz wurde dazu am Fußbalken und am Auflager der Sparren unterbaut. Darauf habe ich die aus altem Dielenholz geschnittenen Bretter verleimt. Der Zahn der Zeit, vorwiegend aber der Holzwurm, hatten dem Holz schon ziemlich zugesetzt. Also perfekt für die geplante, rustikale Optik.

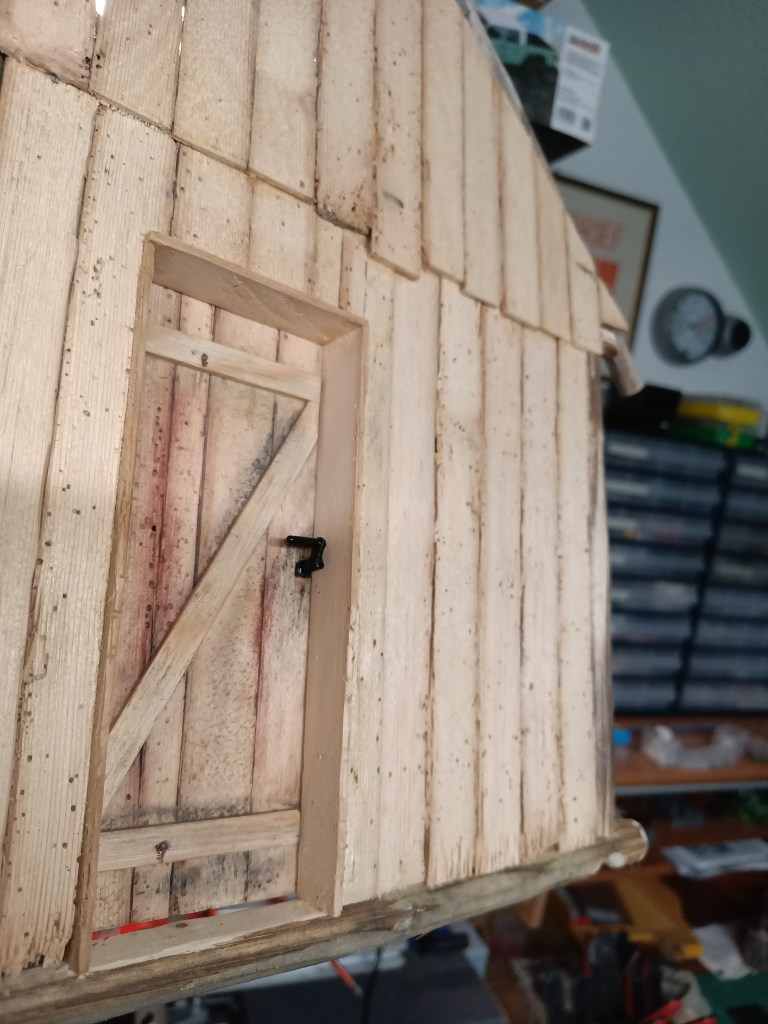
Die Außenseite sieht dann so aus. Wie geplant sehr rustikal und improvisiert. Die in Bodennähe befindlichen Bretter wurden zudem noch mechanisch bearbeitet. Mit Sägeblatt, Schnitzmesser und Feilen.
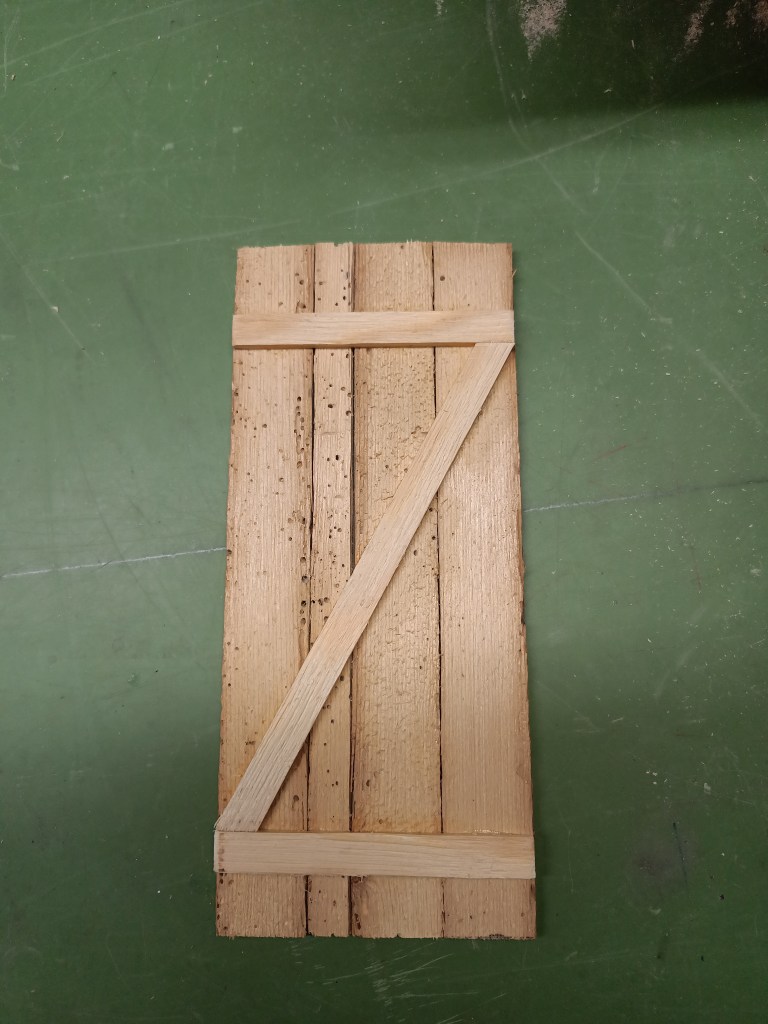
Auch die Eingangstür wurde nach dem Schema gebaut.
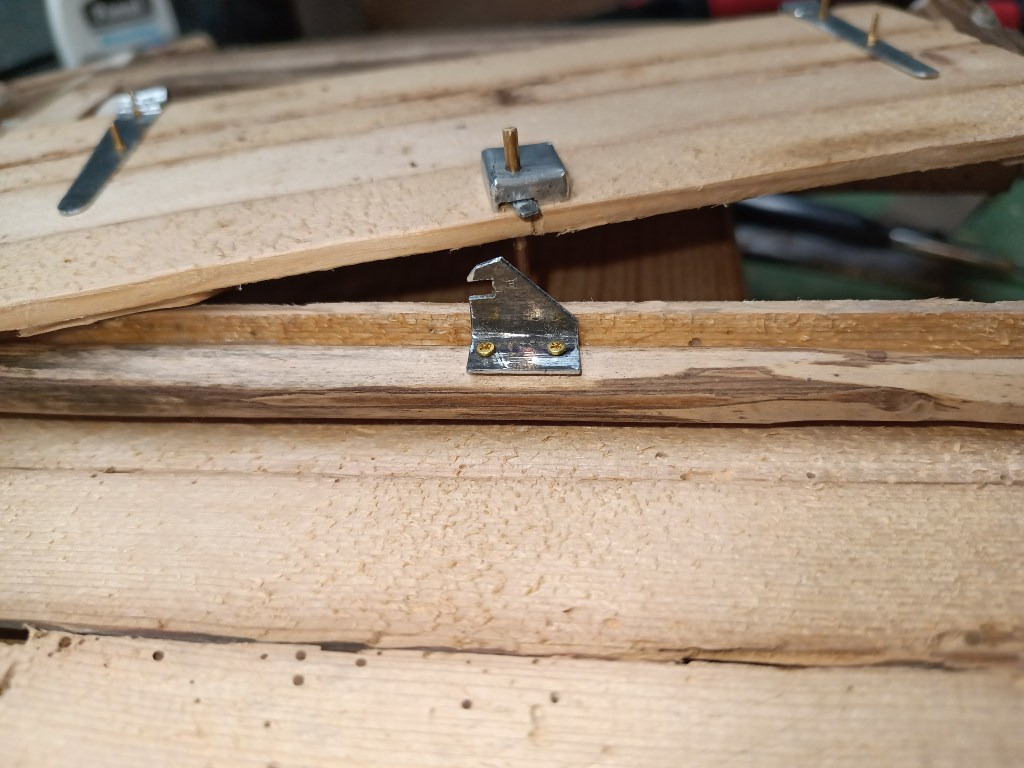
Damit auch eine Funktion gegeben ist, im ersten Schritt zwei Türbänder. Hergestellt aus Zinkblech und am Ende so gerundet um einen Rundzapfen aufzunehmen.
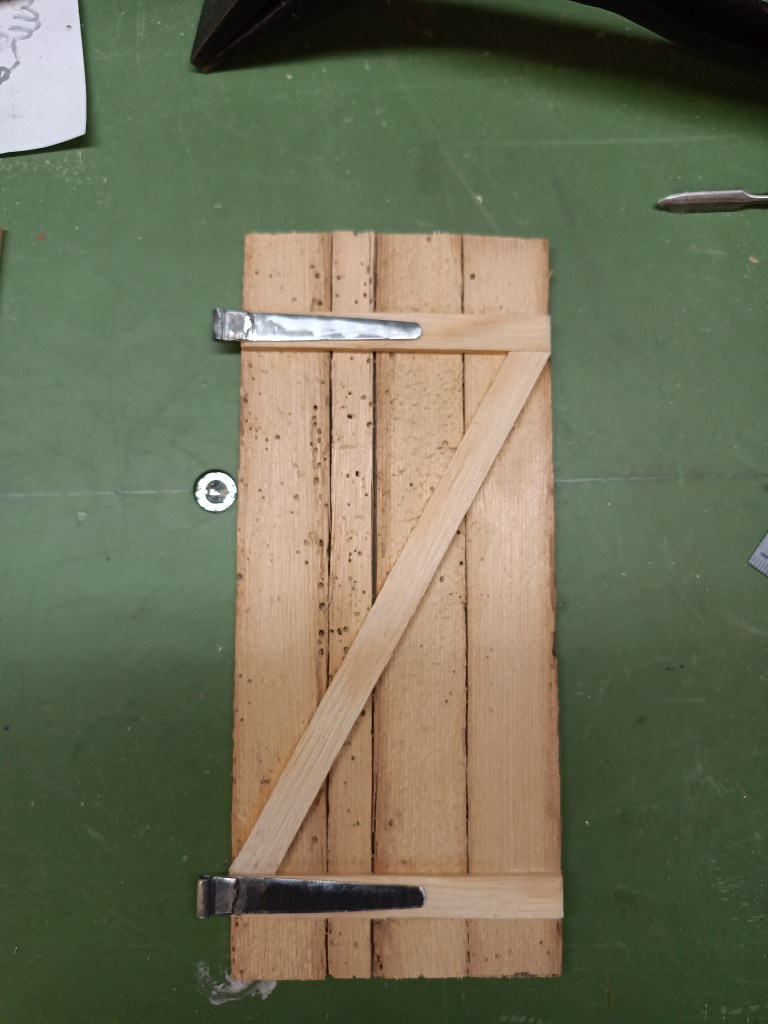
Auch eine Türschließung habe ich vorgesehen. Sie entstand ebenso aus Zinkblech, wie viele Teile zuvor. Von links ausgeschnitten, dann gebogen und verlötet. Mit einem gefeilten Riegel und einer Achse schließlich vervollständigt.

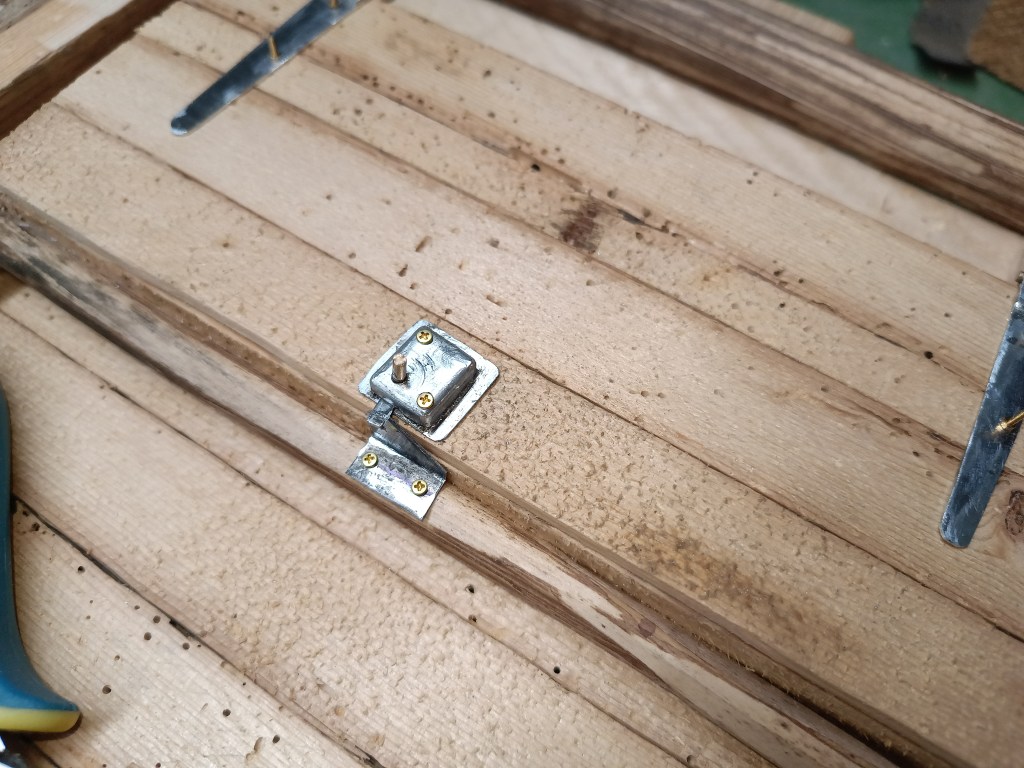
Sieht es dann so aus.
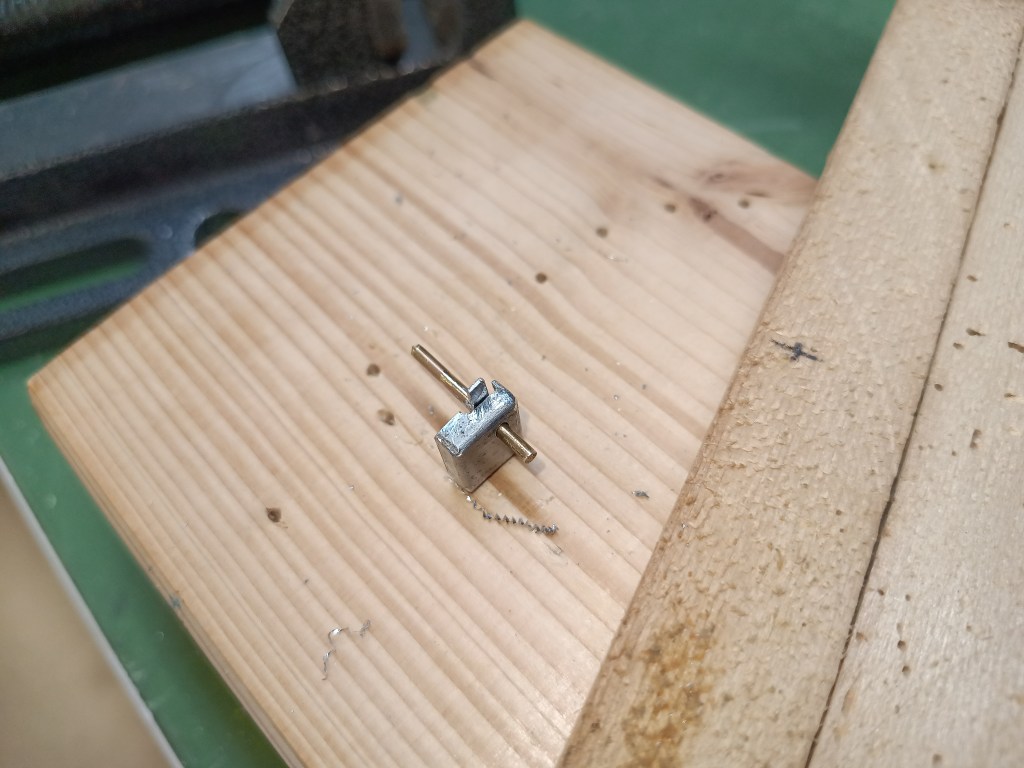
Um einen realistischen Schließvorgang zu ermöglichen, noch eine Steigerung. Ein verlöteter Messingstab mit aufgesetzter und gekürzter Feder waren dazu nötig. Die Feder drückt den Hebel nach unten in die Schlossfalle.
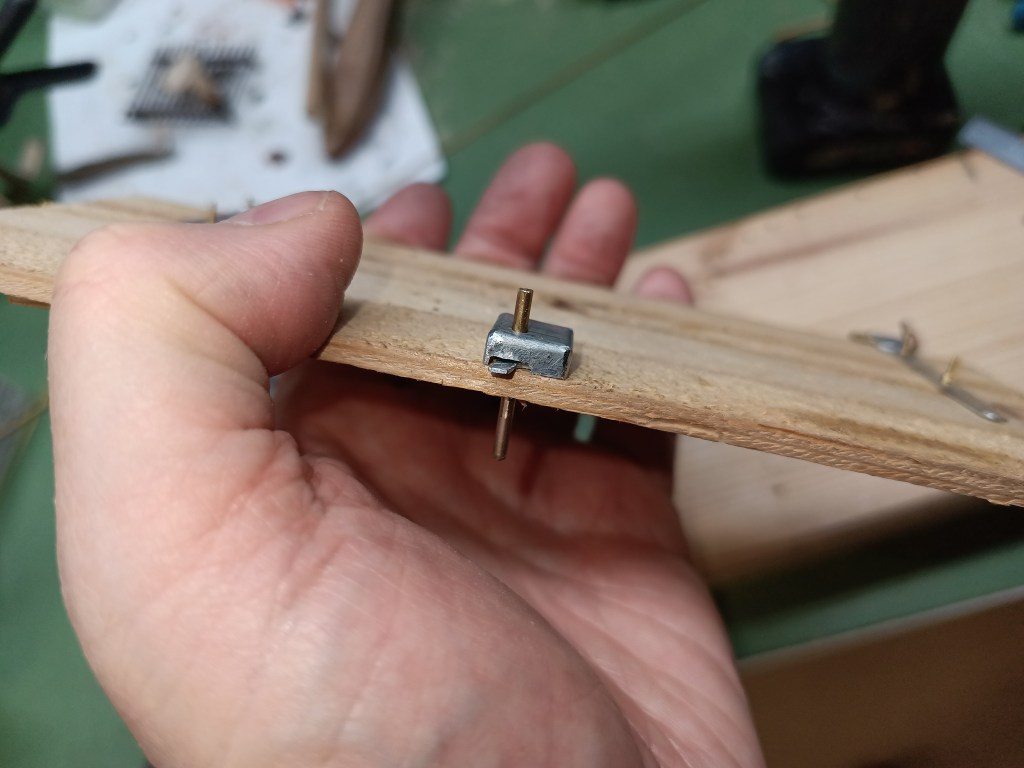
Alle Teile im Schlosskasten zeigen die Funktionsweise besser und der Schließriegel steht so unter Vorspannung.
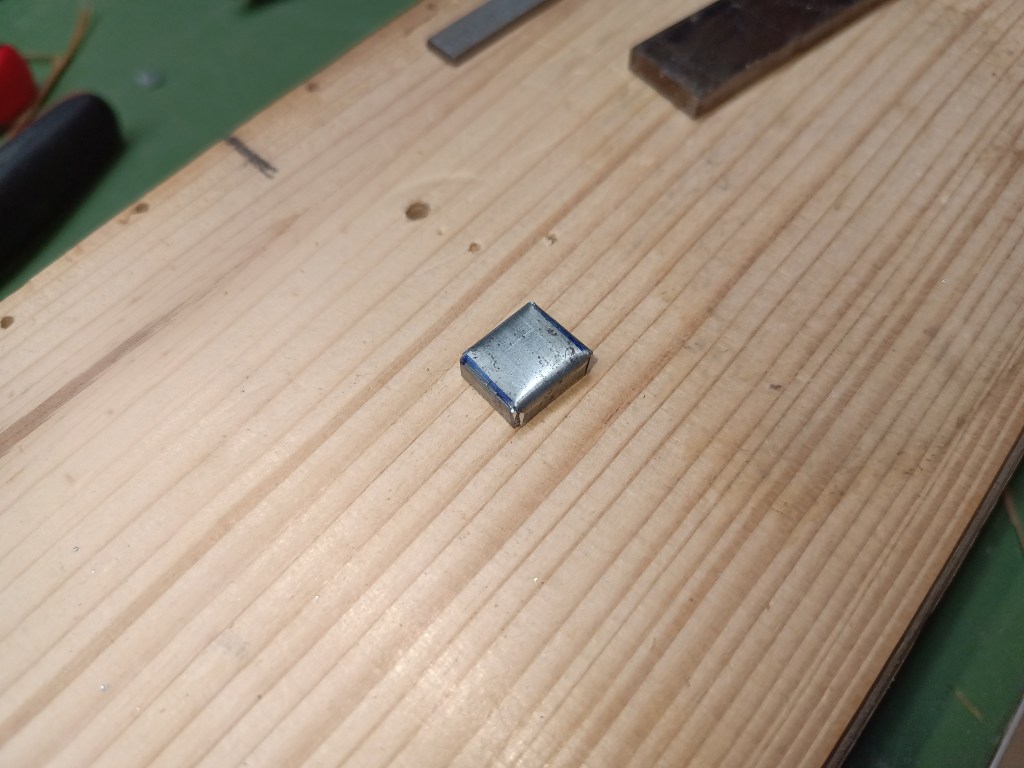
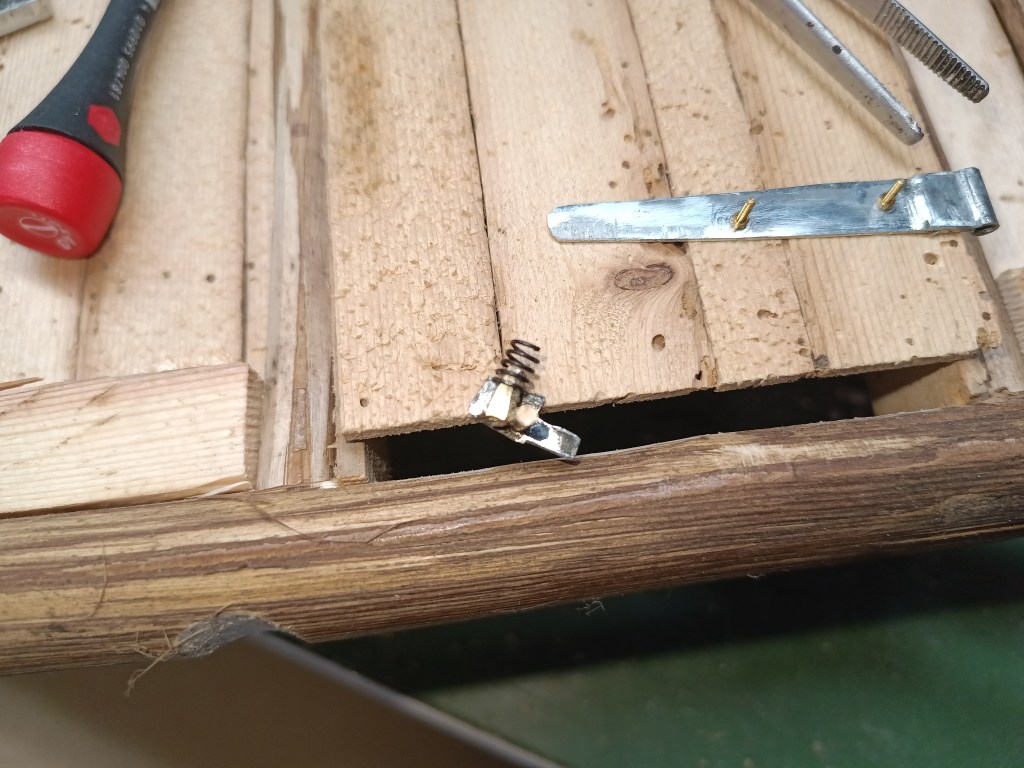
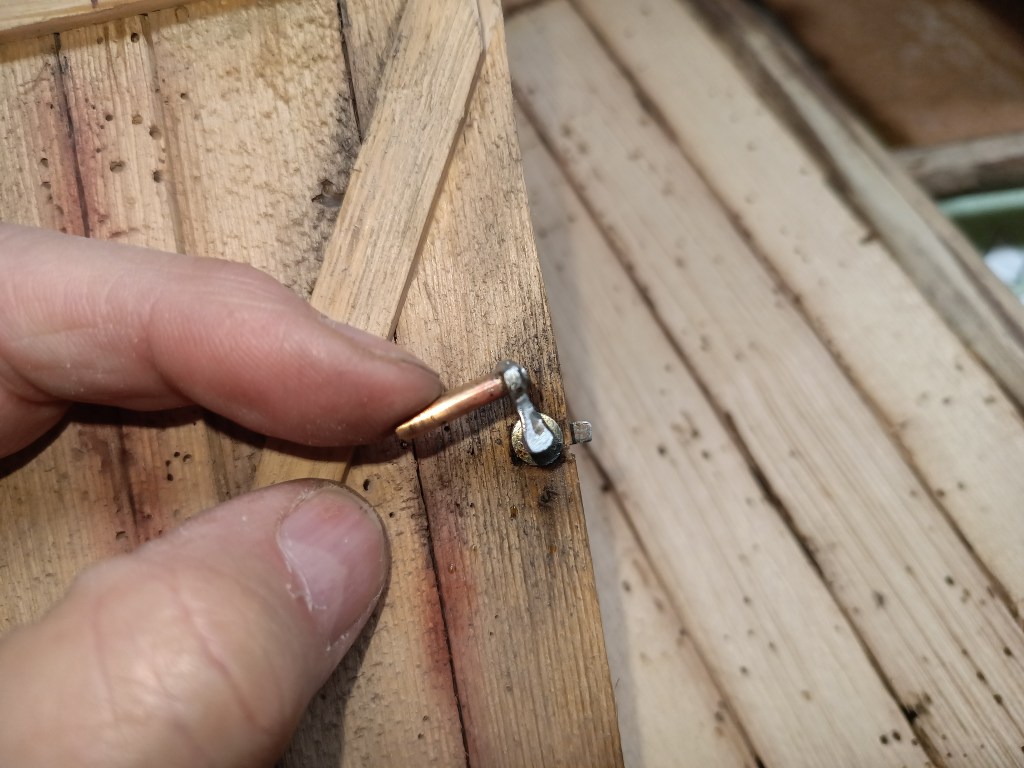
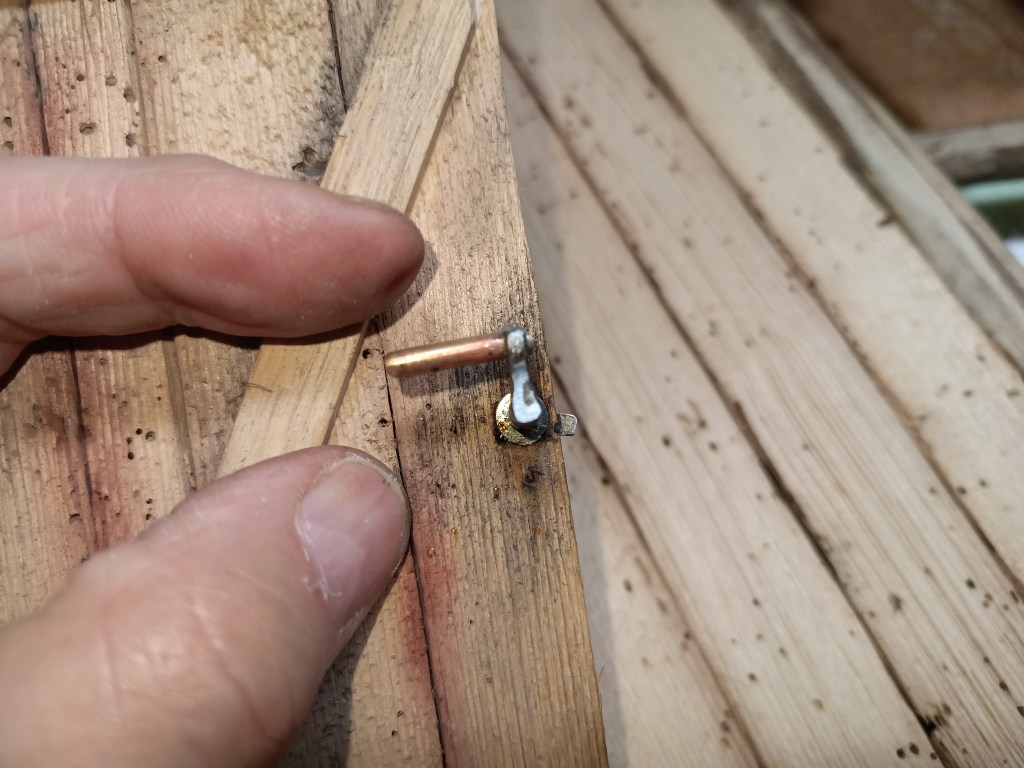
Auch die Schlossfalle wurde aus Zinkblech hergestellt.
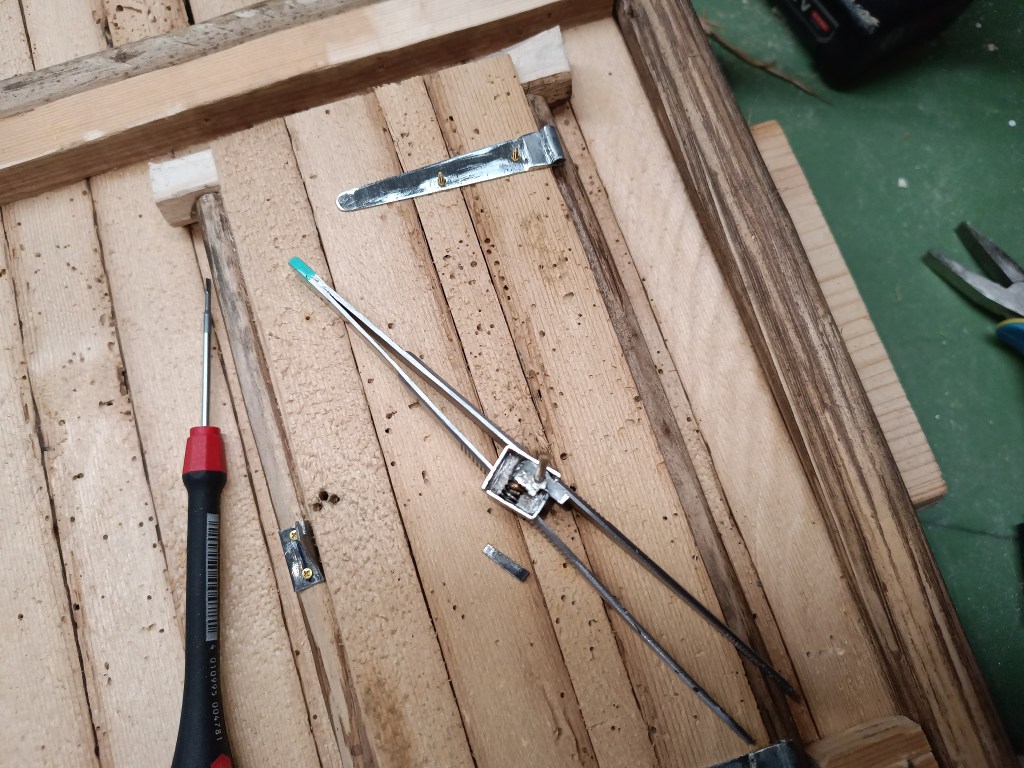
Meine Idee mit der Feder auf dem Messingstift kam mir leider erst, nachdem ich die Tiefe des Schlosskastens schon festgelegt hatte. So stand die aufgesteckte Feder nach hinten minimal über. Als Ergebnis konnte der Riegel nur noch mit hohem Kraftaufwand bewegt werden und löste sich sogar an der Lötstelle. Daher musste ich eine Lage unterbauen. Das geschah mit einer Blechlage, die innen ausgespart und außen leicht überstand. Die Beweglichkeit der Schließung wurde so wieder hegestellt.

Jetzt fehlten nur noch zwei wichtige Bauteile, nämlich die Türgriffe. Aus einer Fischdose habe ich die Blende für den Türgriff ausgestanzt. Ein angefertigtes Blechteil und ein Messingstift ergaben den Türgriff. Den Werdegang habe ich leider nicht dokumentiert. Alles mit der Achse verlötet und funktionsfähig, aber sehr filigran. Es wird aber trotz Funktion wohl eher nicht mehr bewegt. Aber schön zu wissen das es funktioniert, auf der halben Fläche einer Briefmarke.
Wird schnellstmöglich fortgesetzt…
English Version
A door with a lock in the gable wall
Now that the supporting structure for the gable wall has been built, here are the latest developments.
Square timber was used to support the foot beam and the rafter supports. I then glued the boards cut from old floorboards onto this. The ravages of time, but mainly woodworm, had already taken their toll on the wood. So it was perfect for the planned rustic look.
This is what the outside looks like. As planned, very rustic and improvised. The boards near the floor were also machined. With a saw blade, carving knife, and files.
The entrance door was also built according to the same plan.
To ensure that it is functional, the first step was to add two door hinges. Made of zinc sheet and rounded at the end to accommodate a round pin.
I also provided a door closure. Like many of the other parts, it was made from zinc sheet. Cut out from the left, then bent and soldered. Finally, it was completed with a filed bolt and an axle.
This is what it looks like.
To enable a realistic closing process, I added another improvement. This required a soldered brass rod with a shortened spring attached to it. The spring pushes the lever down into the lock latch.
All the parts in the lock case show how it works better, and the locking bolt is preloaded.
The lock latch was also made from zinc sheet metal.
Unfortunately, my idea of using a spring on the brass pin only came to me after I had already determined the depth of the lock case. As a result, the attached spring protruded slightly at the back. This meant that the bolt could only be moved with considerable force and even came loose at the solder joint. I therefore had to add a layer underneath. I did this with a sheet metal layer that was recessed on the inside and protruded slightly on the outside. This restored the mobility of the lock.
Now only two important components were missing, namely the door handles. I punched out the cover for the door handle from a fish tin. A custom-made sheet metal part and a brass pin formed the door handle. Unfortunately, I did not document the process. Everything was soldered to the axle and functional, but very delicate. However, despite being functional, it will probably not be moved anymore. But it’s nice to know that it works, on half the surface area of a postage stamp.
Will be continued as soon as possible…
Translation, with the kind support of deepl.com
