English Version
Besser früher als zu spät. Abgabetermin für den Wettbewerbsbeitrag zum SuperScale ist erst Pfingsten 2026, aber mein allererster Holzbau, ein Vogelhäuschen einmal ausgenommen, macht mich doch etwas nervös. Erschwerend kommt hinzu, dass dabei Rundstämme in verschiedenen Durchmessern und Formen zum Einsatz kommen. So wird sicher jedes Holzstück ein Unikat, individuell ein- und angepasst auf Ort und Lage.
Vom ursprünglichen Baustil, einer rundum offenen Urwaldhütte bin ich abgekommen. Zu wenig Herausforderungen und Anspruch. Das neue Ziel ist allerdings hochgesteckt und wird mir sicher auch einige schlaflosen Nächte bereiten. Ein Fundament 400 x 300 x 100 mm groß und aus Styrodur, dient als Basis für den Holzaufbau. Auf dem Fundamentblock werde ich später versuchen eine Bruchsteinstruktur herauszuarbeiten.
Die erste umlaufende Balkenlage wird soweit an den Fundamenträndern abgesenkt, dass ein Dielenfußboden später darin den unteren Abschluss bildet. An der vorderen Giebelseite sind die Balken über das Fundament hinausgezogen, um eine Veranda aufzunehmen. Zu ihr führt eine Holztreppe direkt zur Eingangstür. Rechts davon gibt es ein Sprossenfenster mit 6 Einzelgläsern. Auf der gegenüberliegenden Giebelseite wird ein Kamin installiert, der eine rustikale Feuerstelle im Wohnraum bekommt. Die rechte Seite bleibt fensterlos, lediglich links sind zwei weitere Sprossenfenster installiert. Dort werden ein Tisch und zwei Stühle ihren Platz finden. Auf der rechten Seite stehen Bett und ein Schrank. Soweit mein Plan. Im Zuge der Baumaßnahme könnte aber noch die eine oder andere Änderung stattfinden.
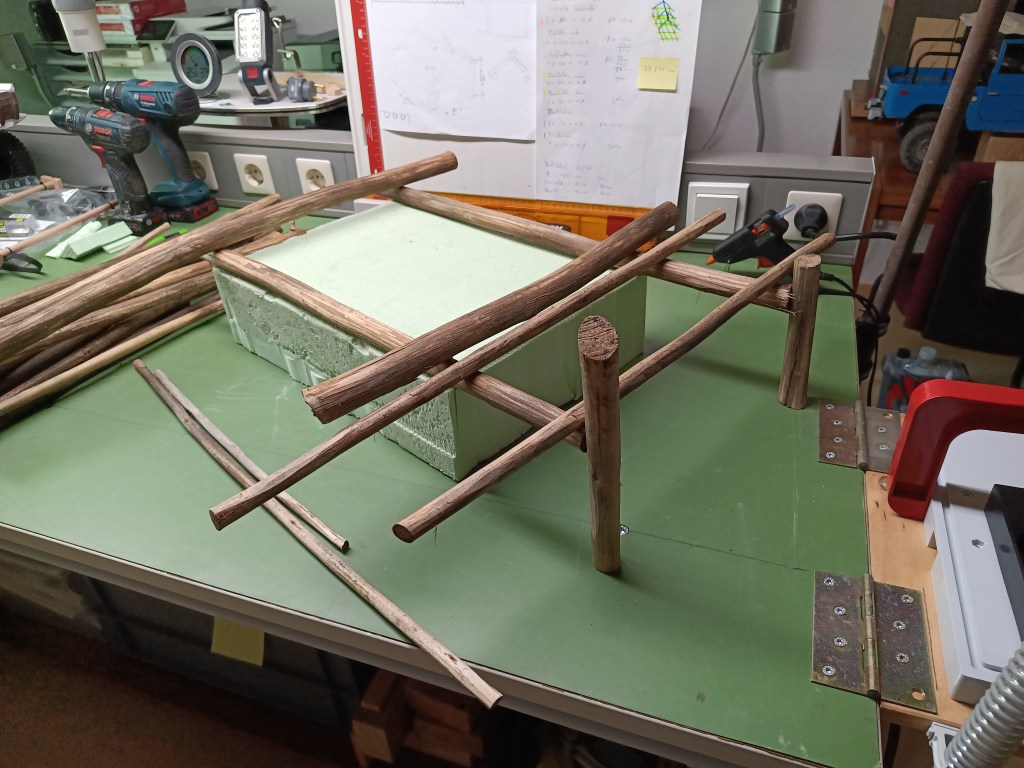
Die ersten Stellversuche sahen so aus.
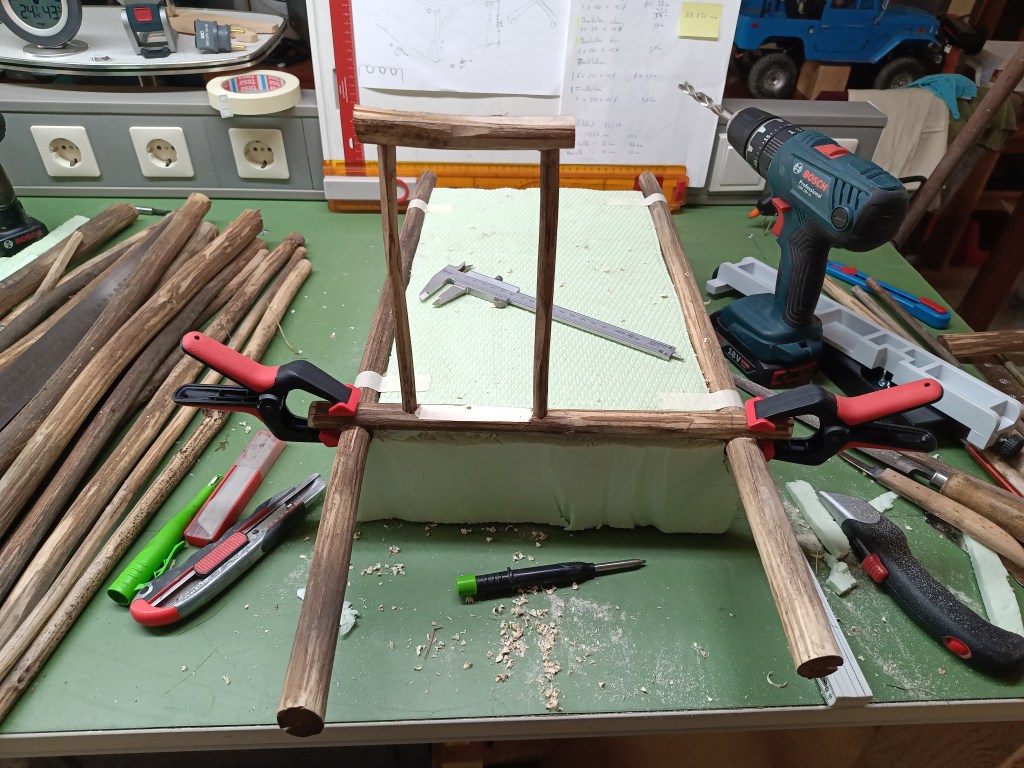
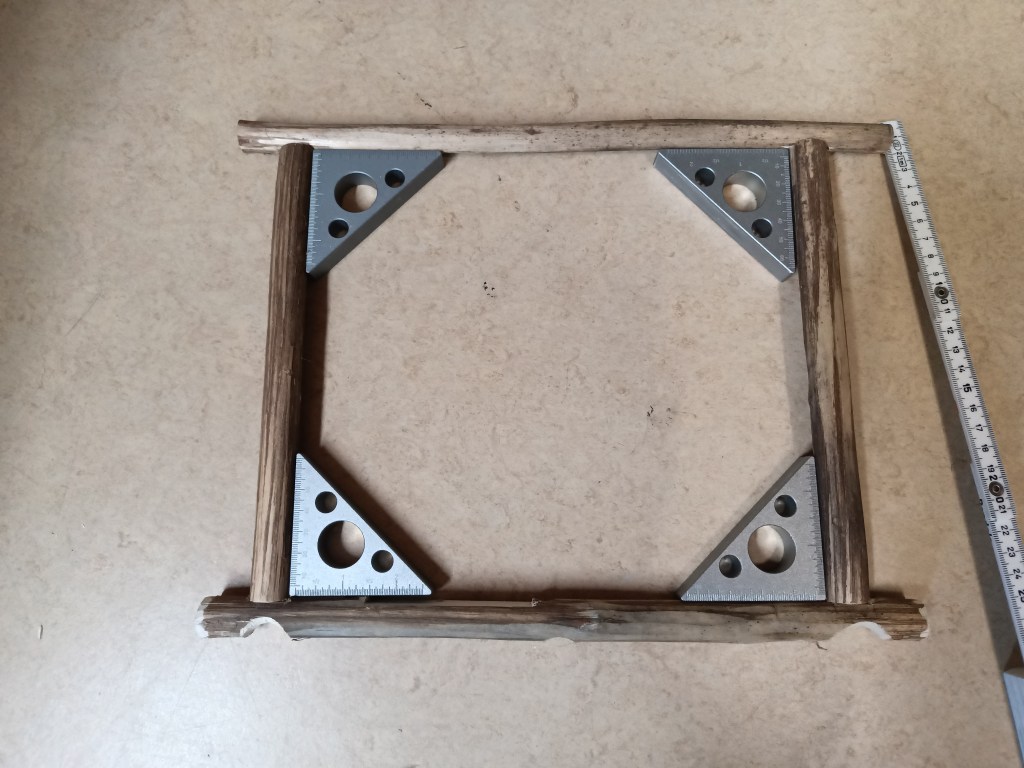
Nach dem Ausschneiden der Fundamente dann dieses Bild. Die Türschwelle wurde abgesenkt und die Türeinfassung aufgestellt. Unten und oben gebohrt und zusammengesteckt, um eine stabile Basis zu erhalten. An den Auflagepunkten der Balken wurden um 90° versetzt halbrunde Profile ausgefeilt, damit die Stämme möglichst formschlüssig verbunden sind. Leim und Nägel sollen später die nötige Festigkeit untereinander verleihen.
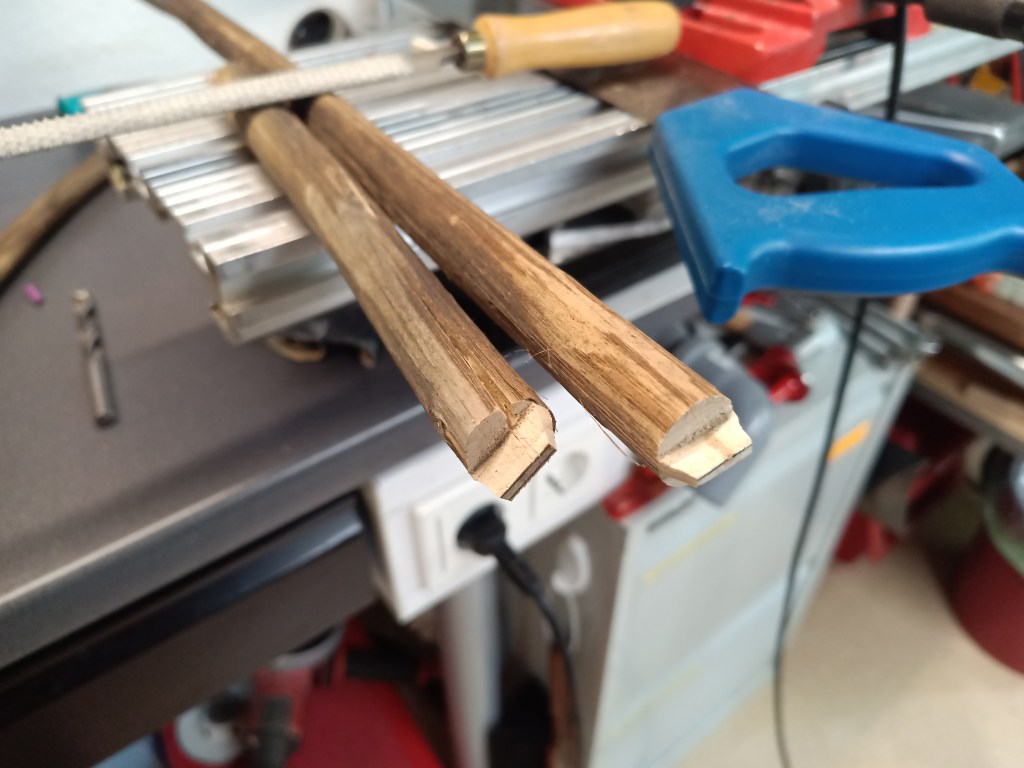
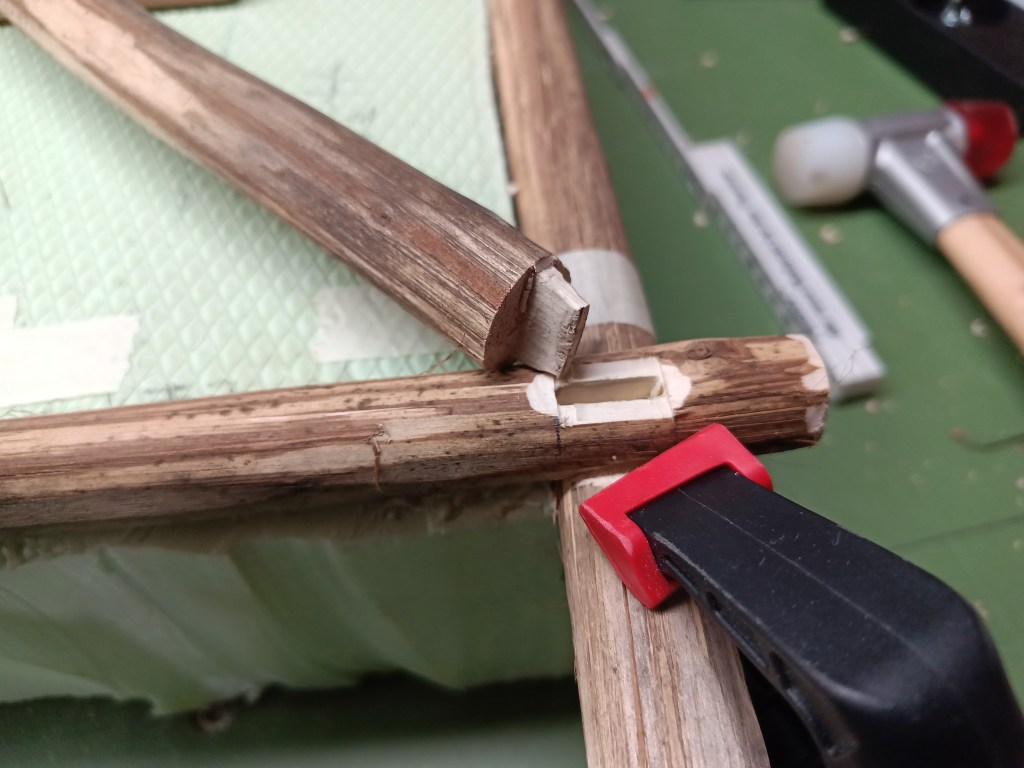
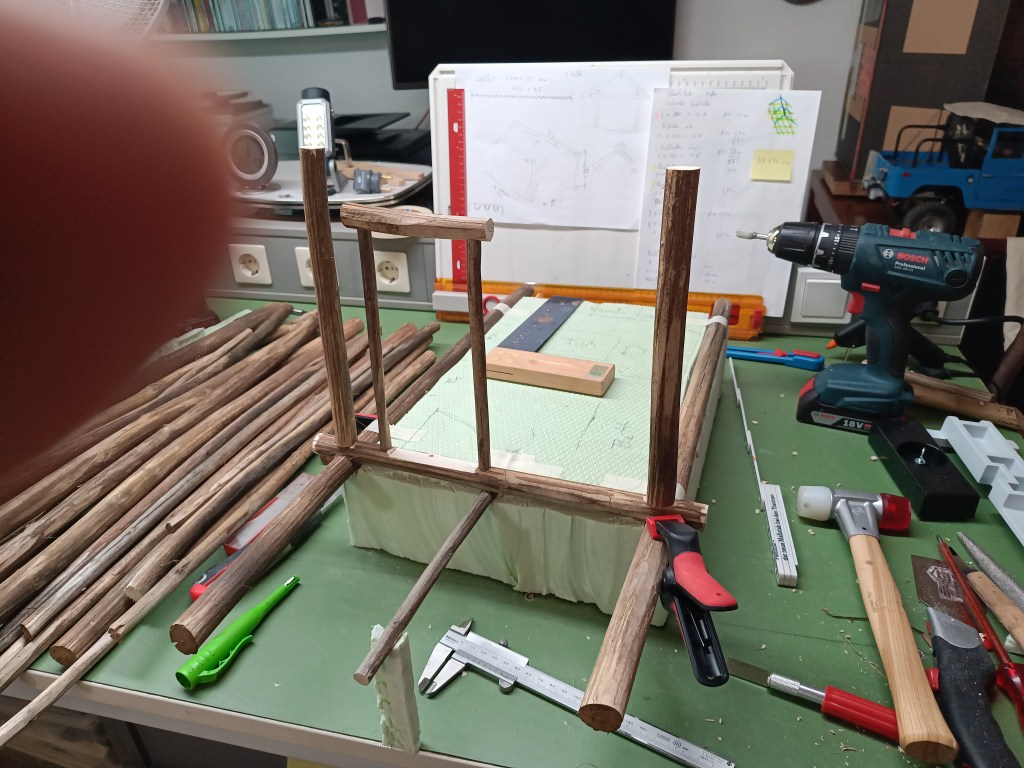
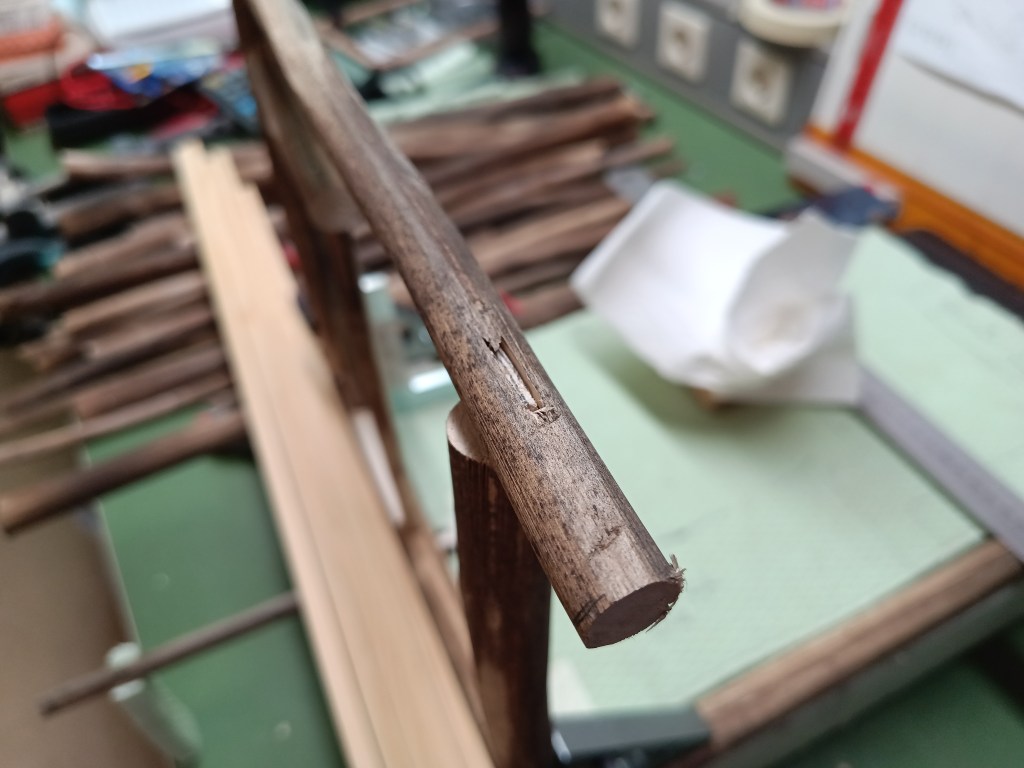
Später nicht mehr sichtbar, aber für mich doch eine Herausforderung, der ich nicht aus dem Weg gehen wollte. Die Befestigung der senkrechten Stützbalken auf der horizontalen Balkenlage. Links, Zapfen an den Auflagepunkten der Stützbalken und in der Mitte ausgefräste Zapfenlöcher im Fußbalken. Schließlich alles provisorisch zusammengesteckt und fertig aufgerichtet.
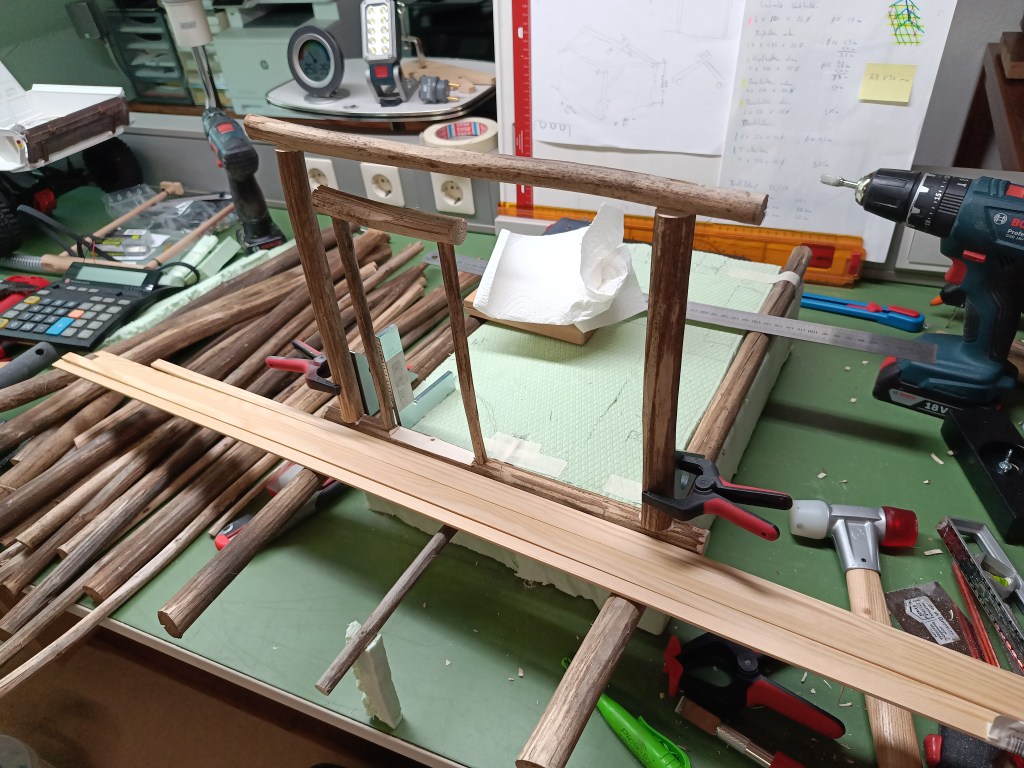
Der Kopfbalken der Giebelseite war der nächste Bauschritt. Trotz der nicht immer geraden Hölzer, habe ich soweit wie möglich versucht, die Winkel einzuhalten. Unten am Fußbalken sieht man auch die drei Ausfräsungen für die über das Fundament ragenden Traghölzer der Veranda.
Auch hier sind die Hölzer mit Zapfen und Zapfenlöchern verbunden.
Der obere Türsturz wurde mit den senkrechten Hölzern verleimt und zusätzlich mit einer Nagelpistole fixiert. Hier mit der Hand zu nageln, führt wahrscheinlich durch die Hammerschläge zur Zerstörung der Holzkonstruktion. Eine Nagelpistole arbeitet nahezu rückstoßfrei und benötigt richtig eingestellt nur einen Aufschlag.

So sieht das heutige Ergebnis aus. Vor der Eingangstür habe ich einige Lagen Holzdielen ausgelegt, um den Aufbau der Veranda darzustellen. Dieser Aufbau ist aber zu edel, später wird hier eine rustikale Optik Einzug halten.
Für den nächsten Bauabschnitt, die hintere Giebelwand, arbeite ich schon in Gedanken am Kaminaufbau. Der über den gesamten Verlauf der Giebelwand, bis über den Dachfirst, geführt wird.
Wird schnellstmöglich fortgesetzt…
English Version
Start of construction of the jungle hut, front gable wall
Better early than late. The deadline for submitting entries to the SuperScale competition is not until Pentecost 2026, but my very first timber construction project, apart from a birdhouse, is making me a little nervous. To make matters more difficult, round logs of various diameters and shapes are used. This means that each piece of wood will be unique, individually adapted to the location and site.
I have moved away from the original architectural style, which was an open jungle hut. It wasn’t challenging or ambitious enough. However, the new goal is ambitious and will certainly cause me a few sleepless nights. A 400 x 300 x 100 mm foundation made of Styrodur serves as the basis for the wooden structure. I will later try to carve out a quarry stone structure on the foundation block.
The first circumferential beam layer is lowered at the edges of the foundation so that a plank floor can later form the lower edge. On the front gable side, the beams extend beyond the foundation to accommodate a veranda. A wooden staircase leads directly to the front door. To the right of it is a lattice window with six individual panes. A fireplace will be installed on the opposite gable end, providing a rustic hearth in the living room. The right side will remain windowless, with only two more lattice windows installed on the left. A table and two chairs will be placed there. On the right side, there will be a bed and a wardrobe. That’s my plan, at least. However, one or two changes may still be made during the construction process.
The first attempts at positioning looked like this.
After cutting out the foundations, this is what it looked like. The door threshold was lowered and the door frame was put in place. Holes were drilled at the top and bottom and the pieces were put together to create a stable base. At the points where the beams rest, semicircular profiles were filed down at a 90° angle so that the logs are connected as securely as possible. Glue and nails will later provide the necessary strength between them.
No longer visible later on, but still a challenge for me that I didn’t want to shy away from. Fastening the vertical support beams to the horizontal beam layer. On the left, tenons at the support beam contact points and milled tenon holes in the base beam in the middle. Finally, everything was provisionally assembled and erected.
The head beam of the gable side was the next construction step. Despite the wood not always being straight, I tried to keep the angles as accurate as possible. At the bottom of the foot beam, you can also see the three milled-out holes for the support beams of the veranda that protrude above the foundation.
Here, too, the wood is connected with tenons and mortises.
The upper lintel was glued to the vertical pieces of wood and additionally secured with a nail gun. Nailing by hand here would probably destroy the wooden structure due to the hammer blows. A nail gun works with virtually no recoil and, when properly adjusted, requires only one strike.
This is what the result looks like today. I laid out a few layers of wooden floorboards in front of the entrance door to represent the structure of the veranda. However, this structure is too elegant, later on, a rustic look will be introduced here.
For the next construction phase, the rear gable wall, I am already thinking about the fireplace structure. It will run along the entire length of the gable wall, up to the roof ridge.
Will be continued as soon as possible…
Translation, with the kind support of deepl.com
