English Version
Das Bauprojekt für den SuperScale 2026 zeigt mir und meiner Werkstatt die Grenzen auf. Von der Organisation wurden eine ungefähre Fläche von 60×60 cm vorgegeben. Das genaue Maß muss ich erst noch ermitteln. Fakt ist, meine aktuelle Arbeitsfläche ist dafür zu klein. Auf dem Boden will ich auch nicht werkeln. Eine Neuorganisation und etwas mehr Ordnung waren aber schon länger mein Ziel.
Daher hatte ich erst einmal die Bestände in meinem Materialfundus gesichtet. Schon einige Jahre lag da versteckt in der hintersten Ecke eine Arbeitsplatte, aus der Auflösung einer Computer-Werkstatt. Zwei weitere habe ich bereits in der Nutzung. Eine stationär und eine zweite auf Rollen, um die Arbeitsstelle flexibel zu gestalten. Das fand ich auch für meine Werkstatt eine gute Lösung. Nur die Arbeitshöhe sollte vom Standard abweichen. Rückenschonend im Stehen zu arbeiten war mein Ziel. Ein normaler Unterbau scheidet also aus.

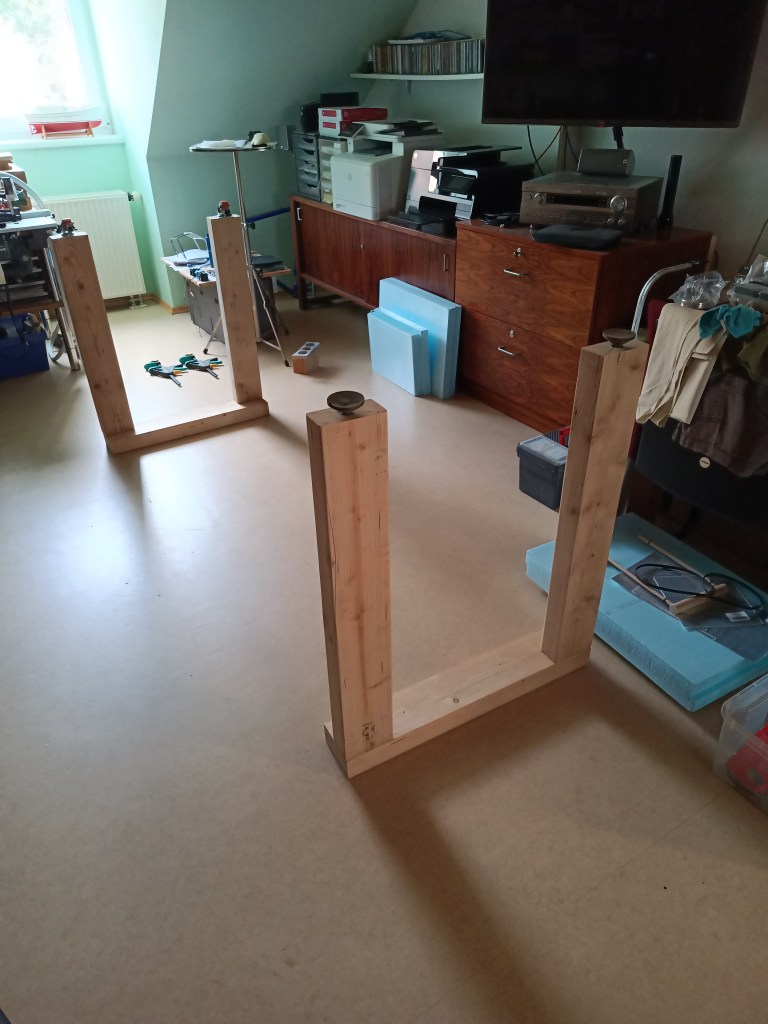
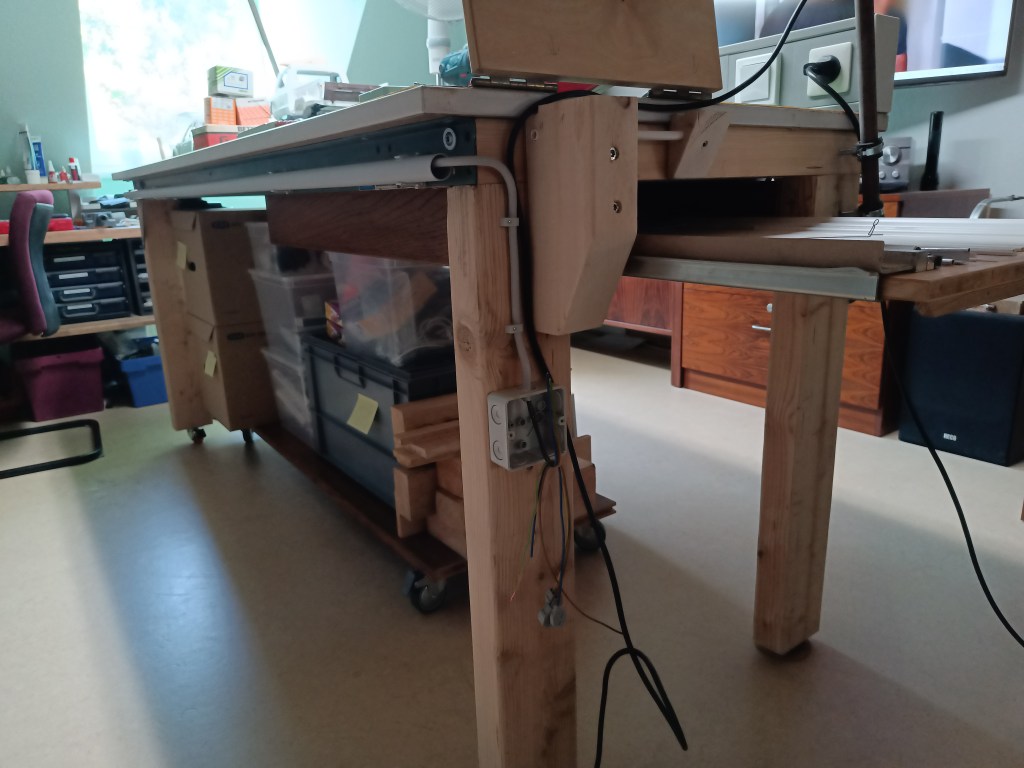
So habe ich die Holzvorräte gesichtet. Viele kurze Reststücke vom Dachausbau der Scheune waren noch vorhanden. Für einen Werkbankunterbau mit 120 x 60 mm reichlich dimensioniert, entstand das Untergestell. Hinten im Bild mit zwei lenk- und feststellbaren Schwerlastrollen. Im Vordergrund die Gegenseite mit höhenverstellbaren Gummifüßen.
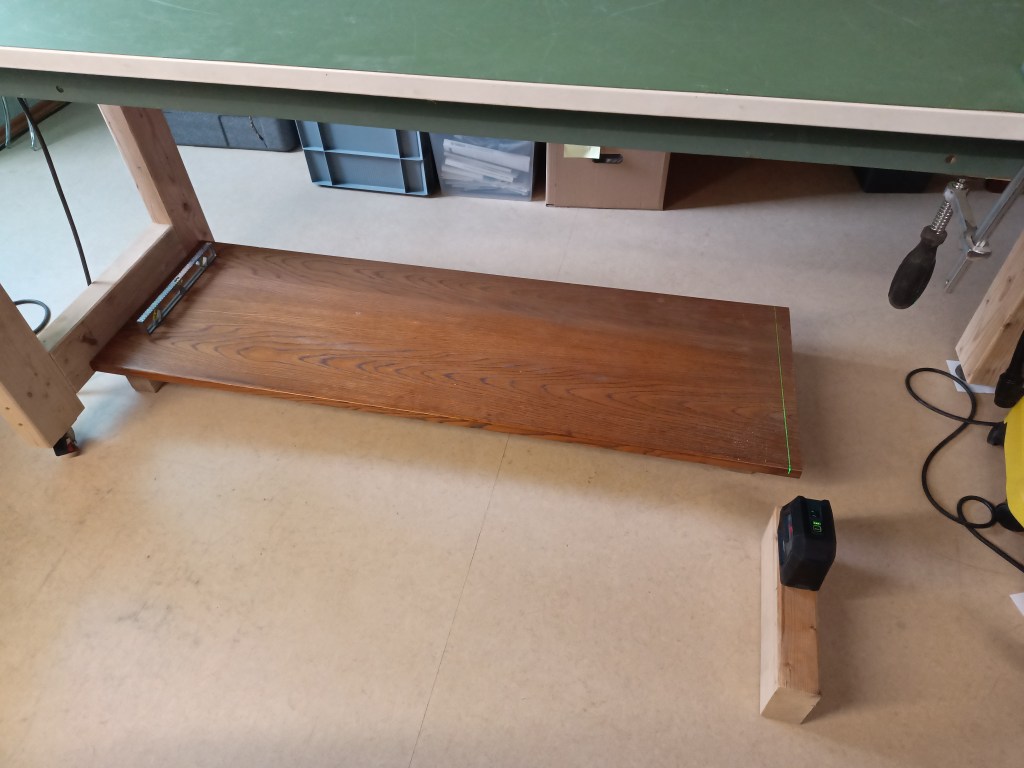
Die Arbeitsplatte hatte bereits an den beiden Längsseiten Winkelprofile im Format 60 x 30 mm, zur Befestigung der originalen Unterbau-Profile aus Metall. Die wurden dann vorne und hinten mit meinem hölzernen Unterbau verschraubt. Eine weitere, unten angebrachte Quertraverse soll die Beine beim Bewegen stabilisieren und dient auch als Anschlag für eine weitere Ablage auf Rollen. Alle Rollen lenkbar und die beiden vorderen noch feststellbar. So bleibt viel Stapelraum bis unter die Werkbank und zum Reinigen einfach nach vorne zu Rollen. Auch dieses Brett, Restholz eines alten Schrankes.
Auf der Arbeitsfläche gab es noch etwas für die Stromversorgung. Ein Metall-Kanal, ebenfalls aus der ehemaligen Computer-Werkstatt. Mit Winkeln hinten an der Arbeitsplatte verschraubt.

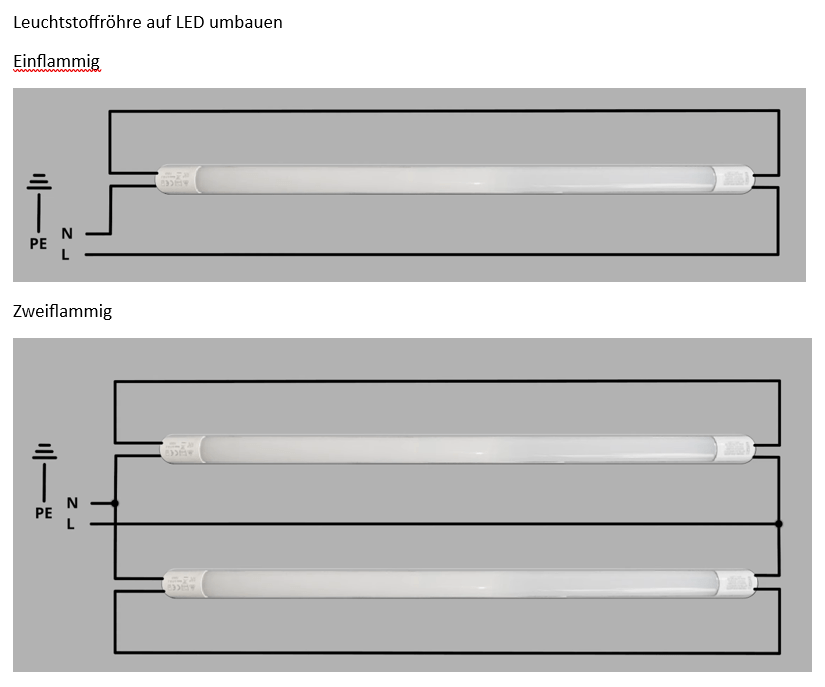
Wo gearbeitet wird, muss auch Licht sein. Eine defekte doppelflammige Leuchtstoffröhre wurde kurzerhand auf LED-Technik umgerüstet. Das Steuergerät war ohnehin defekt und daher ein geeigneter Kandidat, statt Neukauf und Entsorgung der alten Leuchte.

Das alles ist kein Hexenwerk und wer elektrische Kenntnisse und Sachverstand besitzt, kann das problemlos selbst umbauen. Nachfolgend das Blockschaltbild für eine ein- und zweiflammige Leuchte aus dem Internet.
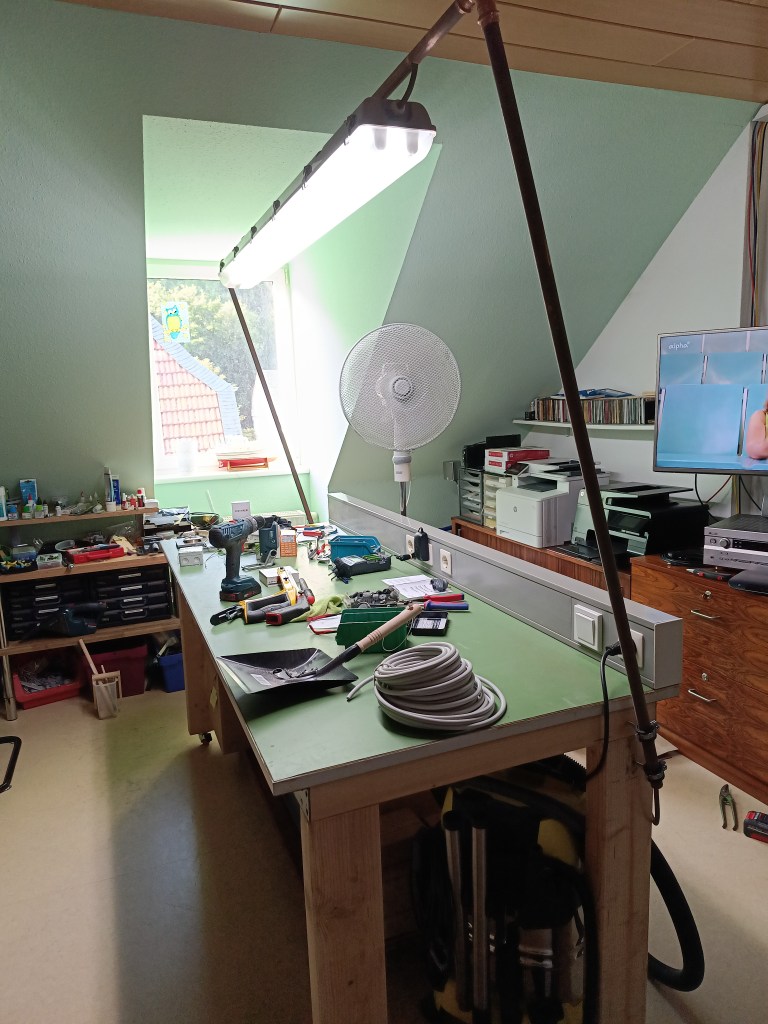
Die Leuchte an sich hängt an drei Cu-Rohren 22 mm, die mit je 2 Schraubschellen auf beiden Seiten verschraubt sind. Leicht versetzt, um das Zentrum der Leuchte über der Mitte der Arbeitsfläche zu positionieren.
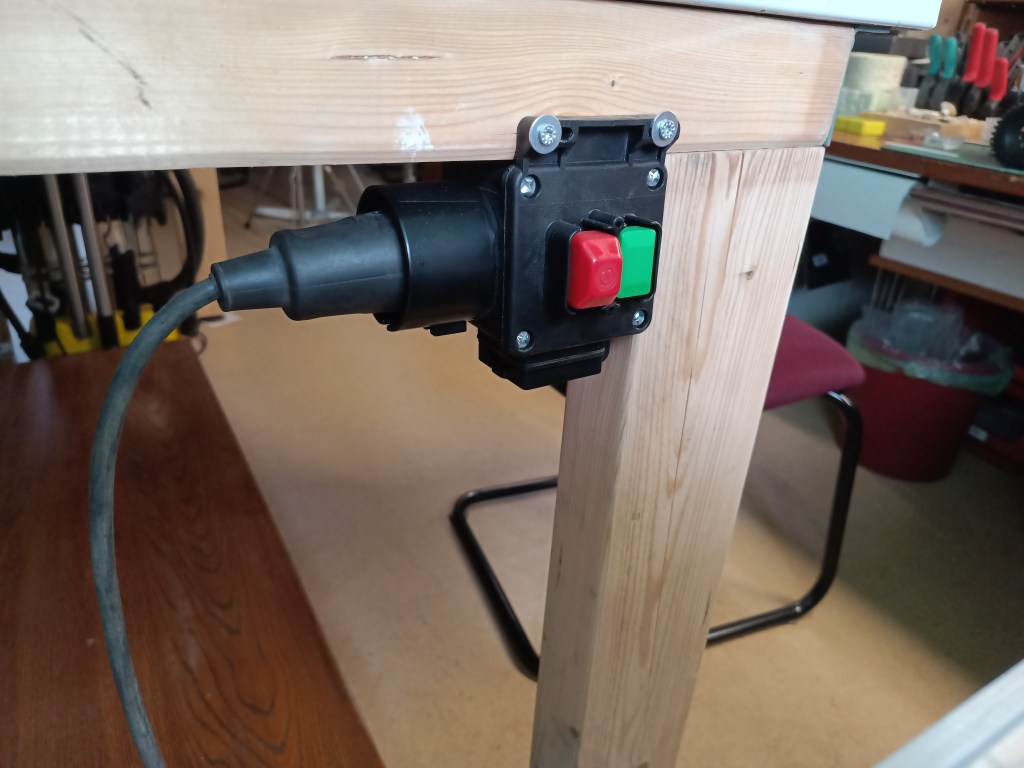
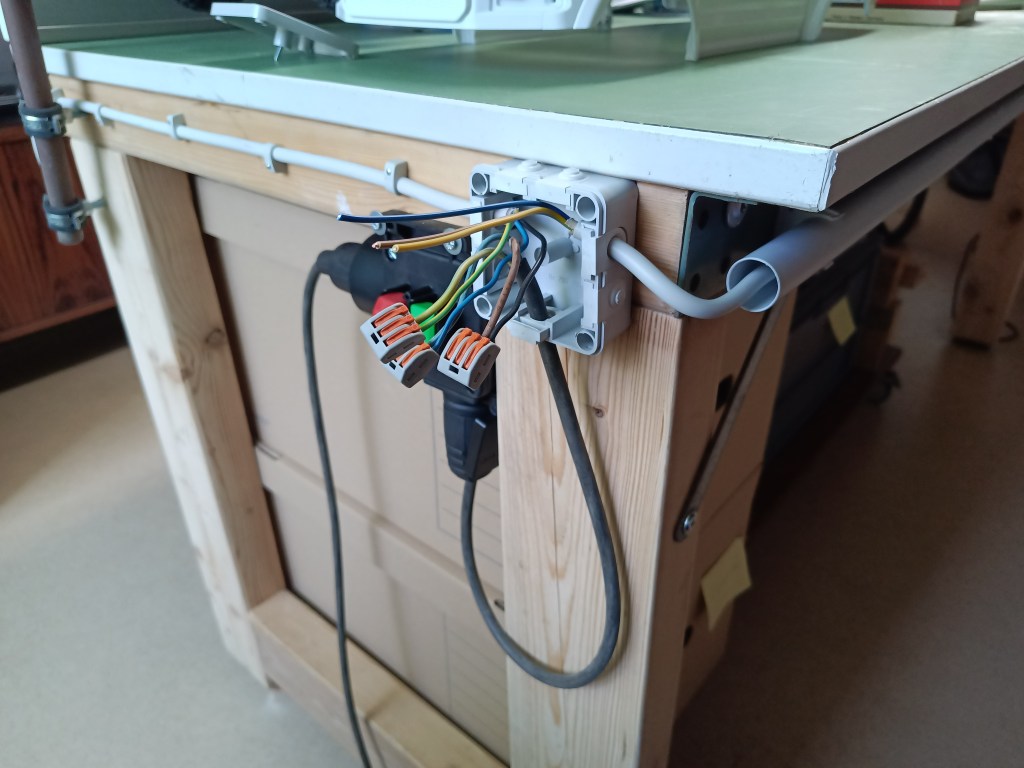
Hier noch einige Detailbilder zur Befestigung, Kabelführung und Stromversorgung. An der Einspeisung wurde ein zentraler Schalter montiert, um das Anschlusskabel auszustecken und bei Nichtnutzung komplett stromlos zu schalten.

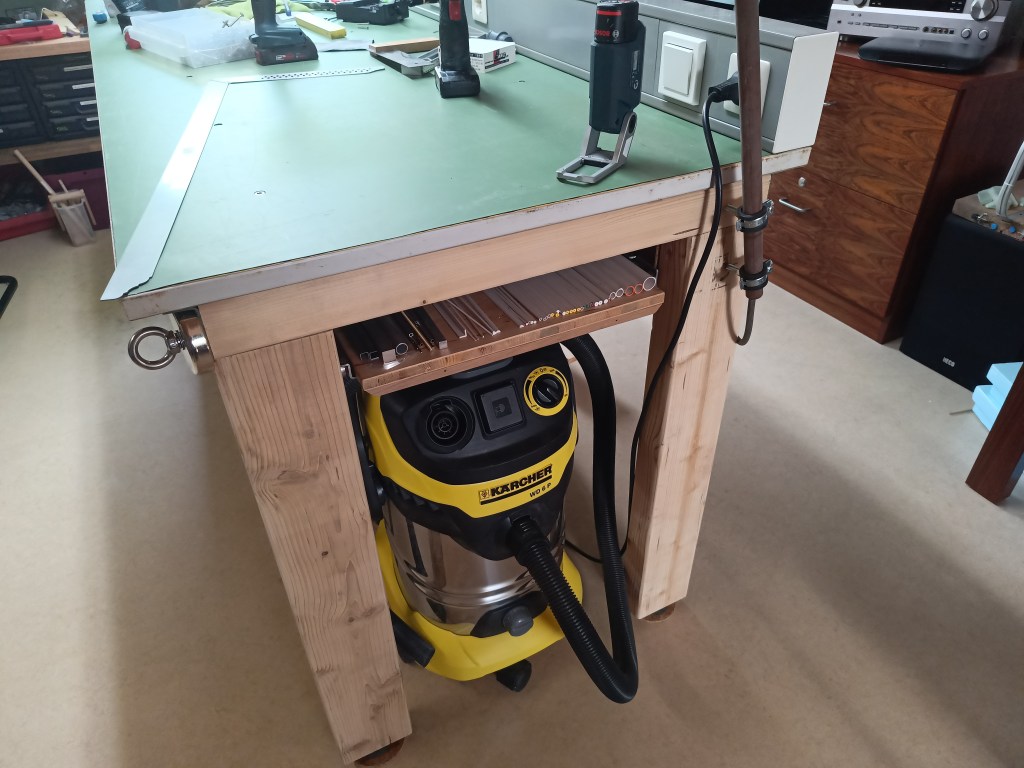
Ganz rechts unter dem Tisch gab es noch eine ungenutzte Fläche. Hier wird der Staubsauger untergestellt. Und selbst darüber gibt es noch reichlich Platz, den ich auch noch nutzen wollte.
Zwei 950 mm lange Unterflurauszüge, zwei massive Holzstücke und der Boden eines ausgedienten Schrankes kamen zum Einsatz.
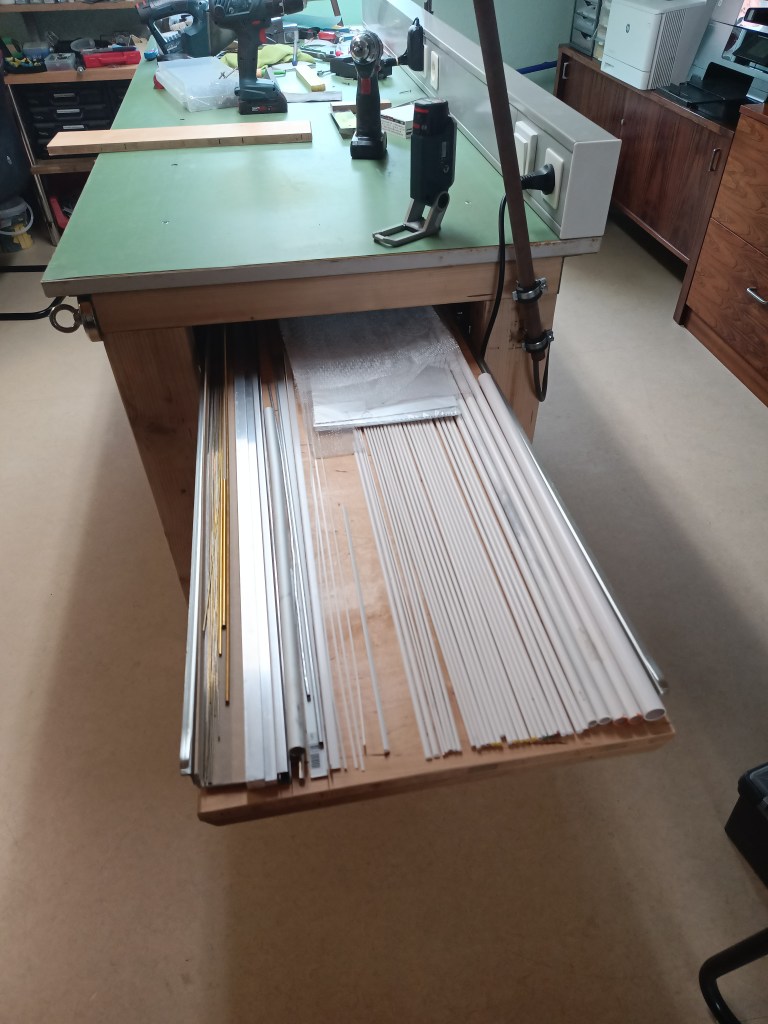
Ein fast komplett ausziehbarer Auszug nimmt so alle meine Kunststoff- und Metallprofile auf und lässt sie auch unter dem Tisch verschwinden. Darunter der Staubsauger.
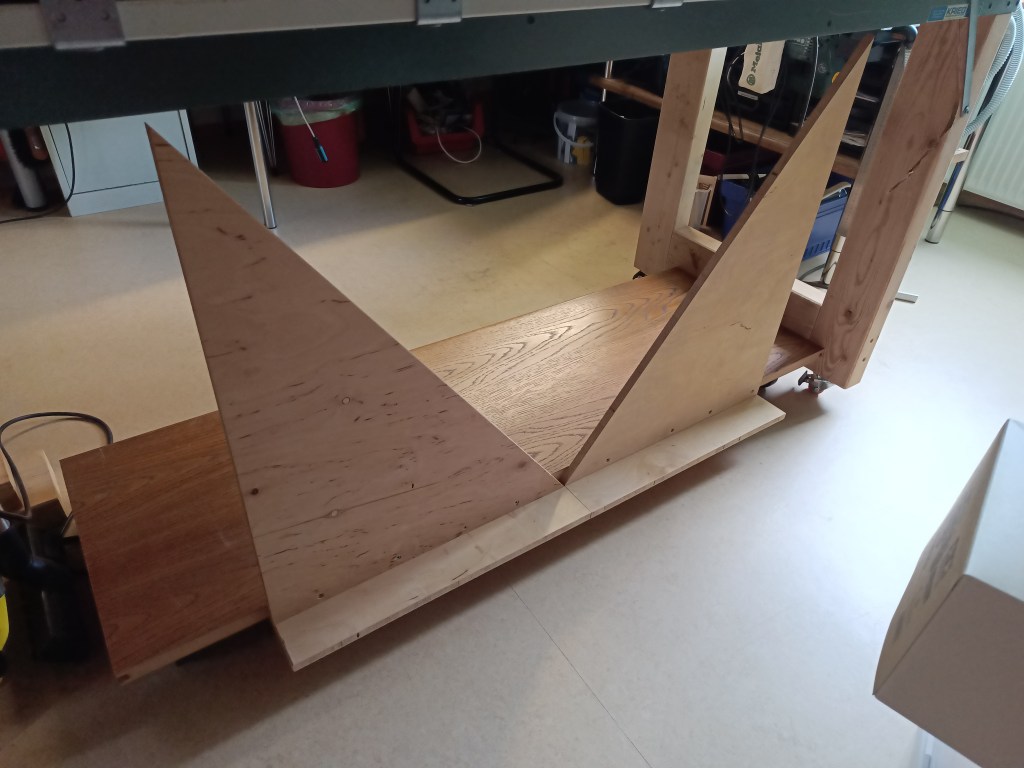
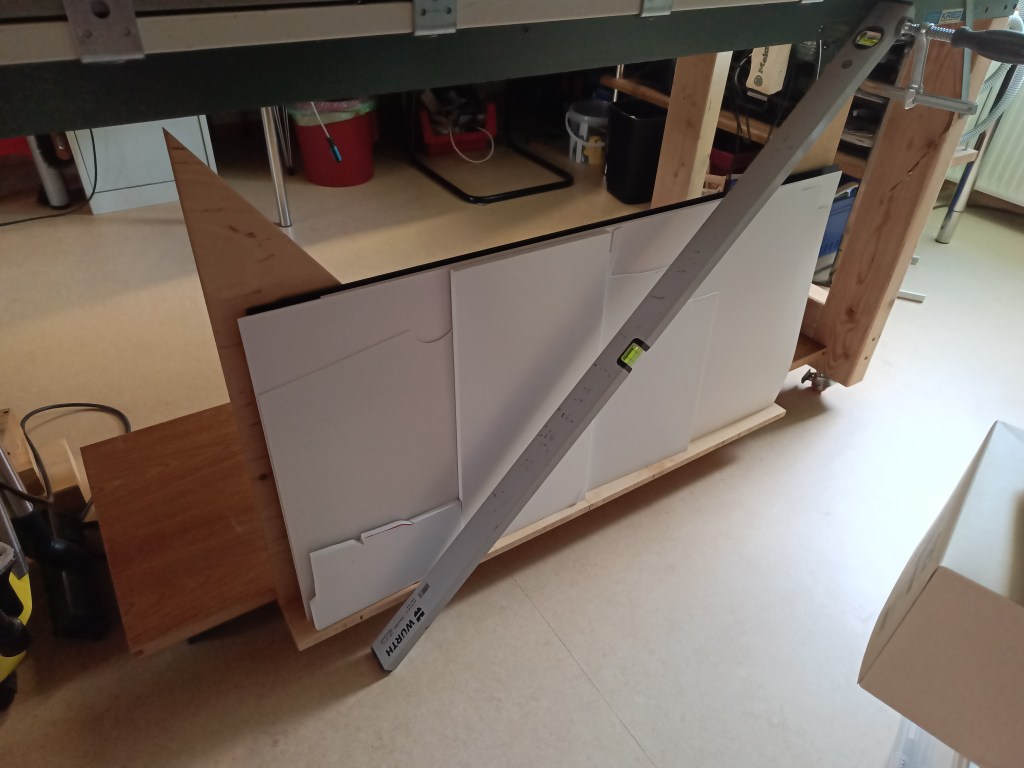
An der Rückseite gab es noch eine Ablage auf dem unteren Rollbrett. Darauf stehen jetzt alle meine Kunststoffplatten. Ein diagonal gesägtes Rechteckbrett, ein ehemaliger Schrankboden, verhindern das die Platten nach vorne umfallen. Die Wasserwaage wird noch durch ein am oberen Rahmen verschraubtes Holzkreuz ersetzt, um auch das Umkippen nach hinten zu vermeiden. Dazu kam ich bisher aber noch nicht.
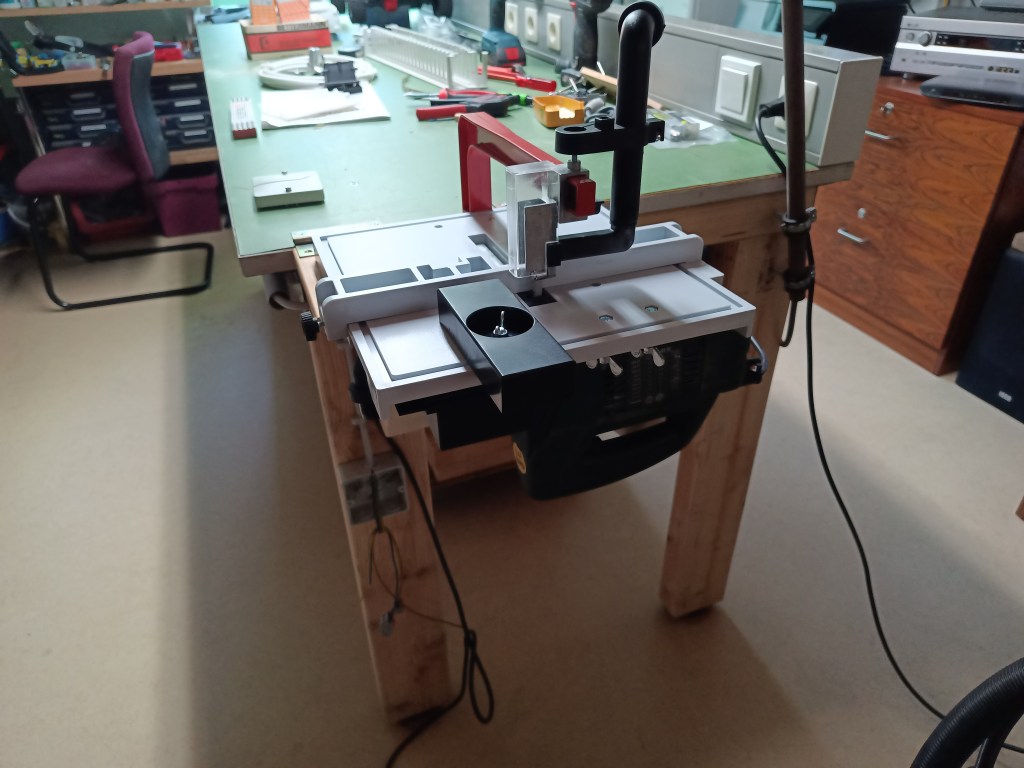
Als vorläufiger Abschluss dann noch einen neuen Platz für meine Stichsäge und den Sägetisch der Fa. Neutechnik. Normal wird der Sägetisch mit der mitgelieferten Schraubzwinge direkt am Tisch befestigt. Das hätte aber meinen Aufbau gestört. Die unter dem Sägetisch hängend montierte Stichsäge würde den zuvor beschriebenen Auszug blockieren.
Meine Lösung; ein zusätzliches Brett um den Sägetisch mit Abstand zu montieren und zwei Scharniere um alles bei Bedarf hochzuklappen.

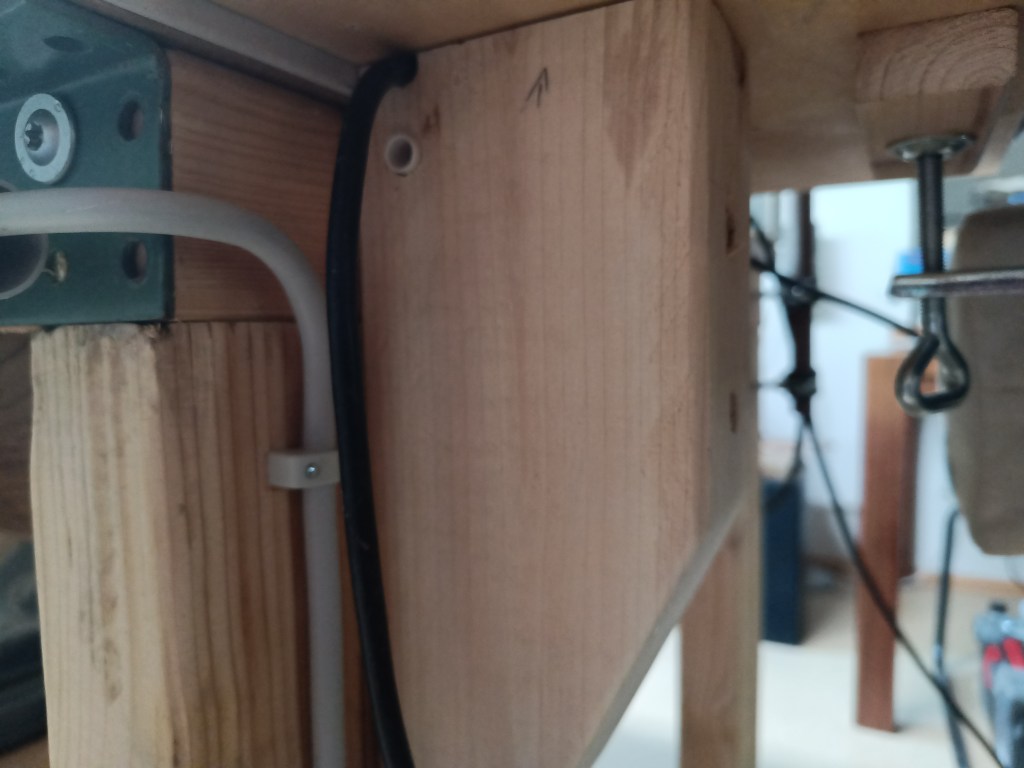
Noch einige Details dazu. Zum aktuellen Zeitpunkt ist die Elektrik noch nicht ganz fertiggestellt. Sie wurde im Leerrohr von der Einspeisung, vor dem Tisch nach rechts geführt. Dort wird in einer Verteilerdose eine weitere Steckdose angeschlossen, an der die Stichsäge eingesteckt wird. Ein zwischengeschalteter Fußschalter wird die Maschine dann bedarfsgerecht ein -und ausschalten.
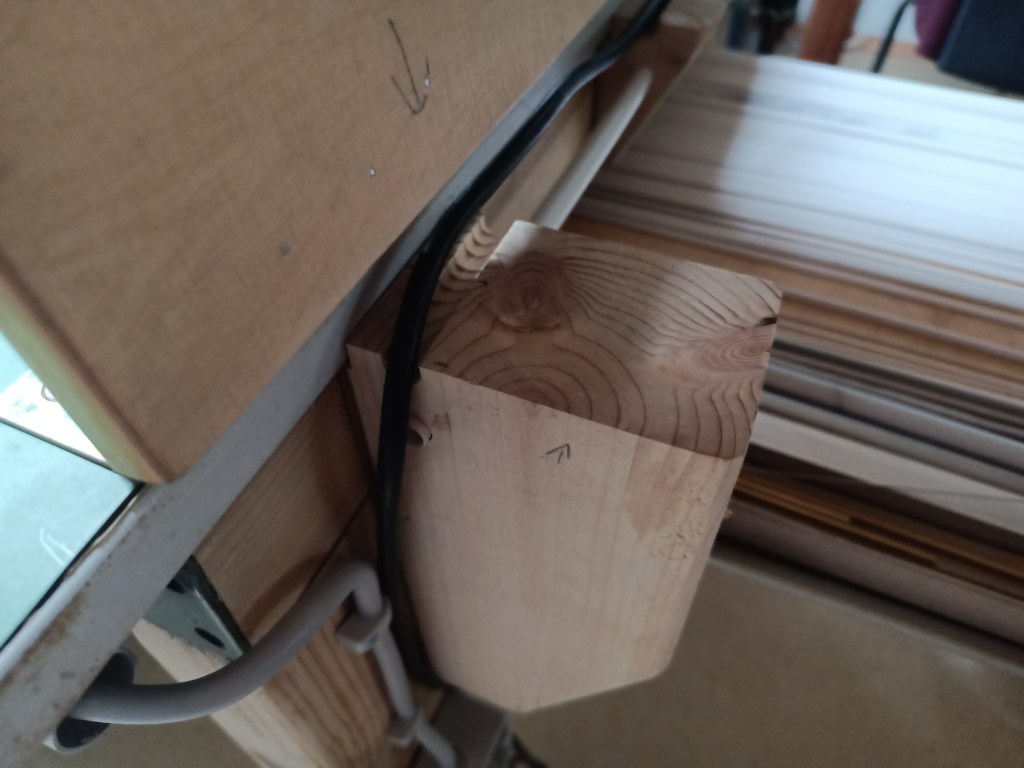
Das Kabel der Stichsäge wurde in Nuten in den zusätzlichen Auflagen geführt, um nicht im Auszugbereich der Ablage oder des Staubsaugers zu hängen. Die beiden Stützen nehmen die Zug- und Druckkräfte von den Scharnieren auf, um sie sicherheitshalber nicht über Gebühr zu belasten.
Wird schnellstmöglich fortgesetzt…
English Version
Workshop renovation, a homemade workbench.
The SuperScale 2026 construction project is pushing me and my workshop to our limits. The organizers specified an approximate area of 60×60 cm. I still need to determine the exact dimensions. The fact is, my current work surface is too small for this. I don’t want to work on the floor either. However, reorganizing and tidying up a bit has been my goal for quite some time.
So I started by looking through the stock in my material pool. Hidden away in the far corner was a worktop that had been left over from the closure of a computer workshop. I already have two others in use. One is stationary and the other is on casters to make the workspace flexible. I thought this would be a good solution for my workshop as well. Only the working height should deviate from the standard. My goal was to be able to work standing up without straining my back. A normal base was therefore out of the question.
So I looked through my wood supplies. There were still many short pieces left over from the roof extension of the barn. The base frame was created, generously dimensioned for a workbench base measuring 120 x 60 mm. In the back of the picture, it has two steerable and lockable heavy-duty casters. In the foreground is the opposite side with height-adjustable rubber feet.
The worktop already had 60 x 30 mm angle profiles on both long sides for attaching the original metal substructure profiles. These were then screwed to my wooden substructure at the front and rear. An additional crossbar attached at the bottom stabilizes the legs when moving and also serves as a stop for another shelf on casters. All casters are steerable and the two front ones can also be locked. This leaves plenty of stacking space under the workbench and makes it easy to roll forward for cleaning. This board is also leftover wood from an old cabinet.
There was something else on the work surface for the power supply. A metal channel, also from the former computer workshop. Screwed to the back of the worktop with angle brackets.
Wherever work is done, there must also be light. A defective double-flame fluorescent tube was quickly converted to LED technology. The control unit was defective anyway and therefore a suitable candidate, instead of buying a new one and disposing of the old light.
None of this is rocket science, and anyone with electrical knowledge and expertise can easily convert it themselves. Below is the block diagram for a single and double-flame light fixture from the Internet.

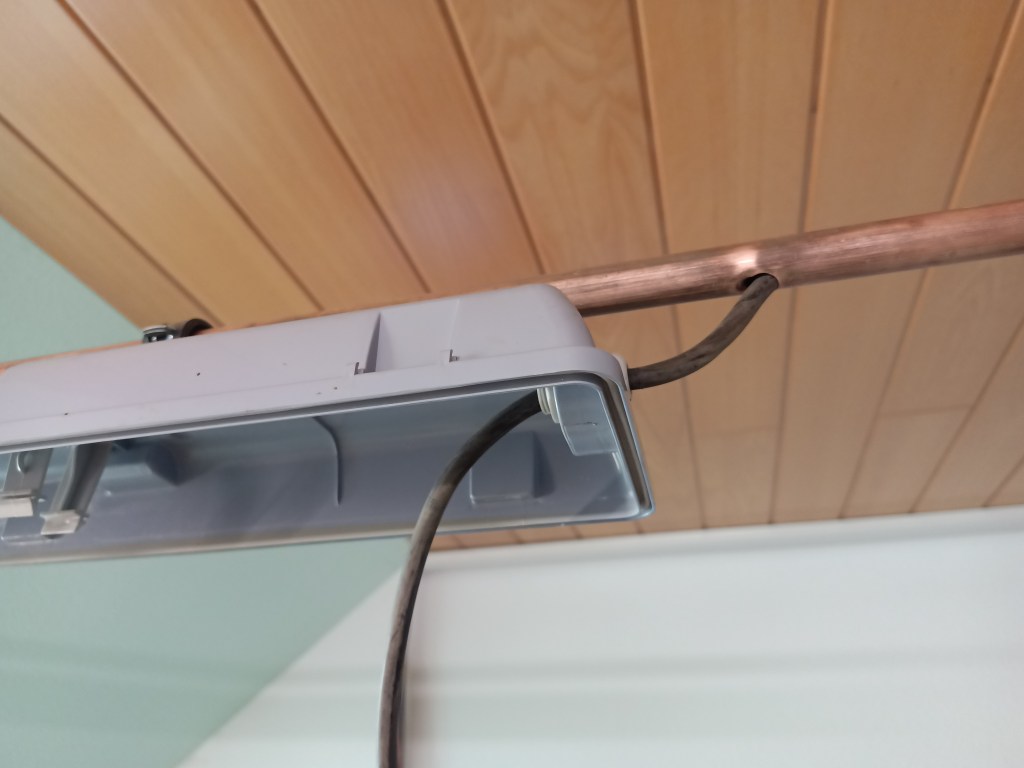
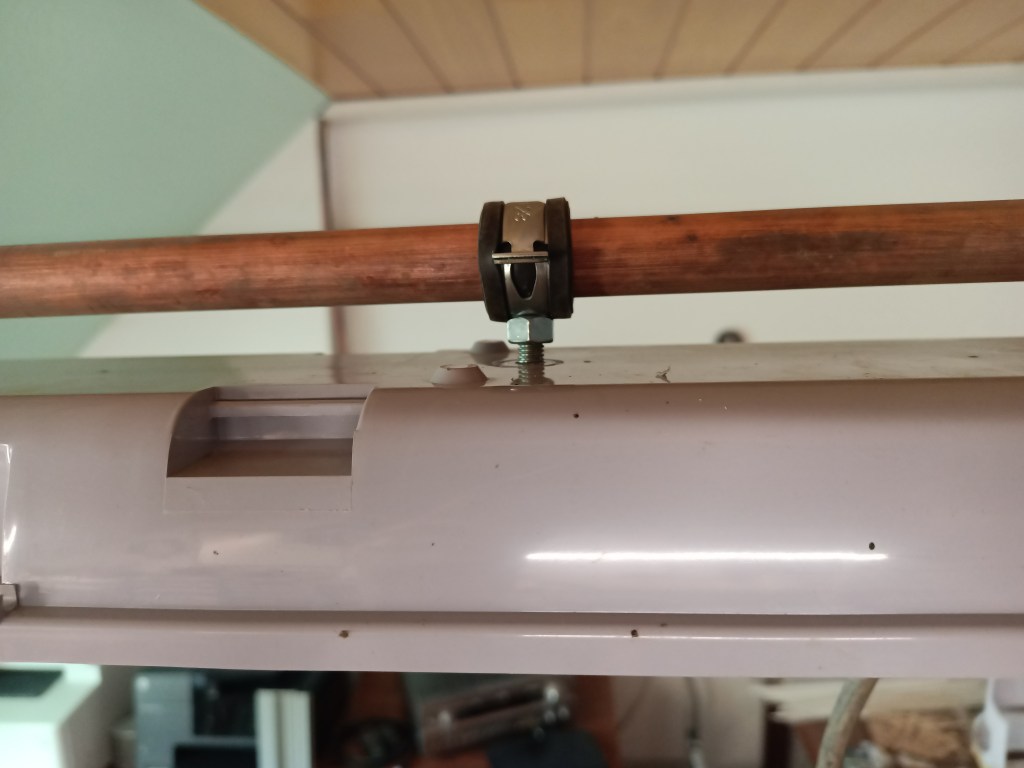
The light fixture itself is suspended from three 22 mm copper pipes, each of which is screwed to both sides with two screw clamps. They are slightly offset to position the center of the light fixture above the center of the work surface.
Here are some detailed pictures of the mounting, cable routing, and power supply. A central switch was installed at the power supply to unplug the connection cable and completely disconnect the power when not in use.
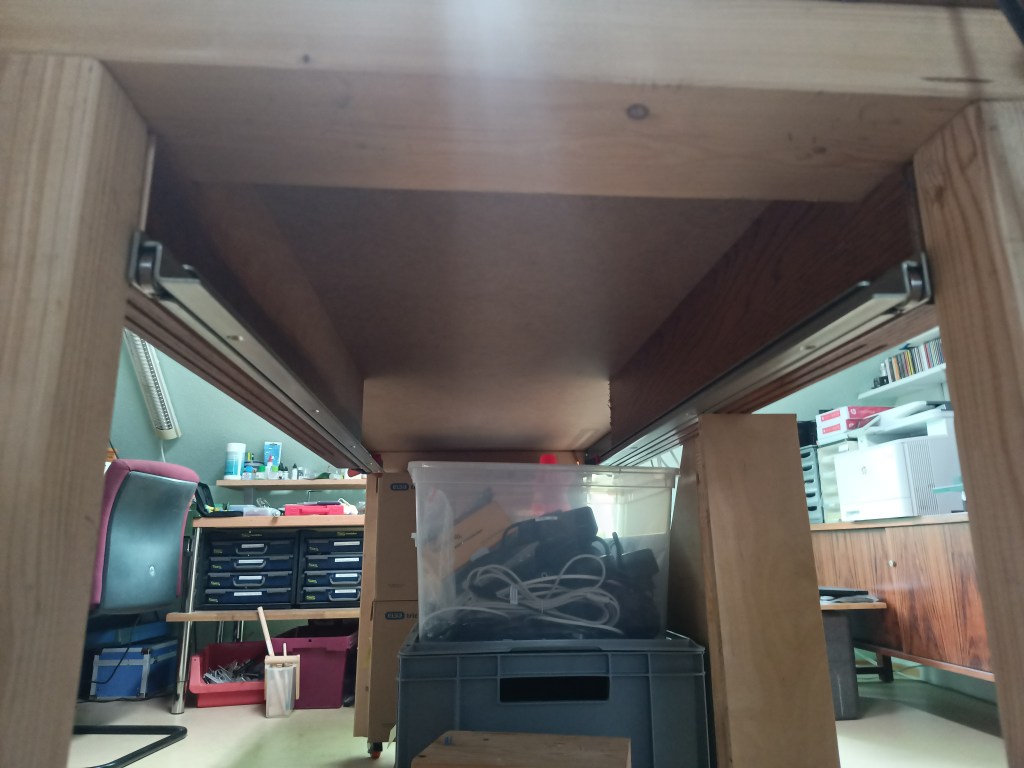
There was still some unused space on the far right under the table. This is where the vacuum cleaner is stored. And even above it, there is still plenty of space that I wanted to use.
Two 950 mm long under-table pull-outs, two solid pieces of wood, and the bottom of a disused cabinet were used.
An almost completely extendable pull-out holds all my plastic and metal profiles and allows them to disappear under the table. The vacuum cleaner is stored underneath.
At the back, there was another shelf on the lower roller board. All my plastic sheets are now stored there. A diagonally sawn rectangular board, a former cabinet floor, prevents the sheets from falling forward. The spirit level is replaced by a wooden cross screwed to the upper frame to prevent it from tipping backward. However, I haven’t gotten around to that yet.
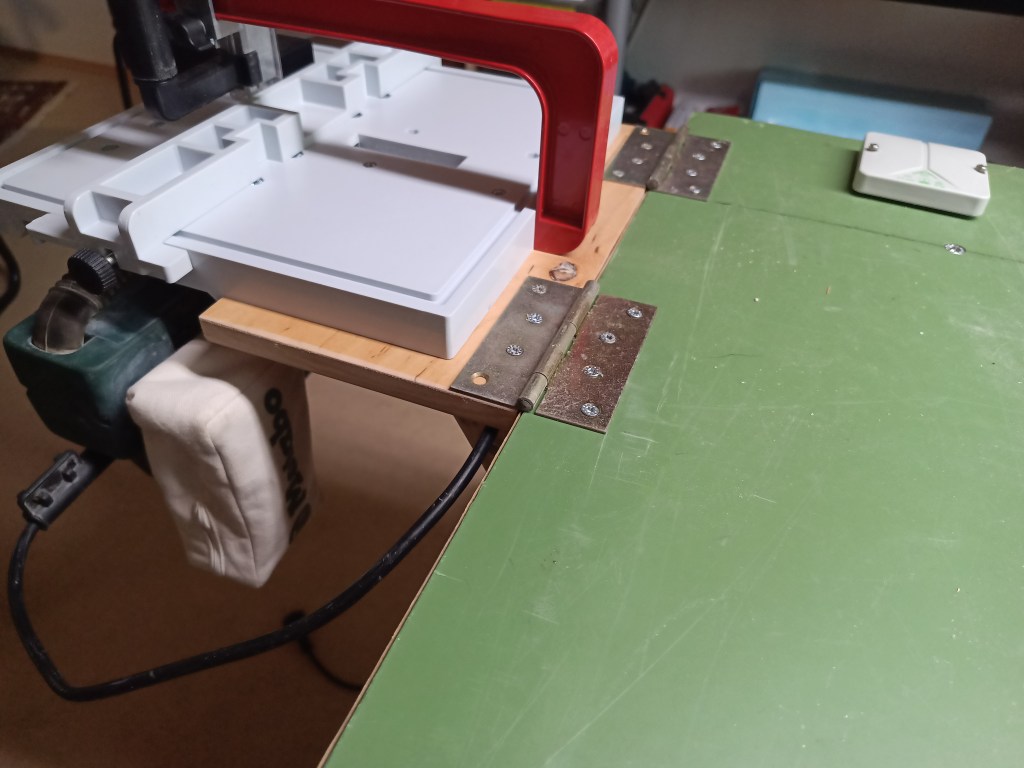
As a preliminary conclusion, I needed to find a new place for my jigsaw and the saw table from Neutechnik. Normally, the saw table is attached directly to the table using the screw clamp supplied. However, this would have interfered with my setup. The jigsaw, which is mounted underneath the saw table, would block the pull-out described above.
My solution: an additional board to mount the saw table at a distance and two hinges to fold everything up if necessary.
A few more details. At the moment, the electrical system is not yet completely finished. It was routed in the empty conduit from the power supply to the right in front of the table. There, another socket is connected in a junction box, to which the jigsaw is plugged in. An intermediate foot switch will then switch the machine on and off as required.
The jigsaw cable was routed in grooves in the additional supports so that it does not hang in the pull-out area of the shelf or the vacuum cleaner. The two supports absorb the tensile and compressive forces from the hinges so as not to overload them for safety reasons.

Will be continued as soon as possible…
Translation, with the kind support of deepl.com
