English Version
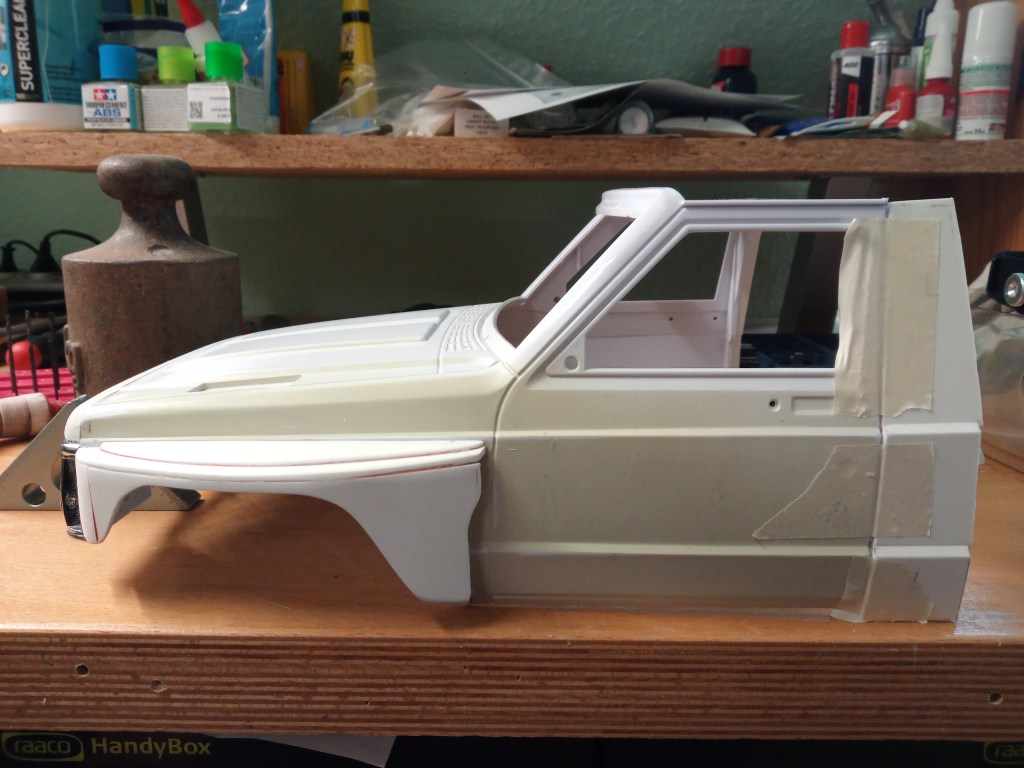
Nun hat die Freude am Modell des Jeep Comanche MJ, mich zu einem weiteren Fahrzeug inspiriert. Im vergangenen Beitrag wurde das neue Modell bereits vorgestellt. Heute setze ich die Bauschritte fort, die im Comanche Truggy bereits begonnen wurde. Der Aufbau eines Fahrzeuges mit der Optik einer Rohkarosse. Das bezieht sich im Wesentlichen auf den Innenraum. Nicht wie beim Truggy als Wettbewerbsfahrzeug, sondern dieses Mal als eine total abgewrackte Endzeitkiste. So viel zur Vorgeschichte und gleich weiter mit den Fakten der neuen Baustelle.
Auch dieser Comanche wurde zunächst optisch an die Realität angepasst. Dieses Mal wie beim ersten Comanche mit selbst gebauten Einzelteilen. Papiervorlagen dienten jeweils als Grundlage für die 2,5 mm PS-Teile. So entstanden je drei Bauteile pro Seite.
Überlappend wurden sie auf 4-kant-Profile aufgeklebt.
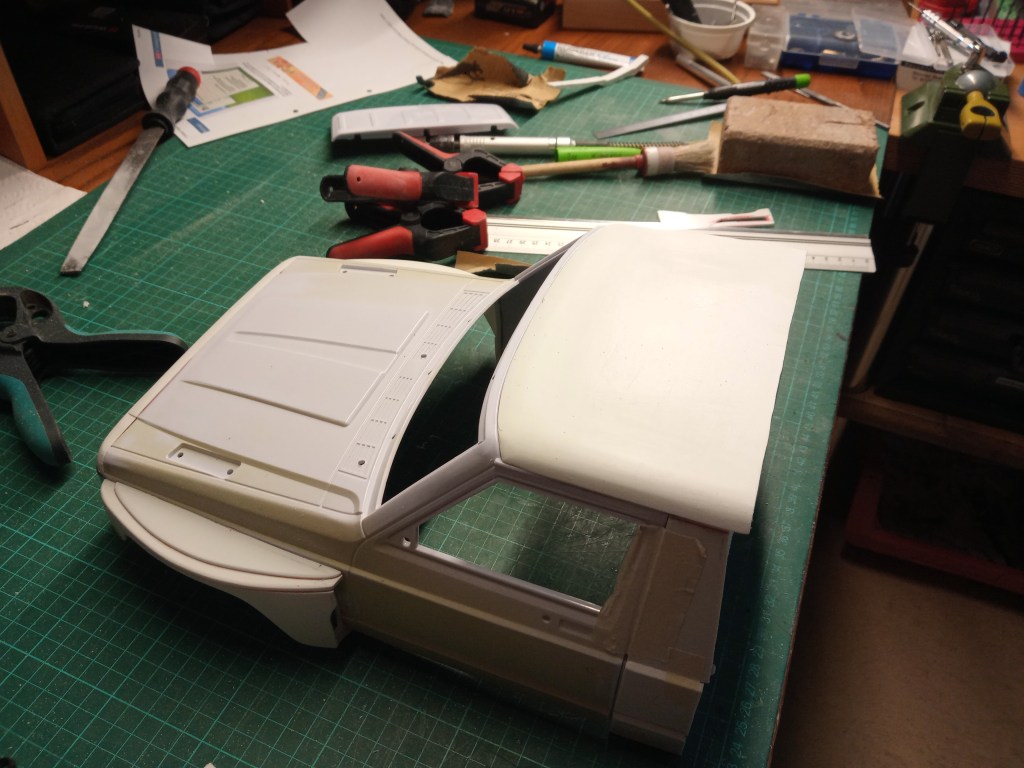
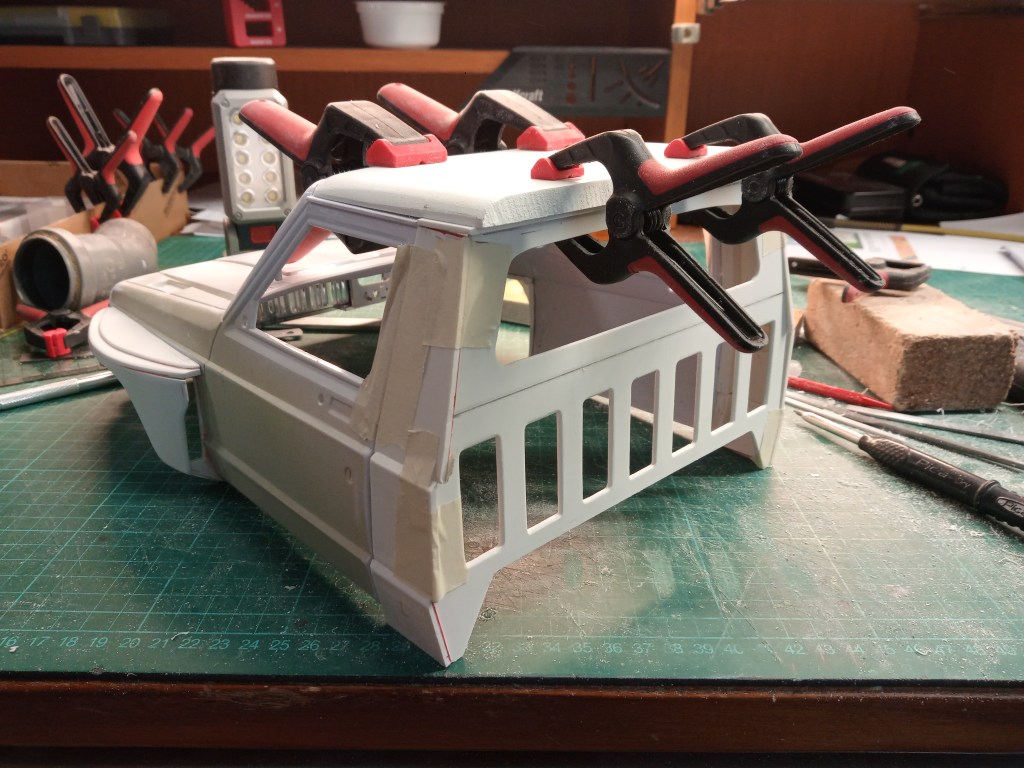
Für das Dach habe ich keine der bereits praktizierten Varianten gewählt. Dieses Mal gab es aus Forex-Platten gleich ein neues Dach. Es wurde auf den von allem Ballast befreiten Unterbau geklebt und an die Konturen der Bauteile beigeschliffen.
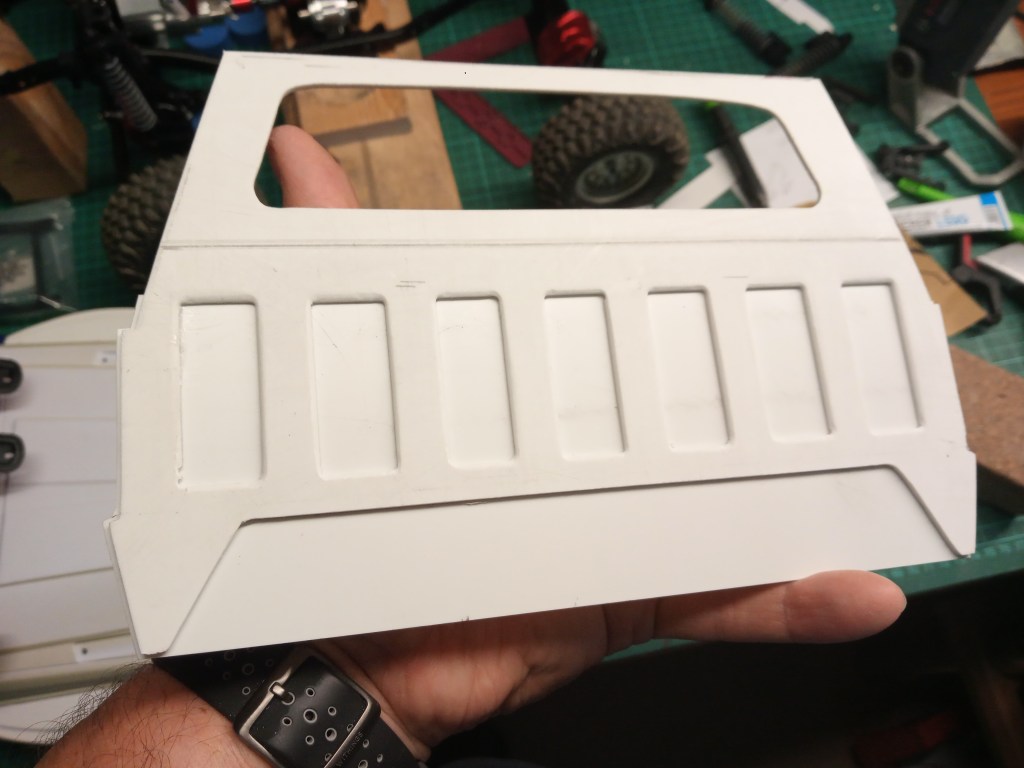
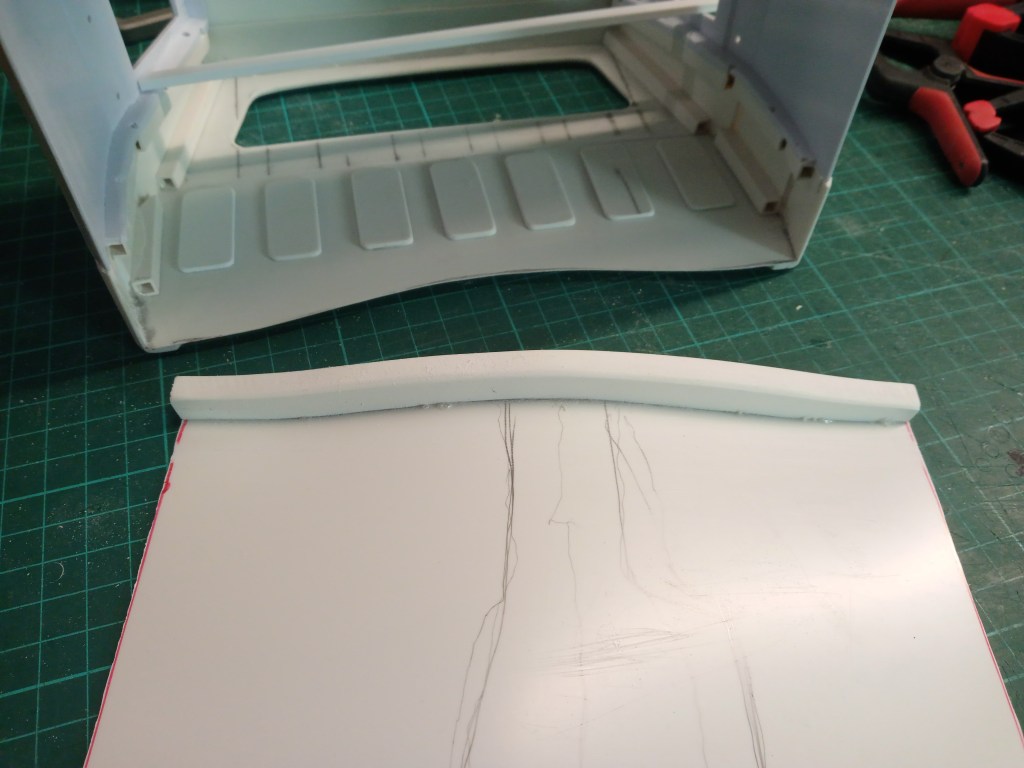
Die Rückwand aus 2,5 mm PS-Kunststoffplatten wurde kalt geformt, um die Form des realen Modells anzunehmen. Eingepasst zwischen den Konturen der Seitenteile, hatte ich kleine Zuschläge an den Seitenteilen und Dach mit eingeplant. So ist genug Material vorhanden, um später eine saubere Rundung zu gestalten.

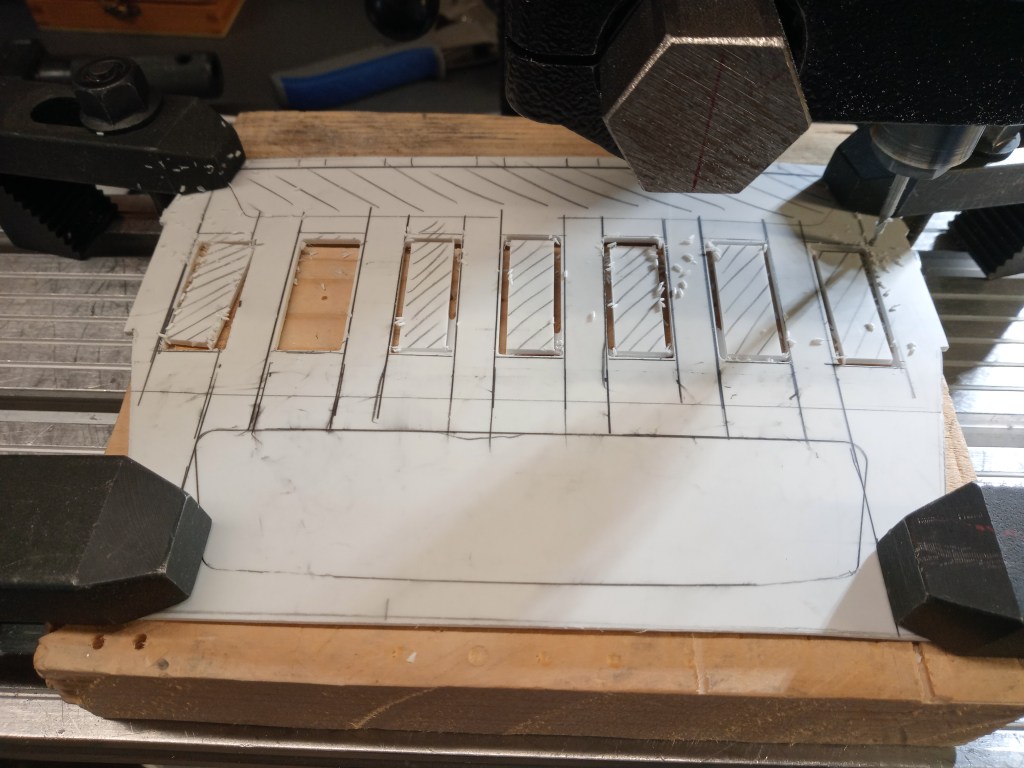
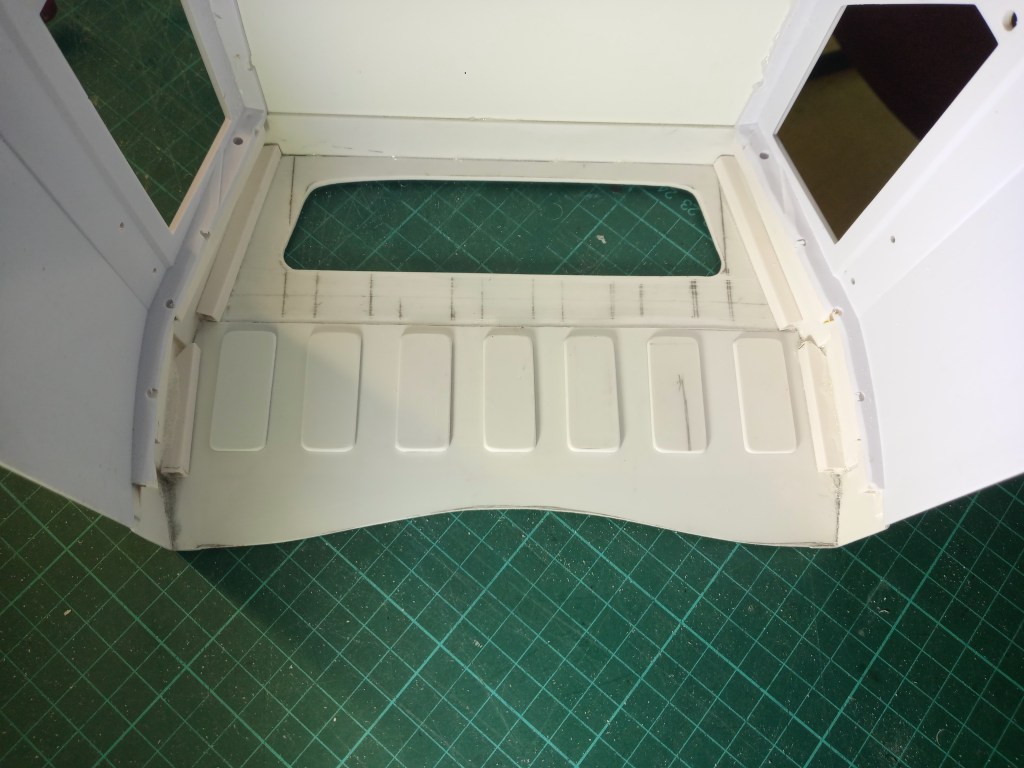
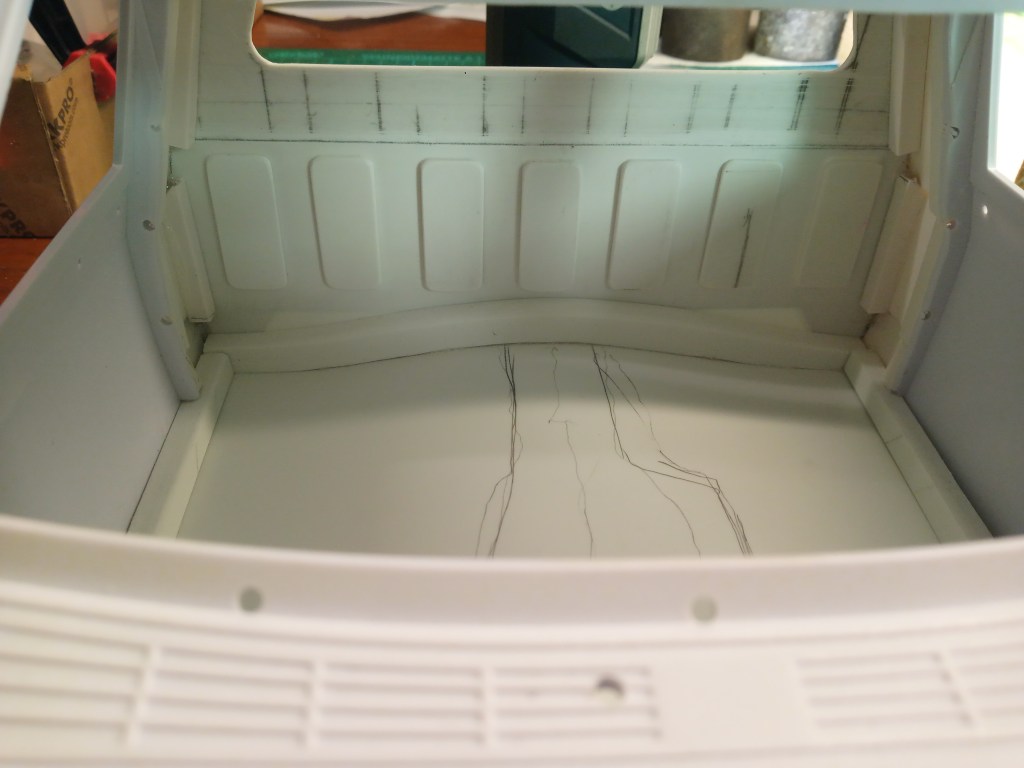
Auf dem Koordinatentisch wurde noch die spätere Struktur der Blechausformungen und Heckscheibe herausgearbeitet.
Nach langer Schleif-Feinarbeit entstanden die Formen der Blechsicken.
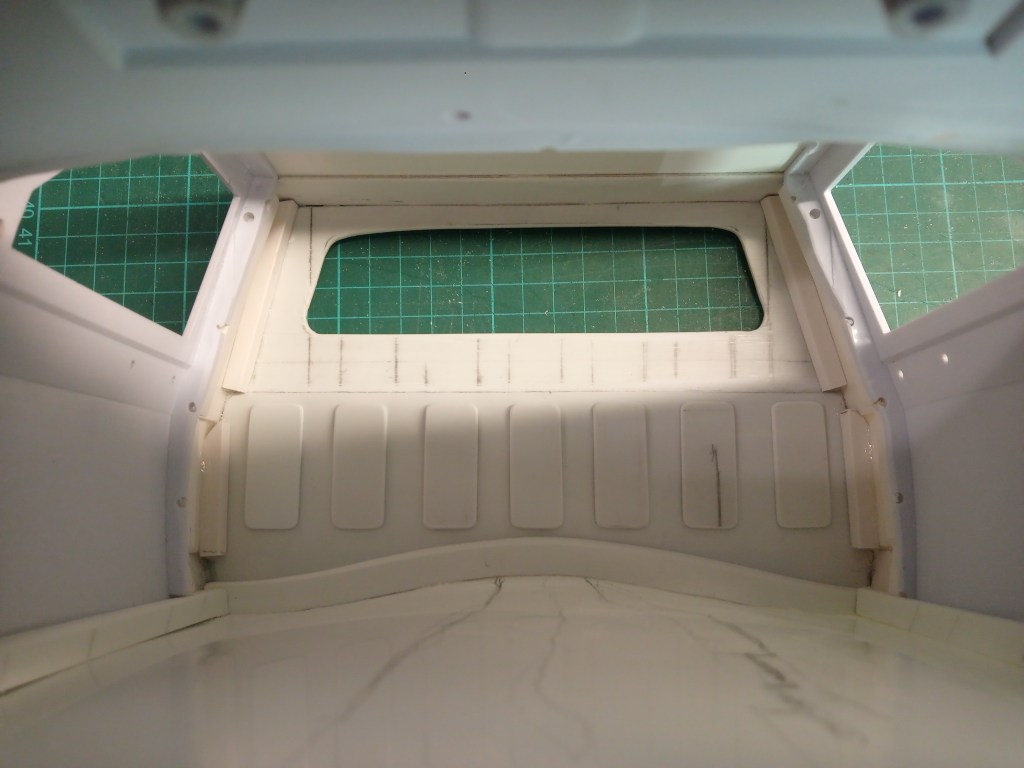
Von der Innenseite noch eine Lage 0,5 mm PS-Platte und die dreidimensionale Optik ist wieder einmal gelungen.
Im Innenraum das erste Verstärkungsprofil an der Rückwand.

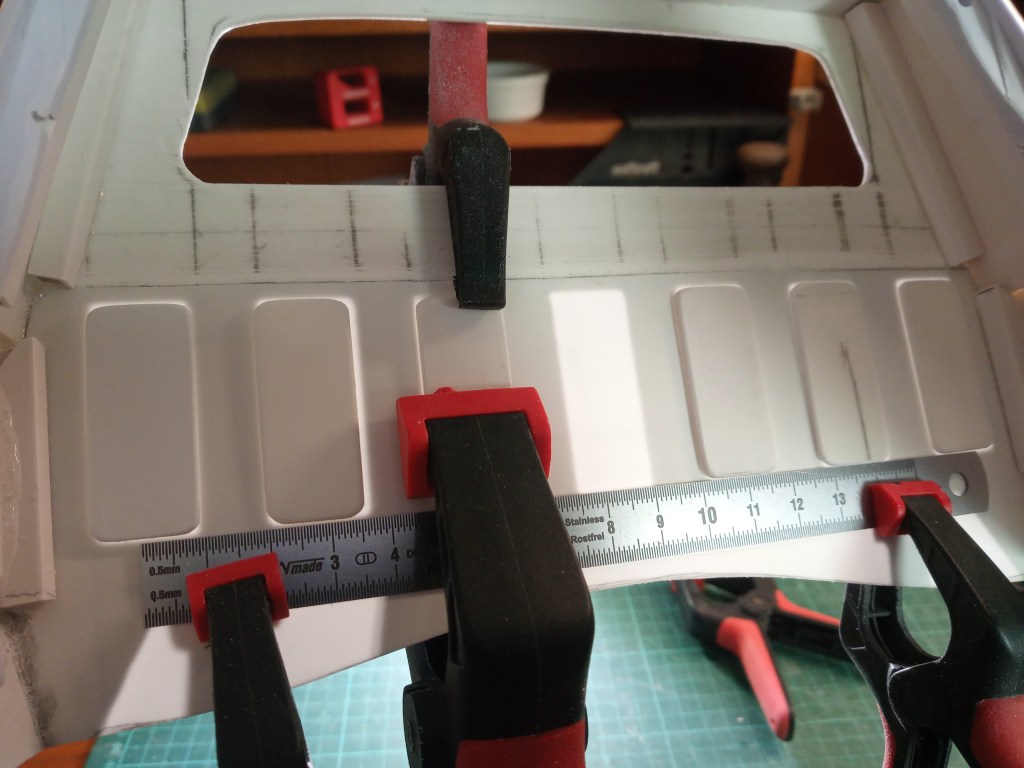
Darunter die Gegenstruktur der Außenseite. Nach den Maßen der Blechsicken, wurden die Formen auf der Innenseite aufgeklebt
Licht durchleuchtete das dünne PS-Material und erleichterte die Positionierung der Formen. Das fixierte Blechlineal diente als feste Unterkante. Hier war ich bei meinen beiden anderen Comanche etwas nachlässiger unterwegs und wollte es dieses Mal besser machen.
Auch die Bodengruppe wurde angepasst und erhielt durch das nach dem Original angefertigte Profil seine Form.
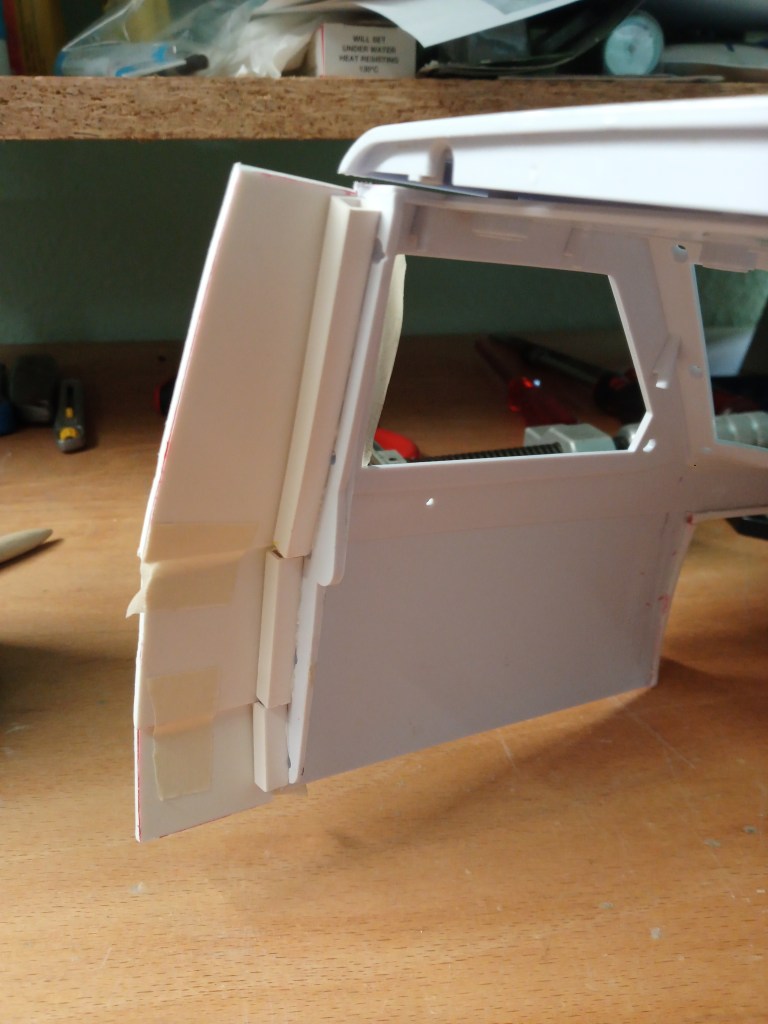
Links und rechts des Fahrerhausbodens sind hier zwei aufrechte Profile an den Seitenteilen montiert. Sie werden in den weiteren Bauschritten mit der Seitenwand verklebt und die jetzt noch sichtbaren scharfen Kanten gerundet. Geplant ist derzeit, die Bodengruppe mit dem Rahmen mittels Magneten zu verbinden. Das Fahrerhaus soll dann mit bis zu sechs Schrauben von unten mit dem umlaufenden Rahmen verschraubt werden. So ist ein Zugang zum Innenraum dauerhaft möglich.
Eine andere Perspektive, aus der die Form der Bodengruppe erkennbar ist.
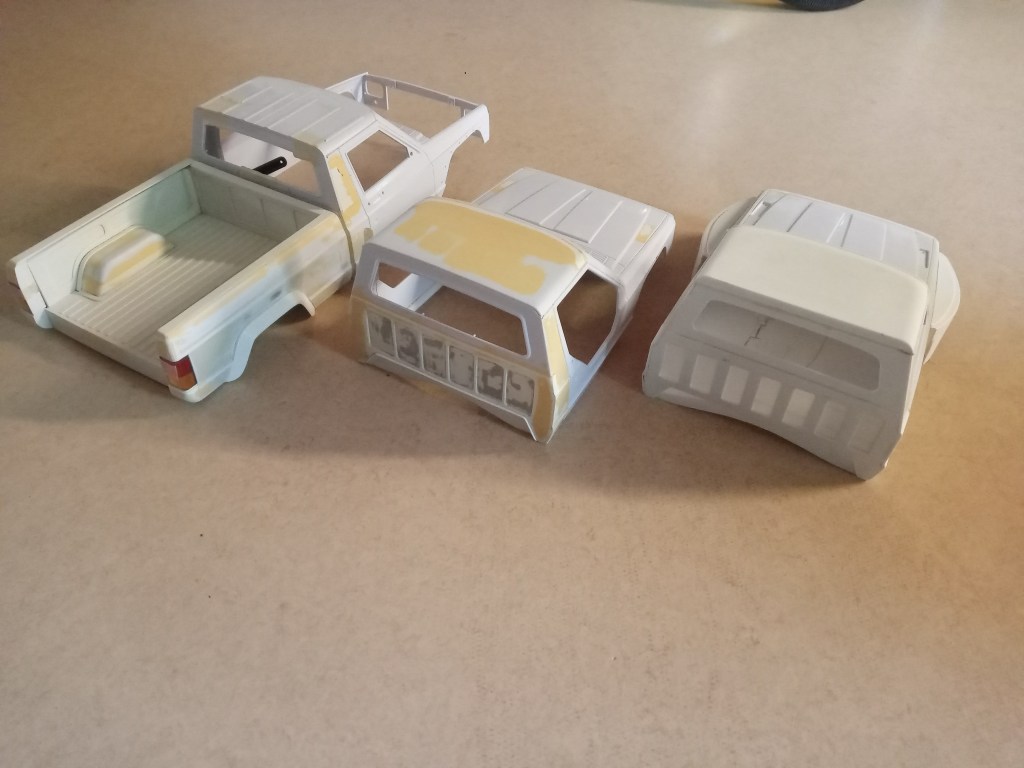
Für die Fortsetzung der Rohkarosse arbeite ich an weiteren, bisher bei mir noch nie realisierten Bauteilen. Einige schon angefangen, andere zum ersten Mal versucht. Mit einem Bild meiner drei so verschiedenen Comanche Träume, ende ich hier heute.
Wird schnellstmöglich fortgesetzt…
English Version
A cab with a bodyshell look is created
Now the joy of the Jeep Comanche MJ model has inspired me to create another vehicle. The new model was already presented in the previous post. Today I am continuing the construction steps that have already been started on the Comanche Truggy. The construction of a vehicle with the look of a bodyshell. This mainly refers to the interior. Not as in the Truggy as a competition vehicle, but this time as a totally scrapped end-time box. So much for the prehistory and on to the facts of the new construction site.
This Comanche, too, was initially visually adapted to reality. This time, as with the first Comanche, with self-built individual parts. Paper templates served as the basis for the 2.5 mm PS parts. This resulted in three parts per side.
They were glued overlapping onto square profiles.
For the roof, I did not choose any of the variants already practiced. This time I made a new roof from Forex panels. It was glued to the base, which had been stripped of all ballast, and sanded to the contours of the components.
The rear wall made of 2.5 mm PS plastic sheets was cold-formed to take on the shape of the real model. Fitted between the contours of the side parts, I had planned small allowances on the side parts and roof. This provides enough material to create a clean curve later on.
The later structure of the sheet metal moldings and rear window was worked out on the coordinate table.
After a long period of fine sanding, the shapes of the sheet metal beads were created.
Another layer of 0.5 mm PS sheet on the inside and the three-dimensional look was achieved once again.
Inside, the first reinforcement profile on the rear wall.
Below this is the counter structure on the outside. The shapes were glued to the inside according to the dimensions of the sheet beads.
Light shone through the thin PS material and made it easier to position the molds. The fixed sheet metal ruler served as a fixed bottom edge. I was a little more careless here with my other two Comanche models and wanted to do better this time.
The floor assembly was also adapted and was given its shape by the profile made according to the original.
Two upright profiles are fitted to the left and right of the cab floor on the side panels. They will be glued to the side wall in the next stages of construction and the sharp edges that are still visible will be rounded off. The current plan is to connect the floor assembly to the frame using magnets. The cab will then be screwed to the surrounding frame from below using up to six screws. This will allow permanent access to the interior.
Another perspective from which the shape of the floor assembly can be seen.
For the continuation of the body shell, I am working on other components that I have never realized before. Some have already been started, others are being attempted for the first time. I’ll end today with a picture of my three very different Comanche dreams.
Will be continued as soon as possible…
Translation, with the kind support of deepl.com
