Quellen: Internet Bildersuche, Spotmodel.com
English Version
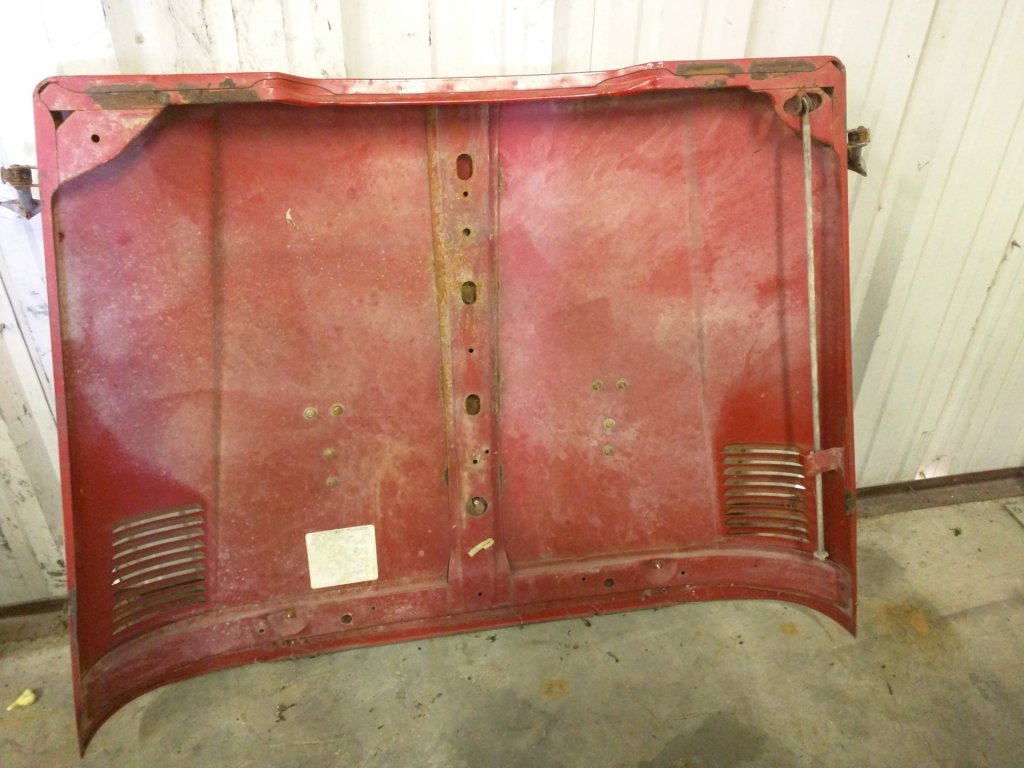
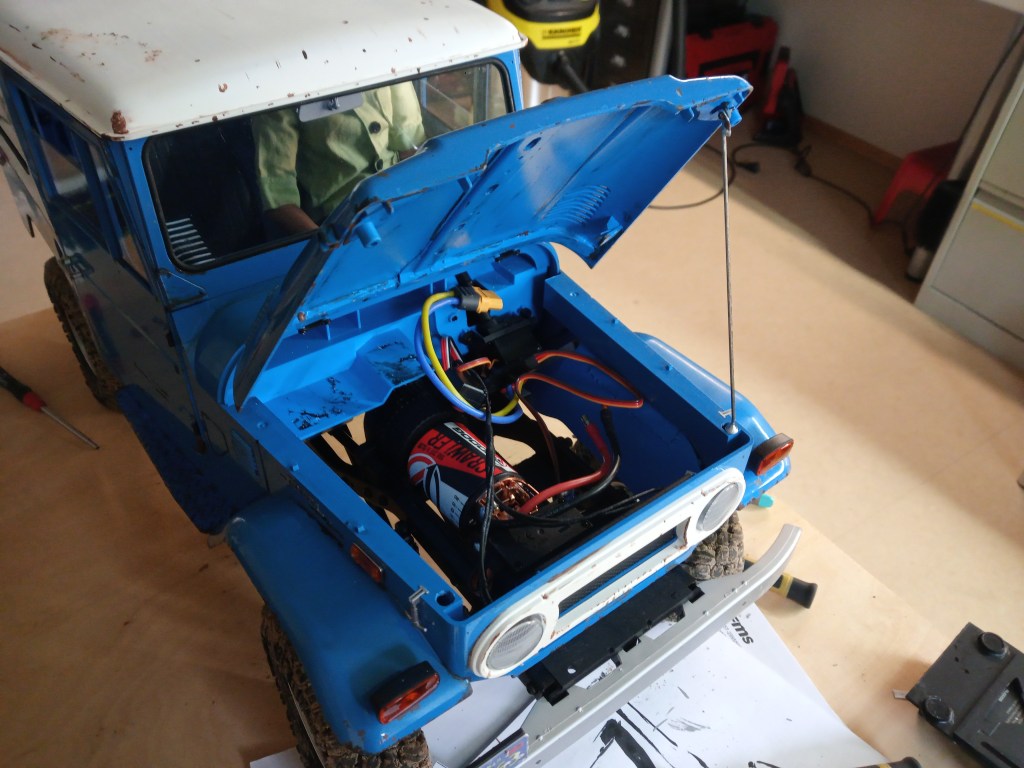
Die Freude über den aktuellen Baustand hielt nicht allzu lange an. Neue Ziele gingen mir nicht mehr aus dem Sinn. Die ansonsten wunderbaren Details des Modells, sind im Motorraum eher unterentwickelt. Immer beim Öffnen der Haube, drängte sich mir der Umbau, wie auf dem folgenden Foto, geradezu auf.
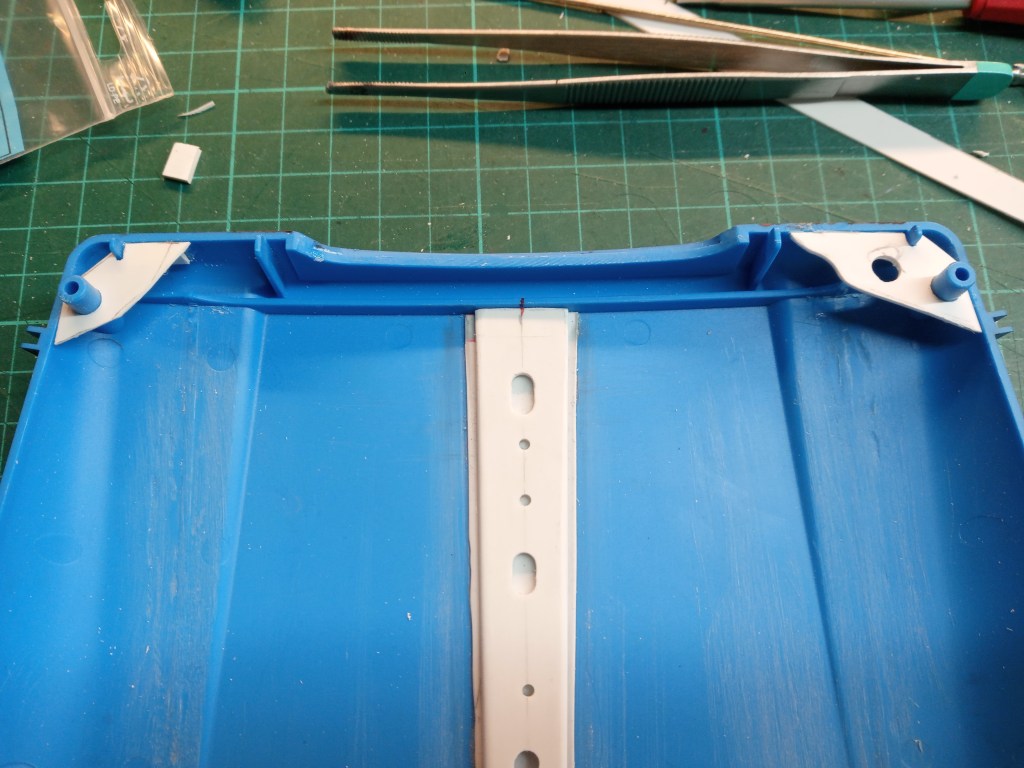
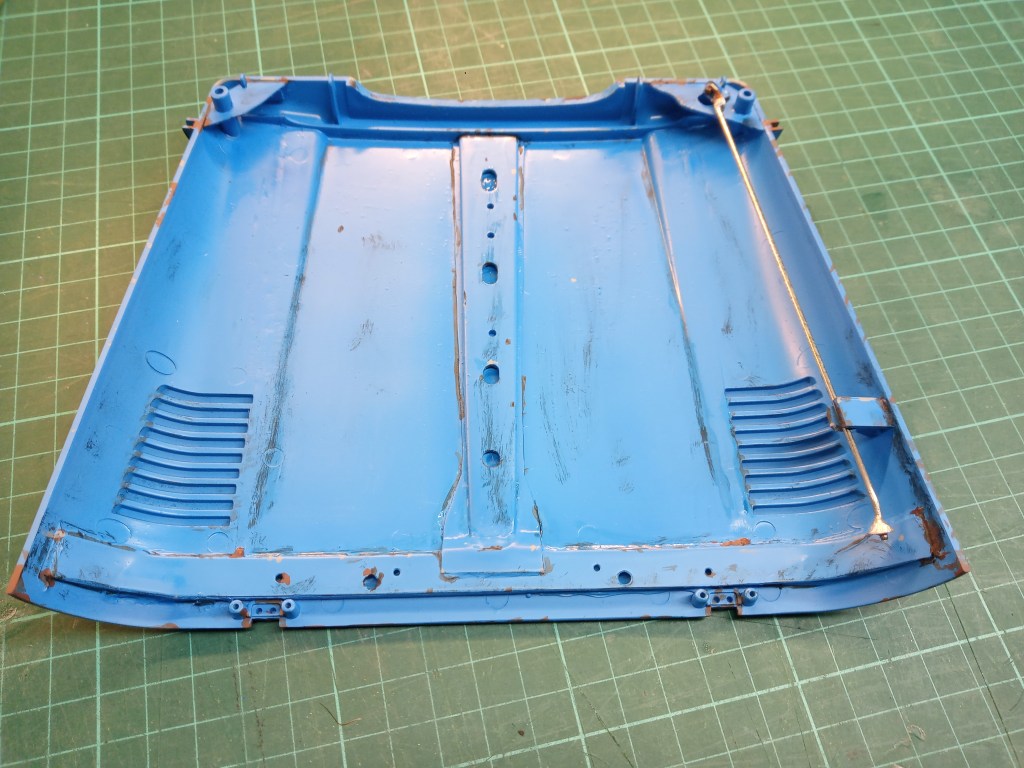
Zunächst wurden also die vorhandenen, unmaßstäblichen Strukturen herausgetrennt und beigeschliffen. Im Bereich der Scharniere dann eine Querversteifung eingezogen. Ein dünner 0,5 mm PS-Streifen, dann Richtung Kühlergrill aufgeklebt. Um das dreidimensionale Blechelement darzustellen, eine weitere Lage mit entsprechenden Aussparungen und Bohrungen aufgebracht.
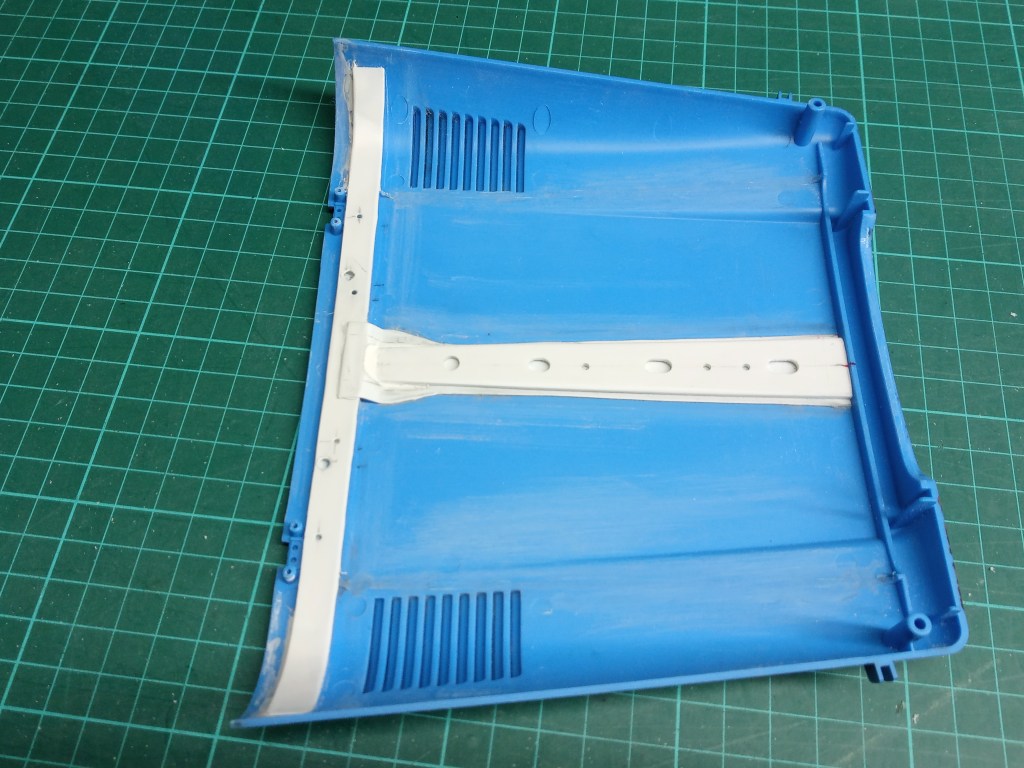
Im Bereich der vorderen Fixierungsstiften wurde zusätzlich zwei „Bleche“ eingepasst.
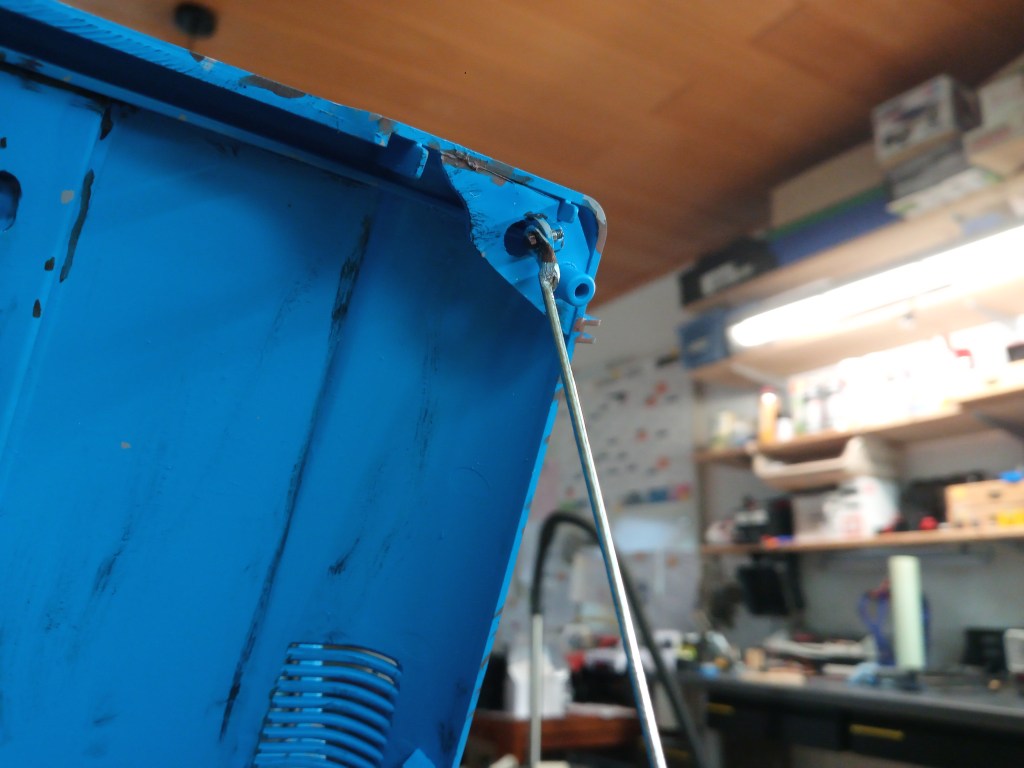
Der Anschlag der Motorhauben-Stütze entstand aus einem Winkelprofil.
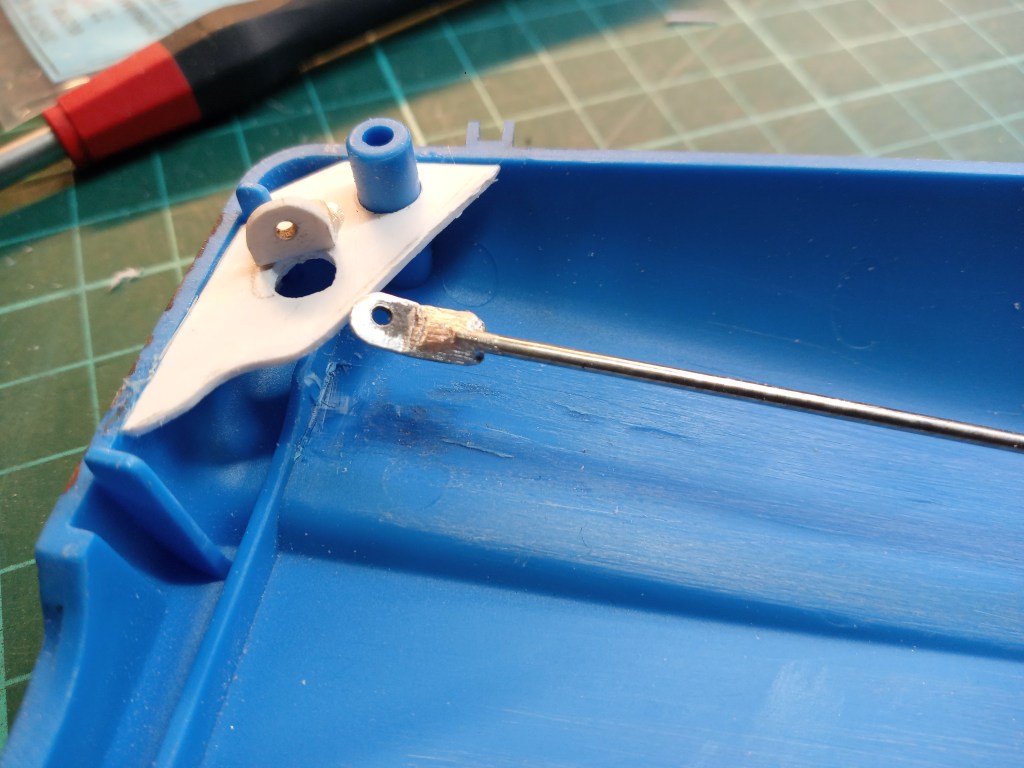
Aus einem Stück Zinkblech, Silberstahl und einer Unterlegscheibe, schließlich die Motorauben-Stütze an sich verlötet.

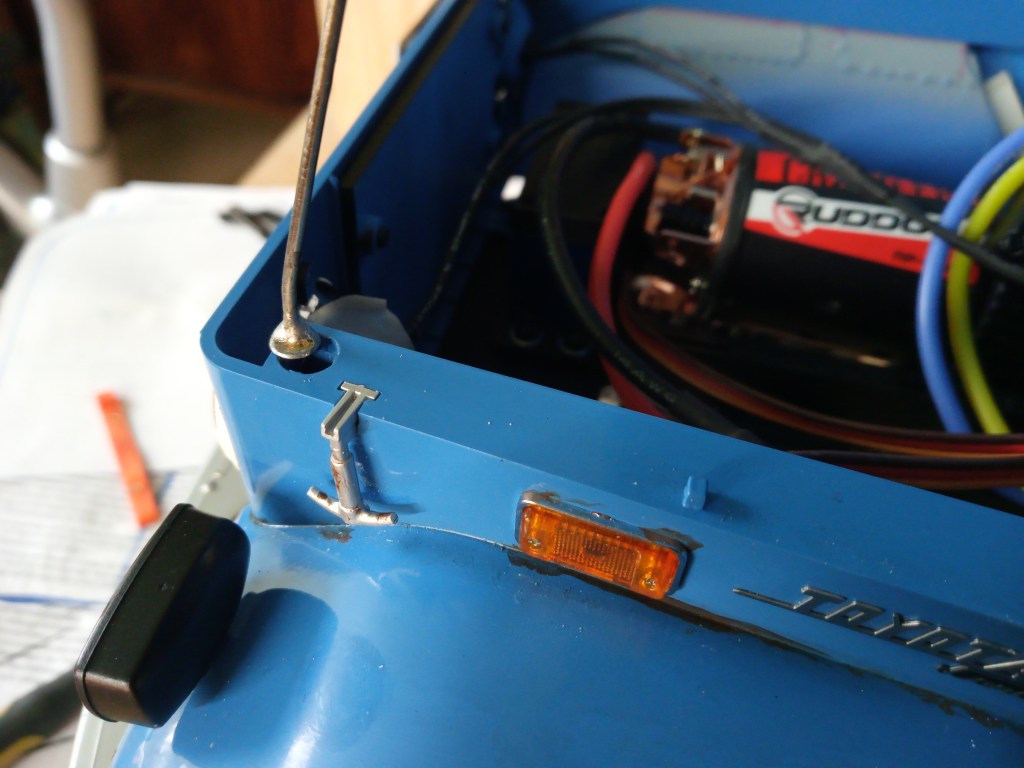
Damit das Gestänge auch bei geschlossener Haube fixiert bleibt, wurde eine Klemmvorrichtung gebaut. Ein abgewinkeltes 0,5 mm PS-Stück hält das Gestänge auf dem Lagerbock.

Dem äußeren Zustand des Toyotas entsprechend, wurde auch die Unterseite der Haube mit Gebrauchsspuren versehen.
Die Details der Motorhauben-Stütze.
FMS hat eine ansehnliche Lösung für die Kühlermaske montiert. Eine Metallblende mit Gitteroptik und einem Metall Emblem des Toyota Schriftzuges. Das wollte ich aber noch etwas realistischer gestalten. Beim Original steht ein Hilfsrahmen mit Steinschlagschutzgitter vor dem eigentlichen Kühler.
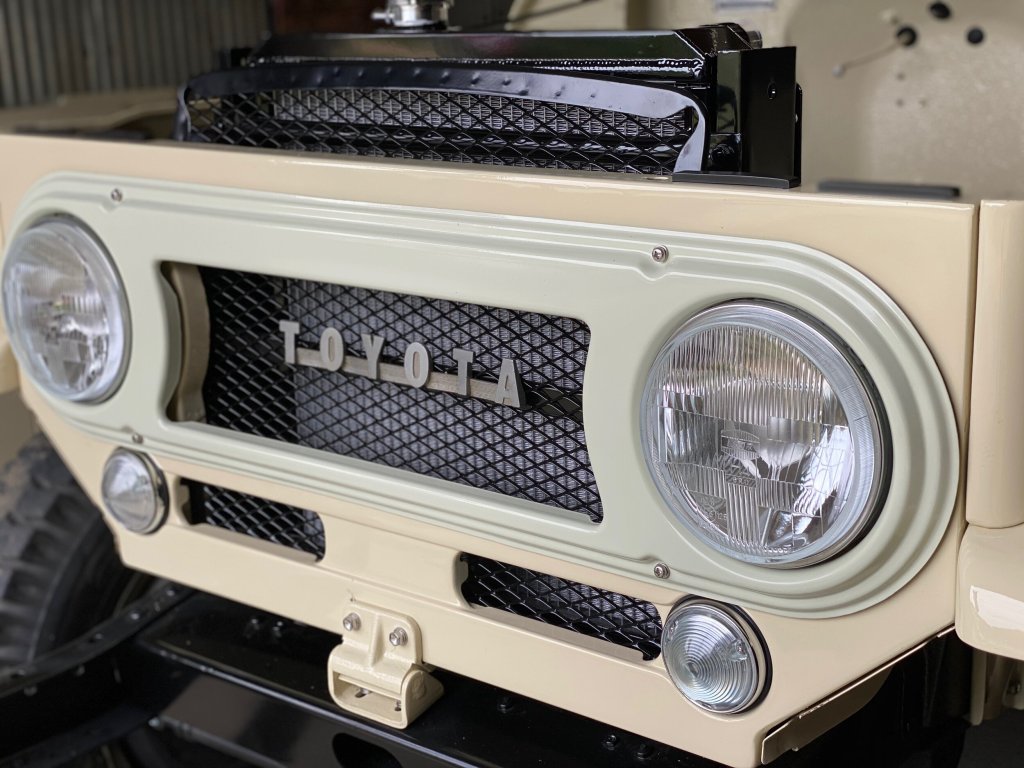
Meine Umsetzung sah dann so aus. Mit auf dem Foto die neuen Scheinwerfer. Hellere Gläser und eine schönere Optik der Glasstruktur.

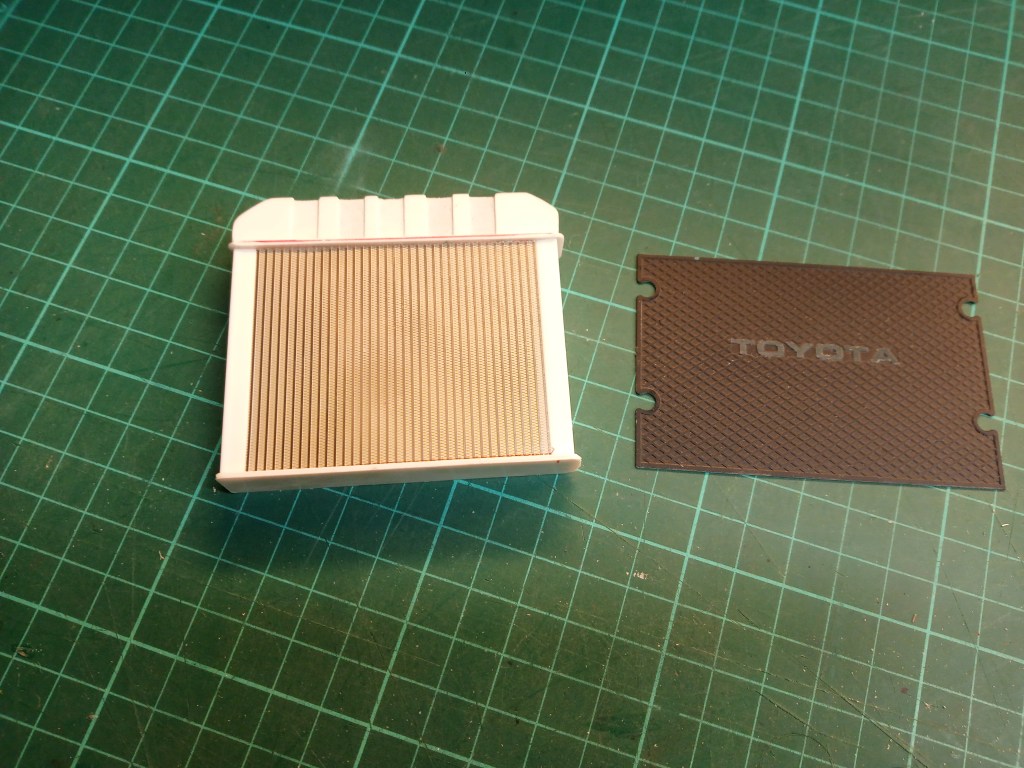
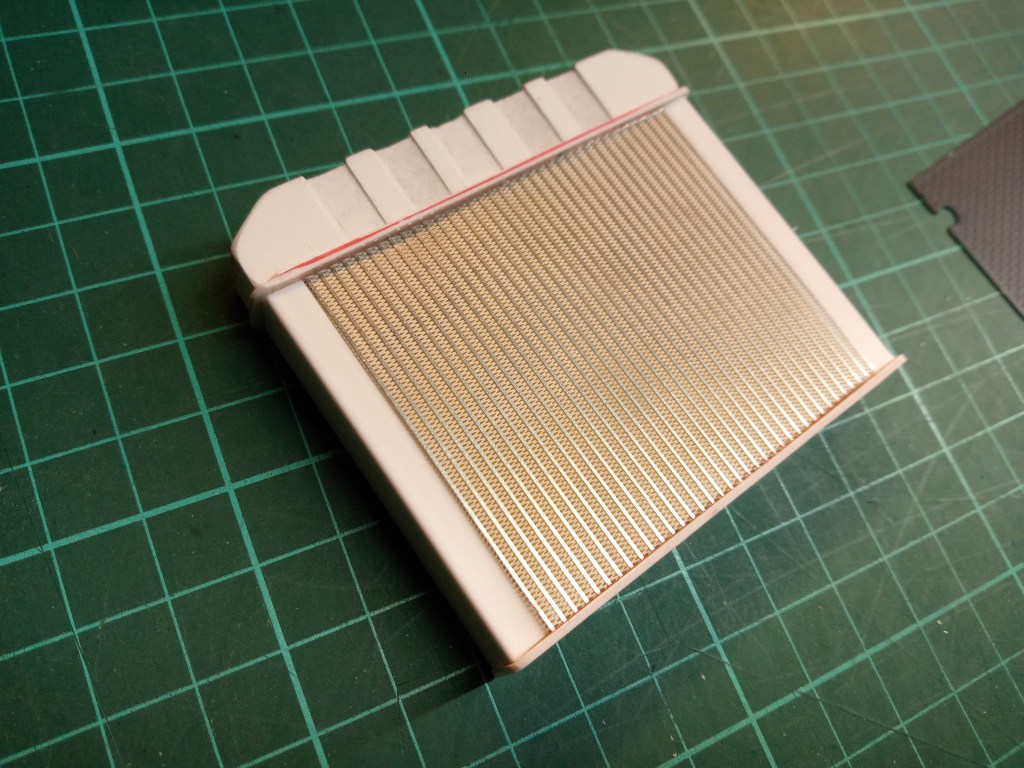
Hinter dem Gitter fehlte jetzt noch der Kühler. Nachfolgend die ersten Bauteile. Das aus einem Forex-Block gefräste und geschliffene Oberteil des Kühlers. Rechts daneben die Kühlerattrappe aus dem Baukasten. Das Lamellengitter ist eine lasergeschnittene Vorlage mit perfekt nachgebildeter Kühleroptik.
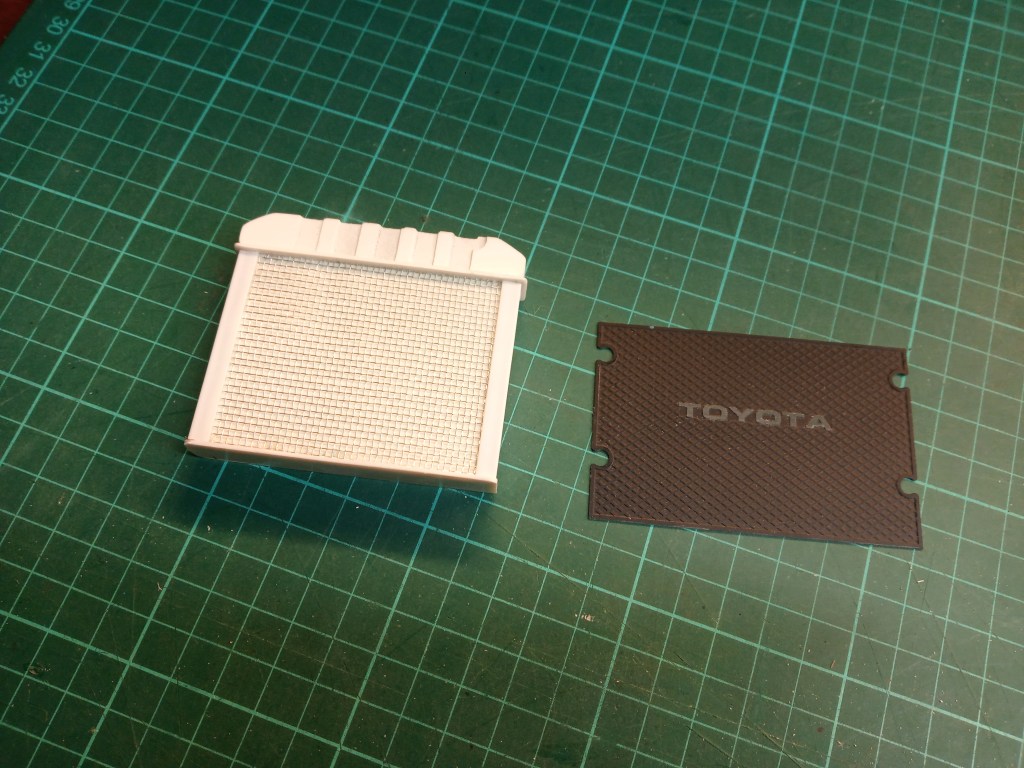
Das vorläufige Ergebnis der Rückseite. Hier nur mit einer einfachen Gitterstruktur, da das Lüfterrad und das ihn umgebende Gehäuse den Blick später vollständig versperren.
Wird schnellstmöglich fortgesetzt…
English Version
Sheet metal structures and radiator construction
Sources: Internet image search, Spotmodel.com
The joy at the current state of construction didn’t last too long. I could no longer get new goals out of my mind. The otherwise wonderful details of the model are rather underdeveloped in the engine compartment. Whenever I opened the hood, the conversion, as shown in the following photo, almost forced itself upon me.
First of all, the existing, out-of-scale structures were cut out and sanded down. A transverse stiffener was then inserted in the area of the hinges. A thin 0.5 mm PS strip was then glued to the radiator grille. To create the three-dimensional sheet metal element, another layer with corresponding cut-outs and drill holes was applied.
Two additional „metal sheets“ were fitted in the area of the hood fixing pins.
The stop of the hood support was created from an angle profile.
Finally, the hood support itself was soldered from a piece of sheet zinc, silver steel and a washer.
A clamping device was built so that the linkage remains fixed even when the hood is closed. An angled 0.5 mm PS piece holds the linkage on the bearing block.
In keeping with the external condition of the Toyota, the underside of the hood also shows signs of wear.
The details of the hood support.
FMS has fitted an attractive solution for the radiator grille. A metal panel with a grille look and a metal emblem of the Toyota lettering. However, I wanted to make this a little more realistic. The original has a subframe with a stone guard in front of the actual radiator.
My realization looked like this. The photo also shows the new headlights. Brighter lenses and a nicer look for the glass structure.
The radiator was still missing behind the grille. Below are the first components. The upper part of the radiator milled and sanded from a forex block. To the right is the dummy radiator from the kit. The finned grille is a laser-cut template with a perfectly reproduced radiator look.
The preliminary result of the rear side. Here only with a simple grid structure, as the fan wheel and the surrounding housing will completely block the view later.
To be continued as soon as possible…
Translation, with the kind support of deepl.com
