Quellen: Internet-Bildersuche
English Version
Wieder einmal steht das Weihnachtsfest vor der Tür. Die Stimmung hat auch mich ergriffen. Seit Jahren ist auch wieder einmal Schnee gefallen, mit einer wunderbaren, trockenen Kälte. Es soll wohl so nicht bis Heiligabend bleiben, aber das ändert nichts an meinem Wohlbefinden. Das Bewusstsein für die Aussicht auf ein paar beschauliche Tage, sind mit zunehmendem Alter, bei mir intensiver als jemals zuvor. In der Kindheit die Vorfreude auf Geschenke. In den späteren Jahren eher ein Grund zum Schaudern. Was verschenkt man an wen? Eine Frage die mich oft gestresst hat. Bei meiner Frau eher das Gegenteil. Immer Ideen und passende Vorschläge. Was habe ich doch für ein Glück, noch mehr, seit wir unsere „Geschenke“ selbst beschaffen. So schenke ich mir derzeit besonders gerne Teile, Material und Werkzeuge für mein liebstes Hobby. Modellbau eine scheinbar unendliche Geschichte, mit zusätzlichen Glücksmomenten am laufenden Band.
Im letzten Beitrag hatte ich schon eine Vorschau aufgestellt, was baulich zu erwarten ist. Zuerst das angekündigte Ergebnis der hinteren Magnetbefestigung. Gelungen, wie erhofft. 4 Kilogramm Haltekraft der Magnete, sind aber eine stattliche Größenordnung. Nur mit viel Fingerkraft und Geschick, lassen sich Karosserie und Rahmen voneinander trennen. Mit eingebauten Fensterscheiben, wird das aber eine große Herausforderung, für die Haltepunkte am Karosseriegehäuse. Es läuft wohl versuchsweise auf 3 kg Magnete hinaus. Dennoch bin ich mit dem Ergebnis mehr als zufrieden. 🥰
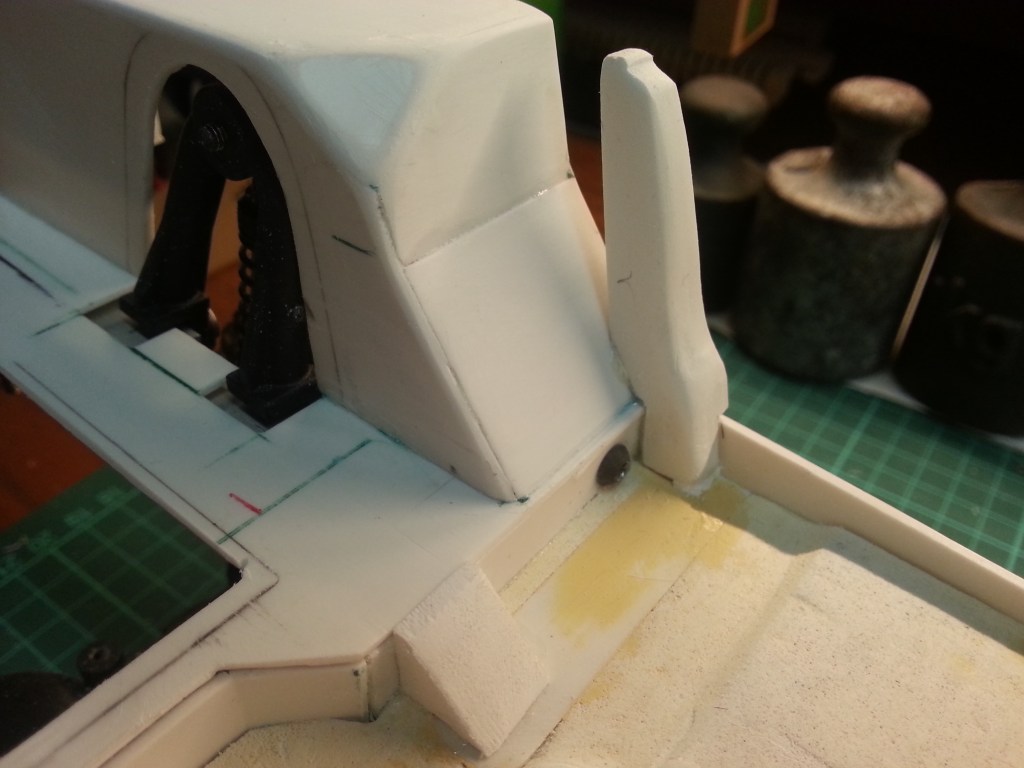
Im Vorgriff auf die beiden Türverkleidungen, habe ich zunächst ein Verstärkungsprofil gebaut. Es ist an der Seitenwand zwischen den hinteren Radkästen und den Türen montiert. An diesem Punkt, ist in der Realität auch der Überrollbügel montiert. Somit eine stark belastete Stelle. Aus Forex-Resten wurden zwei entsprechende Profile herausgearbeitet und mit der Bodengruppe verklebt.
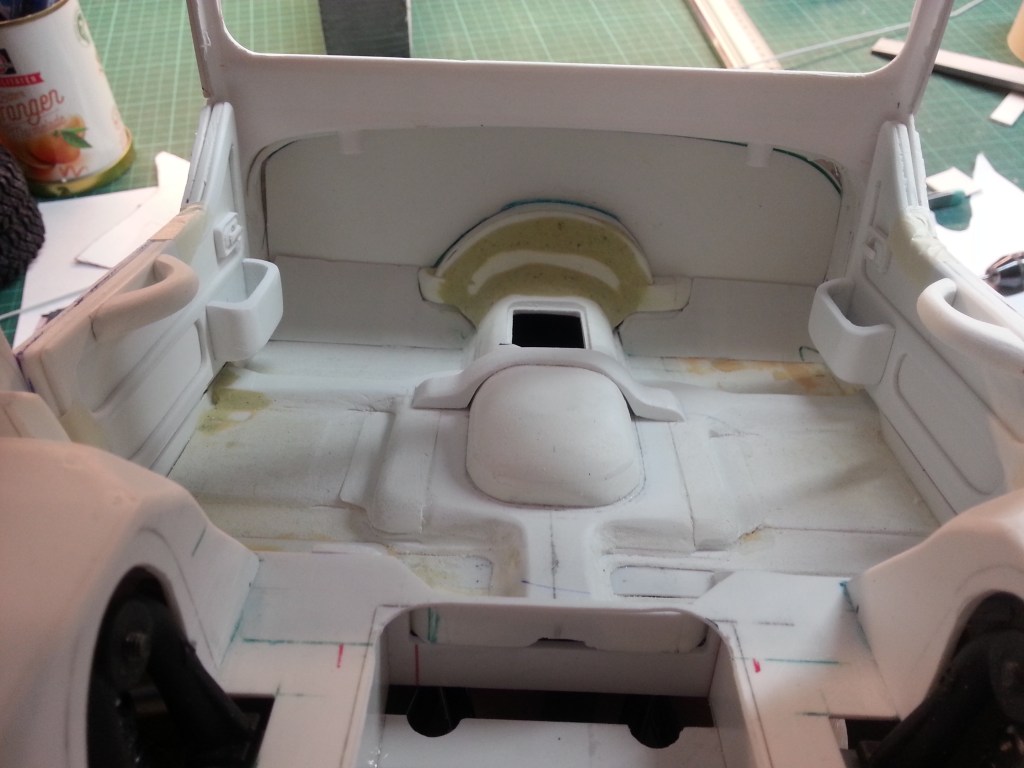
Die Innenansicht entwickelt sich so schrittweise. Für das Akku wurde inzwischen die Bodenplatte geöffnet. An der Hecktür ist auch die Abdeckung für das Türschloss entstanden, am rechten Rand zu sehen.

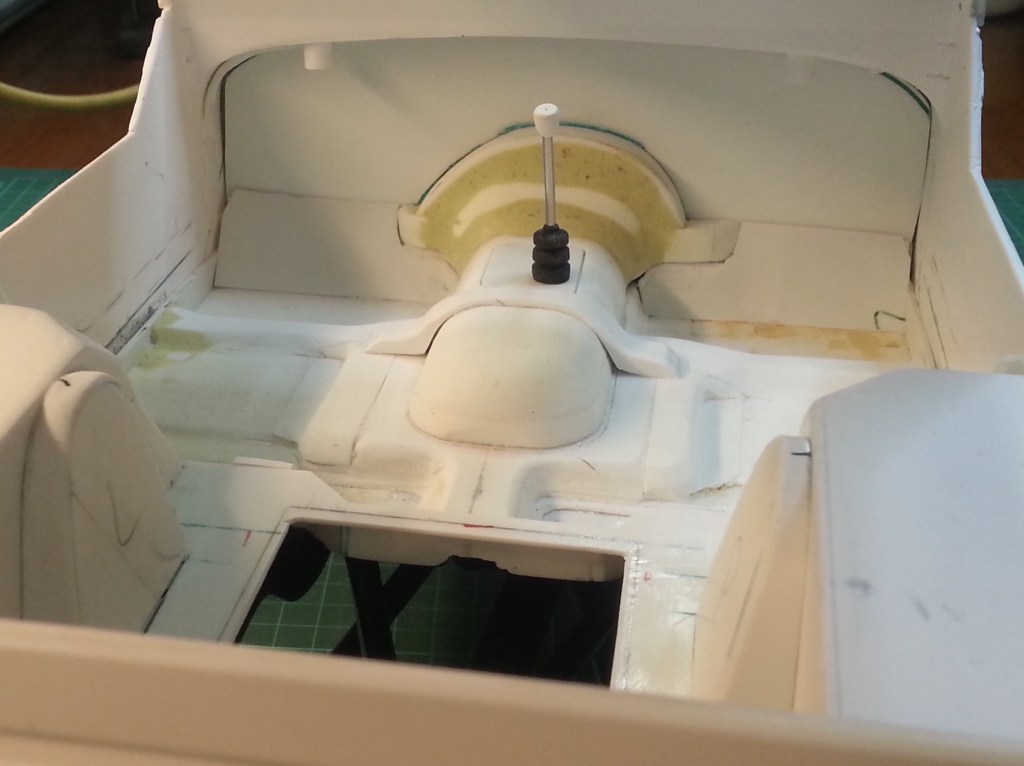
Die Verstärkungsbrücke über den Kardantunnel wurde ebenfalls verklebt und flacher geschliffen. Milliput wird die Ungenauigkeiten an den Übergängen noch kaschieren. Mein Arbeitsziel während der Feiertage!
Vor dem Bau der Türverkleidungen, habe ich noch die Halterung, für das im Boden liegende Akku gebaut. Kleine, aus PS-Resten geschnittenen Elementen ergaben das nachfolgende Bild. Ein knapp unter dem Boden endendes Akku-Fach. Extra für diesen Wrangler, wurden zwei Hardcase-Shorty Akkus, mit zwei Zellen, angeschafft. Das war notwendig, weil ich einen leeren und vor allen Dingen möglichst realistischen Innenraum wollte.


Eine nach dem Original strukturierte Bodenplatte, wird mit Magneten gesichert, das Akku-Fach abdecken. Hier bisher nur die Abdeckung. Am Rest wird noch gearbeitet…
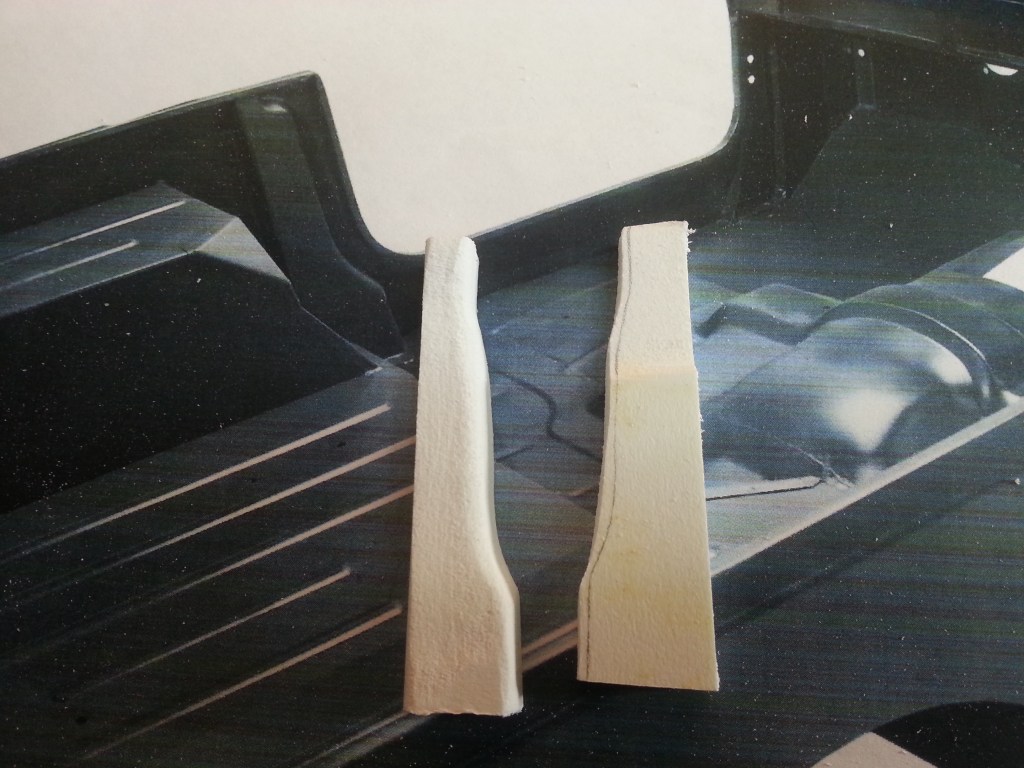
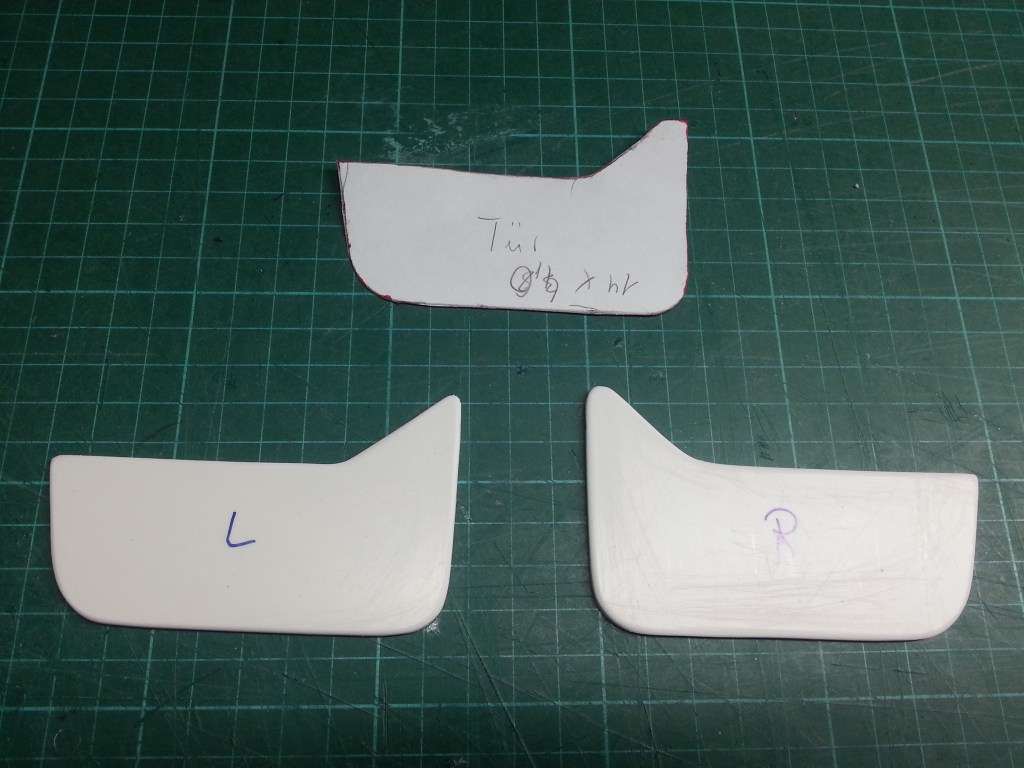
Nun zu den vorderen Türverkleidungen. Da ein reguläres Cockpit montiert wird, wollte ich auch entsprechende Türverkleidungen. Ist auch der Rest des Innenraums in Blechoptik gehalten, soll der Fahrerbereich zumindest einen Rest von Wohnlichkeit behalten. Aus Papier (oben) entstand wieder eine Vorlage für die beiden Türverkleidungen.
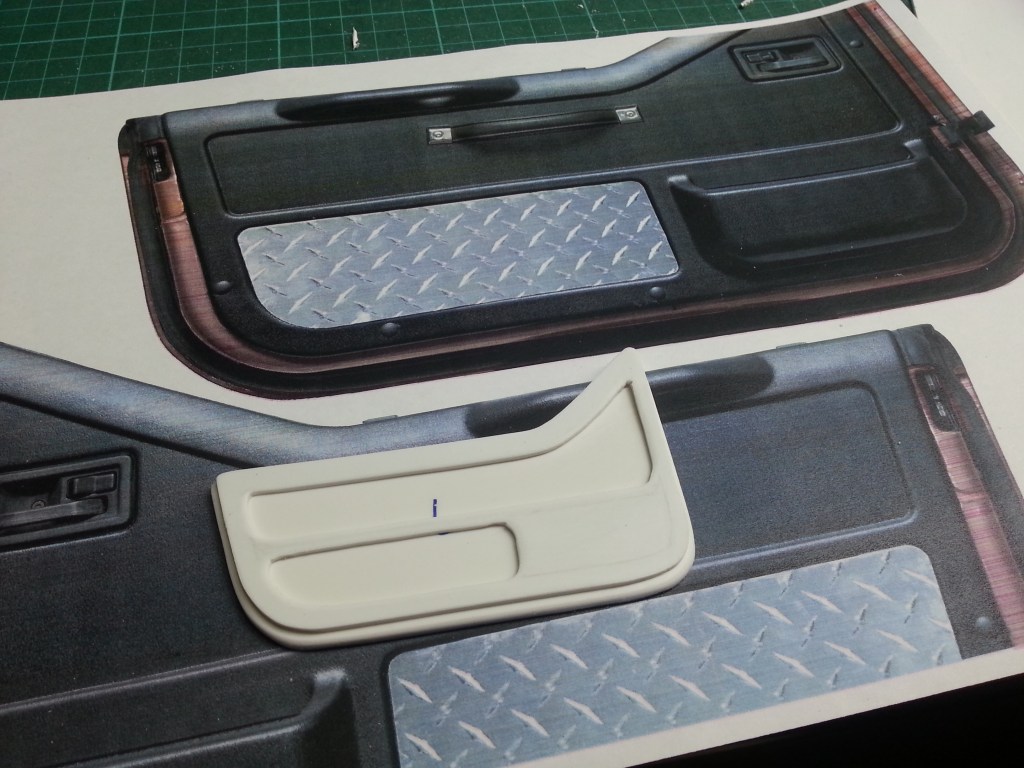
Auf das Grundelement kam eine zweite dünnere PS-Platte, die etwas mehr Erhabenheit für die weiteren Details bringt. Dazu gehört auch das Türschloss und ein Ablagefach. Die Bilder repräsentieren einen Tag Arbeit, der sich aber gelohnt habt. Ich zumindest bin stolz darauf. Die Handgriffe werde ich aber noch etwas filigraner schleifen… 🥰

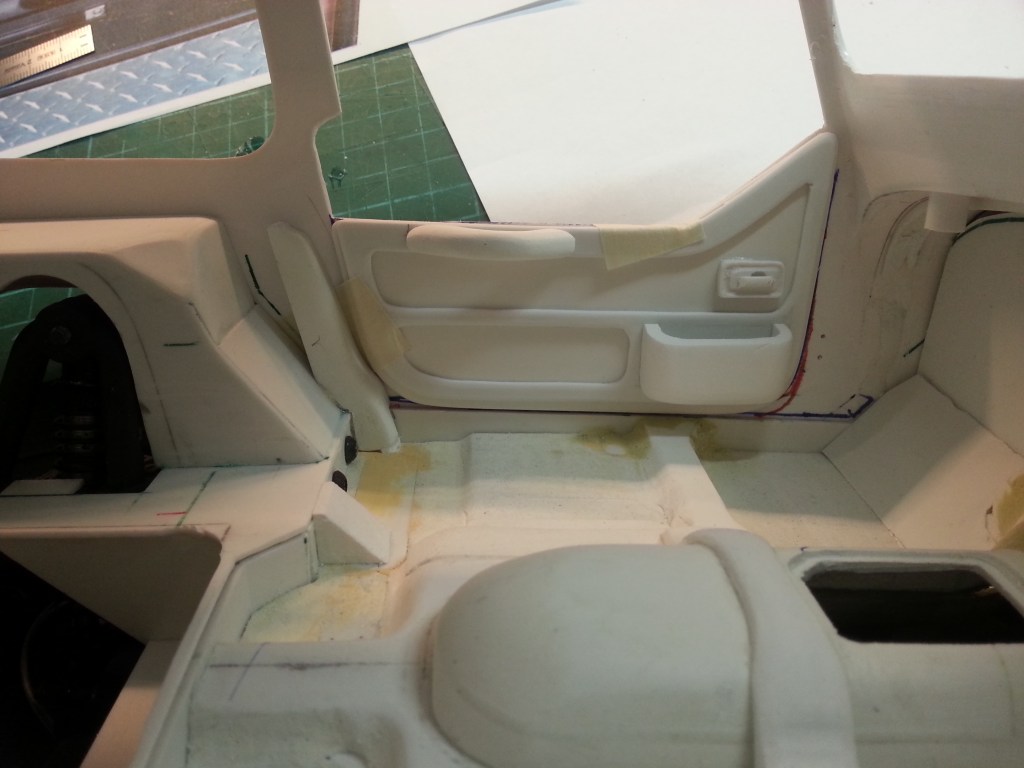
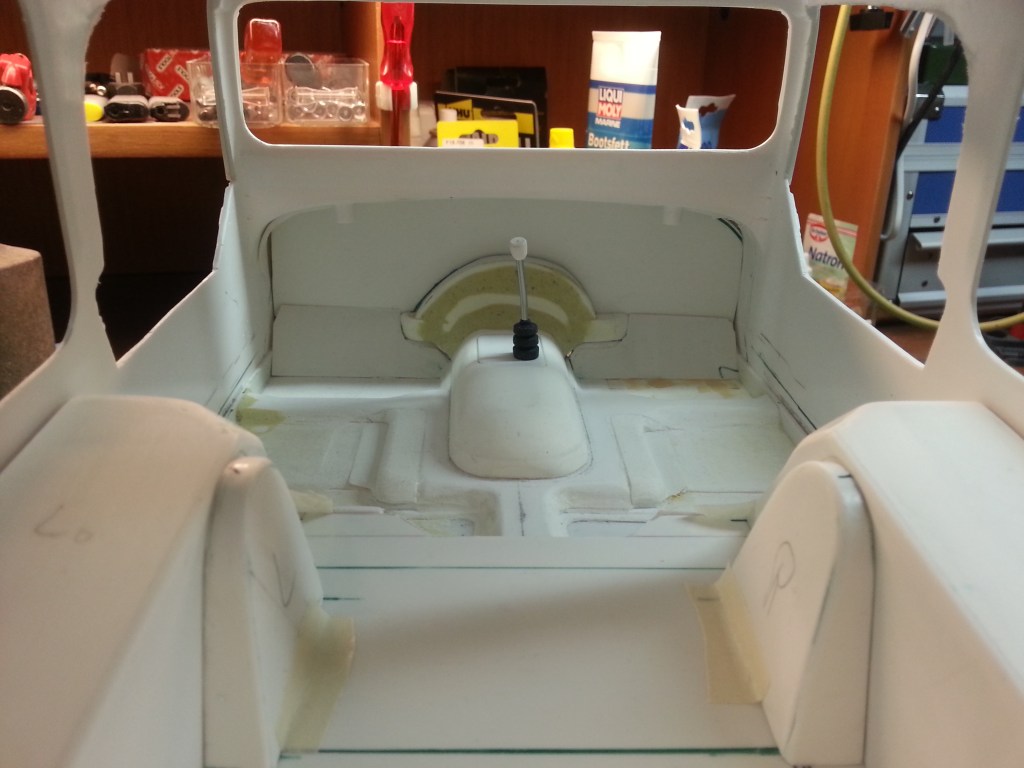
Eine Ansicht des derzeitigen Innenraums.
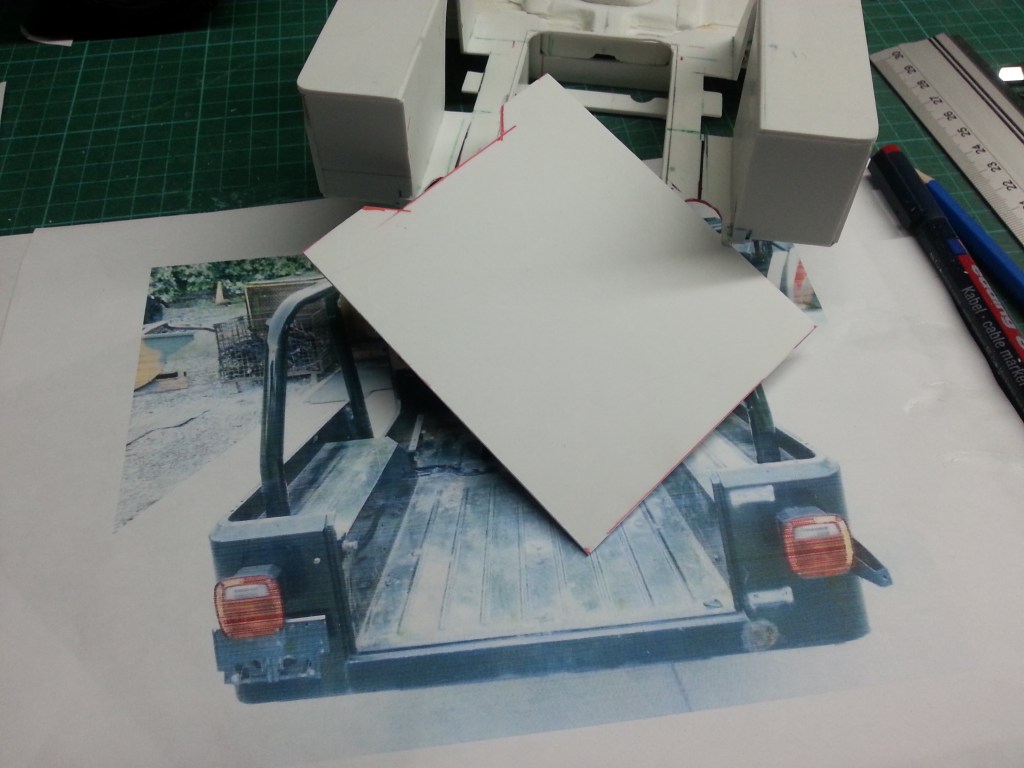
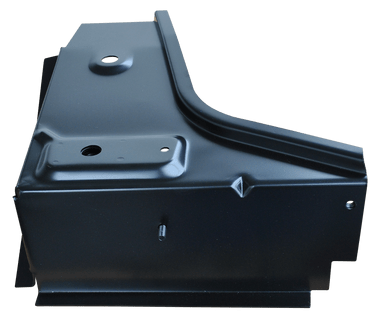
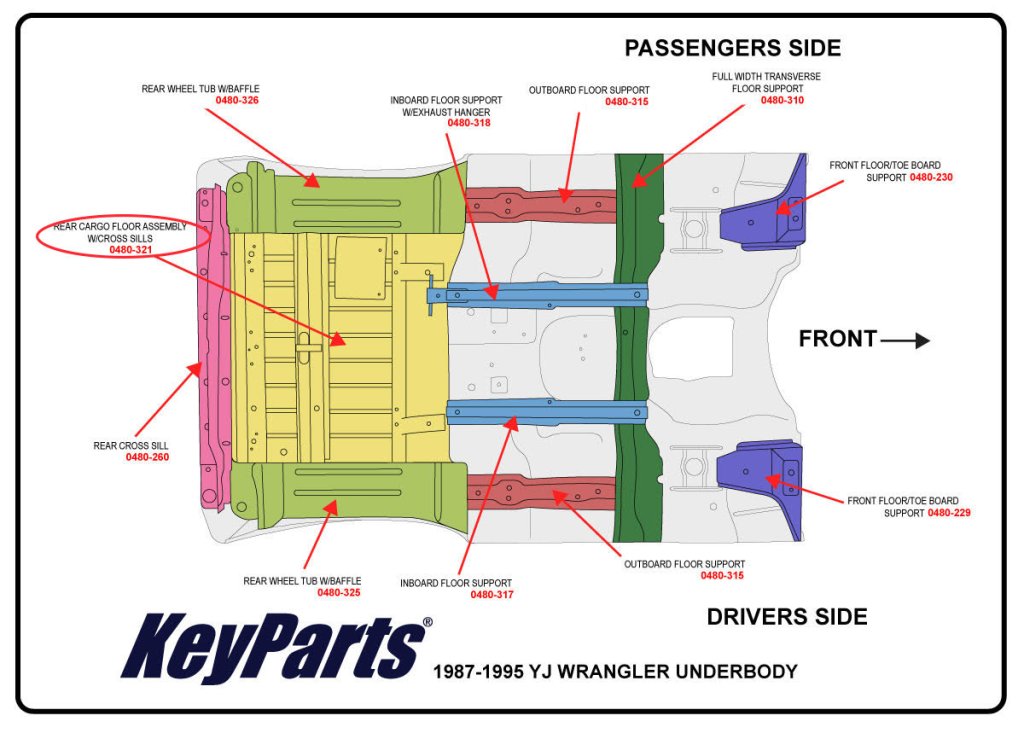
Zum heutigen Abschluss die vordere Halterung, der Bodenplatte auf dem Rahmen. Ein äußerlich recht unscheinbares Bauteil, im Detail aber aufwändig. In der Draufsicht nur ein eindimensionales Blech. Mir war aber schnell klar, dass es so seinen Zweck nicht erfüllen kann. Also wieder eine ausgiebige Internetrecherche. Demnach ist das Bauteil dreidimensional und sieht so aus, linkes Foto. Rechts sieht man die beiden lilafarbenen Teile, auf beiden Seiten der Karosserie
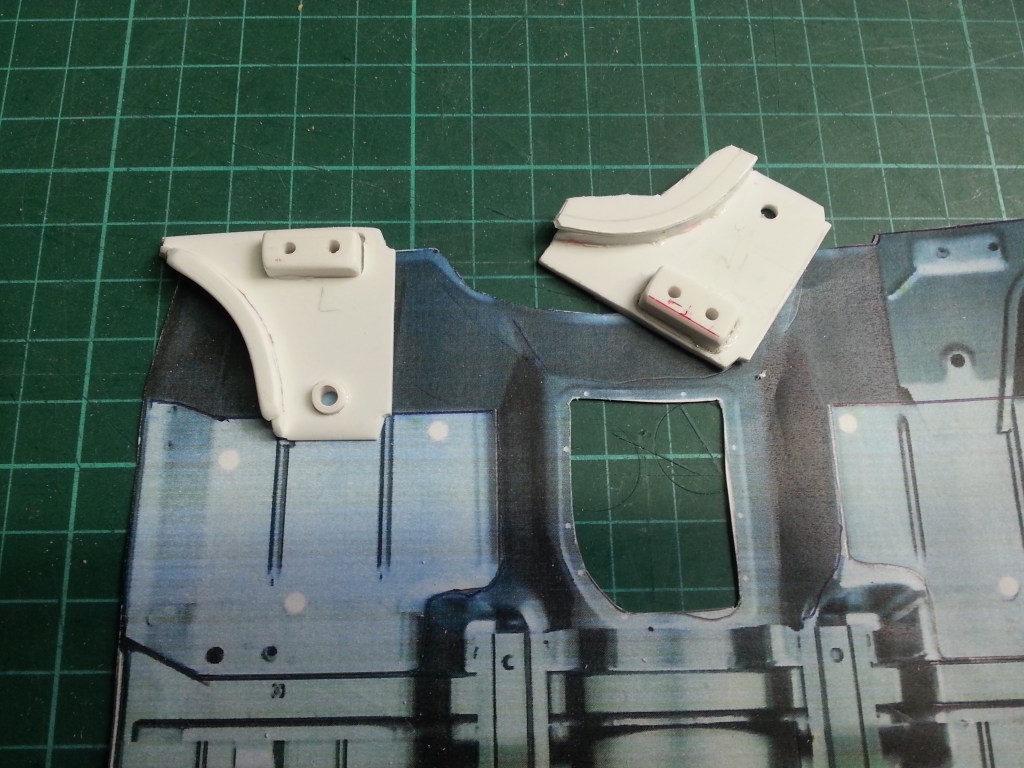
So sieht das vorläufige Bauteil aus.
Zum bevorstehenden Weihnachtsfest wünsche ich Ihnen, Ihren Familien und Freunden, ein harmonisches Weihnachtsfest, voller Liebe und Freude, sowie einen guten Rutsch in ein hoffentlich gesundes und friedliches Jahr 2023!
Wird schnellstmöglich fortgesetzt…
English Version
🎄Christmas and more happy moments 🎄
Sources: Internet image search
Once again, Christmas is just around the corner. The mood has also taken hold of me. For years, snow has also fallen once again, with a wonderful, dry cold. It’s probably not supposed to stay that way until Christmas Eve, but that doesn’t change my sense of well-being. The awareness of the prospect of a few contemplative days, are with increasing age, with me more intense than ever before. In childhood, the anticipation of gifts. In later years, rather a reason to shudder. What do you give away to When? A question that has often stressed me. With my wife rather the opposite. Always ideas and suitable suggestions. What I have but for a happiness, even more so since we procure our „gifts“ themselves. So I currently give myself especially like parts, materials and tools for my favorite hobby. Model making a seemingly endless story, with additional moments of happiness non-stop.
In the last post, I had already set up a preview of what to expect construction-wise. First the announced result of the rear magnet attachment. Successful, as hoped. 4 kilograms of holding force of the magnets, but are a stately order of magnitude. Only with a lot of finger strength and skill, the body and frame can be separated. With the window panes installed, this will be a great challenge for the holding points on the body. It probably boils down to 3 kg magnets on a trial basis. Nevertheless, I am more than satisfied with the result. 🥰
In anticipation of the two door panels, I first built a reinforcement profile. It is mounted on the side wall between the rear wheel arches and the doors. At this point, is in reality also the roll bar mounted. Thus a strongly loaded place. Two corresponding profiles were worked out of forex remnants and glued to the floor assembly.
The interior view is developing step by step. In the meantime, the floor panel was opened for the battery. On the rear door, the cover for the door lock has also been created, visible on the right edge.
The reinforcing bridge over the gimbal tunnel has also been glued and sanded flatter. Milliput will still conceal the inaccuracies at the transitions. My work goal during the holidays!
Before building the door panels, I still built the bracket, for the battery lying in the floor. Small elements cut from PS rests resulted in the following picture. A battery compartment ending just below the floor. Especially for this Wrangler, two Hardcase-Shorty batteries, with two cells, were purchased. This was necessary because I wanted an empty and above all as realistic as possible interior.
A floor plate, structured after the original, will cover the battery compartment, secured with magnets. Here so far only the cover. The rest is still being worked on…
Now to the front door panels. Since a regular cockpit is mounted, I also wanted corresponding door panels. If the rest of the interior is also kept in sheet metal look, the driver’s area should at least keep a rest of coziness. From paper (above) again a template for the two door panels was created.
On top of the basic element came a second thinner PS panel, which adds a bit more grandeur for the other details. This includes the door lock and a storage compartment. The pictures represent a day’s work, but it was worth it. I, at least, am proud of it. I’ll be sanding the handles a bit more intricately though…. 🥰
A view of the current interior.
Finally, the front bracket of the base plate on the frame. A rather inconspicuous component on the outside, but elaborate in detail. In the top view only a one-dimensional sheet metal. But it was quickly clear to me that it can not fulfill its purpose. So again an extensive internet research. According to this, the component is three-dimensional and looks like this, left photo. On the right you can see the two purple parts, on both sides of the body.
This is how the preliminary part looks like from me.
For the upcoming Christmas, I wish you, your families and friends, a harmonious Christmas, full of love and joy, and a happy new year in a hopefully healthy and peaceful 2023!
Will be continued as soon as possible…
Translation, with the kind support of deepl.com
