Quellen: GHW Modellbau, Actionfilmfiguren, MonsterHopups
English Version
Nach meiner Auszeit läuft es wieder rund. Nachdem der Tiefpunkt erst einmal überwunden war, bin ich sofort wieder auf die Baustelle fixiert. Dafür ist sogar ein Kurzurlaub in Köln flachgefallen. Die Seiten- und Heckschützen, mit Akkufach, standen als nächstes auf dem Bauplan. Alles musste natürlich auch mit der Ladefläche verbunden werden. Genug mit Theorie, weiter in der Praxis.
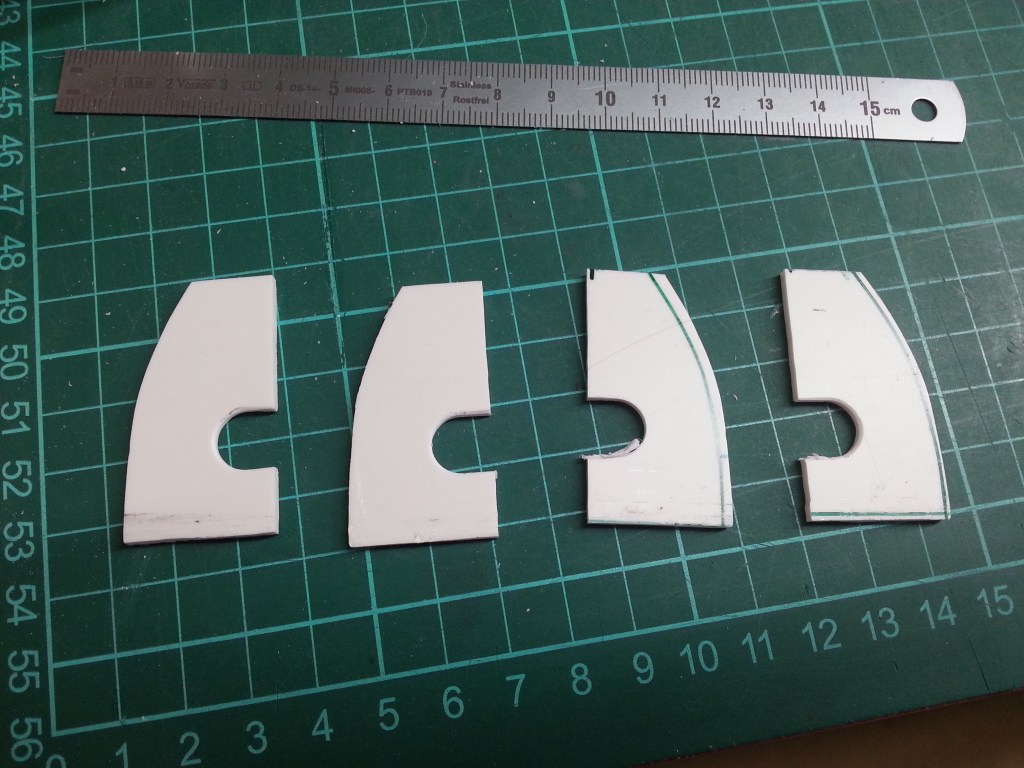
Die Seitenteile wurden in Form gebracht und mit Kreppband am Rahmen fixiert. So konnten die Konturen für die Innenverstärkungen, das Akkufach und den Heckabschluss abgegriffen werden.
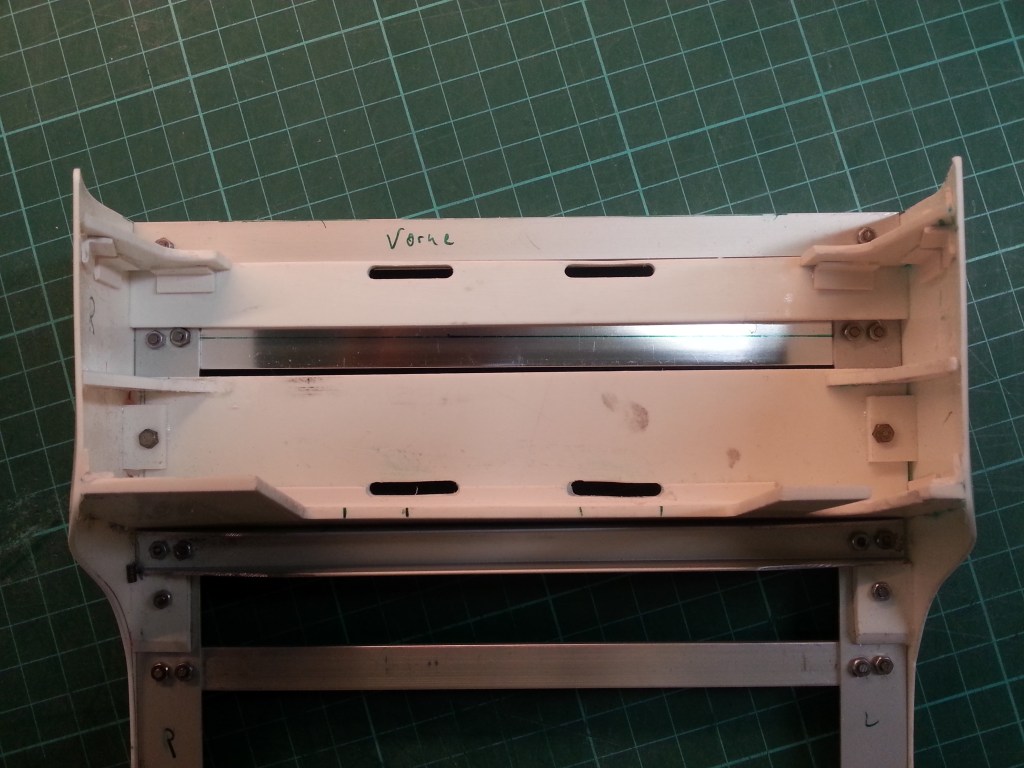
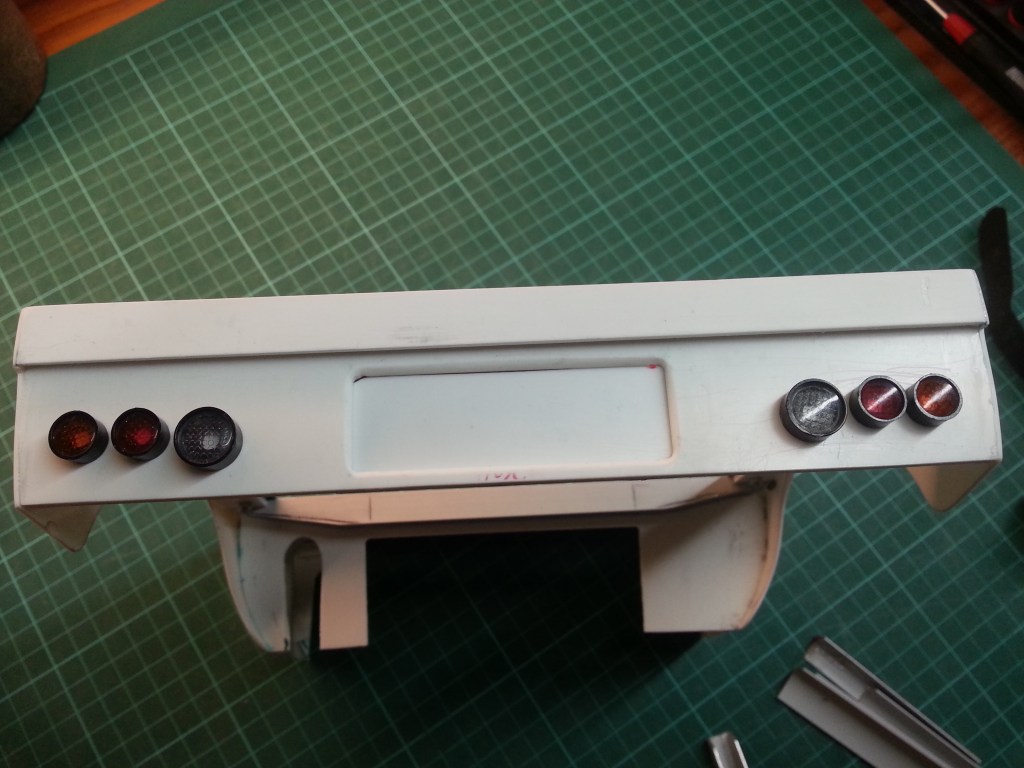
Vor den Radkästen wird eine Trennwand das Akkufach begrenzen. Zunächst noch durchgängig. Daneben der noch unbearbeitete Heckabschluss mit den nur aufgelegten Beleuchtungselementen.

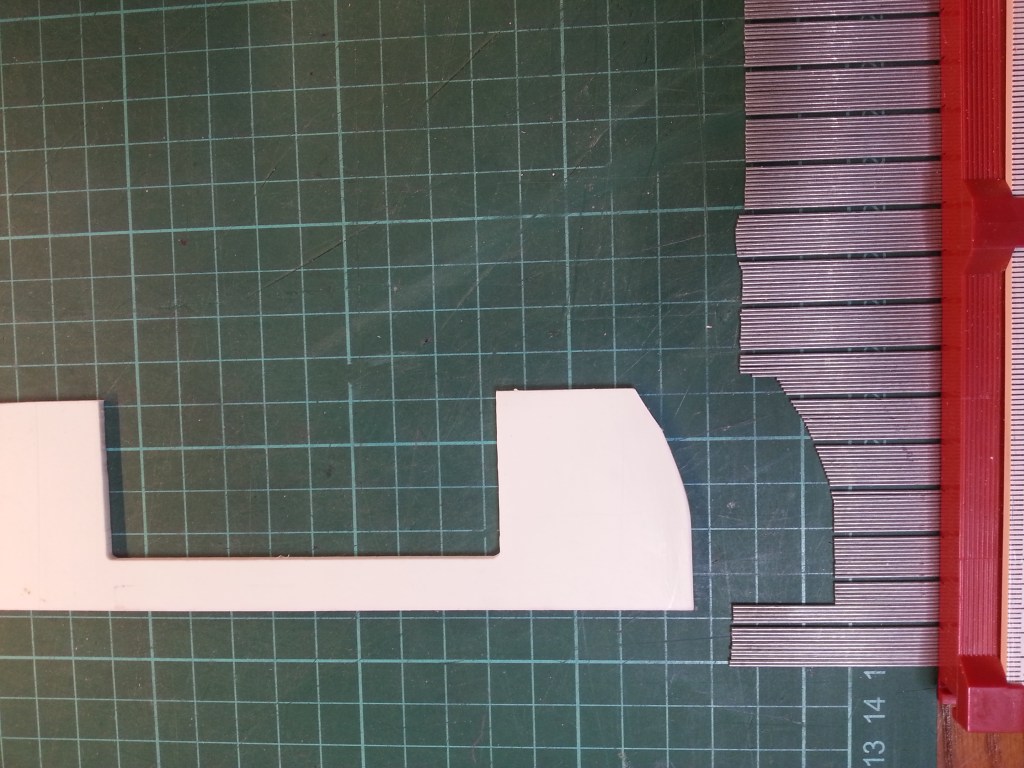
Wegen des Rahmens konnte die Trennwand aber so nicht blieben. Dazu wurde ein entsprechendes Feld ausgefräst. Für den seitengleichen Aufbau, wurde das Profil ermittelt, um so auf die Gegenseite übertragen zu werden.
Nach weiterer Feinarbeit wurde das Element schließlich mit Winkeln an der ersten Seitenwand fixiert. Schnell geschrieben und in gut 5 Stunden gebaut. Der erste Blick in das Akkufach und sein Umfeld.
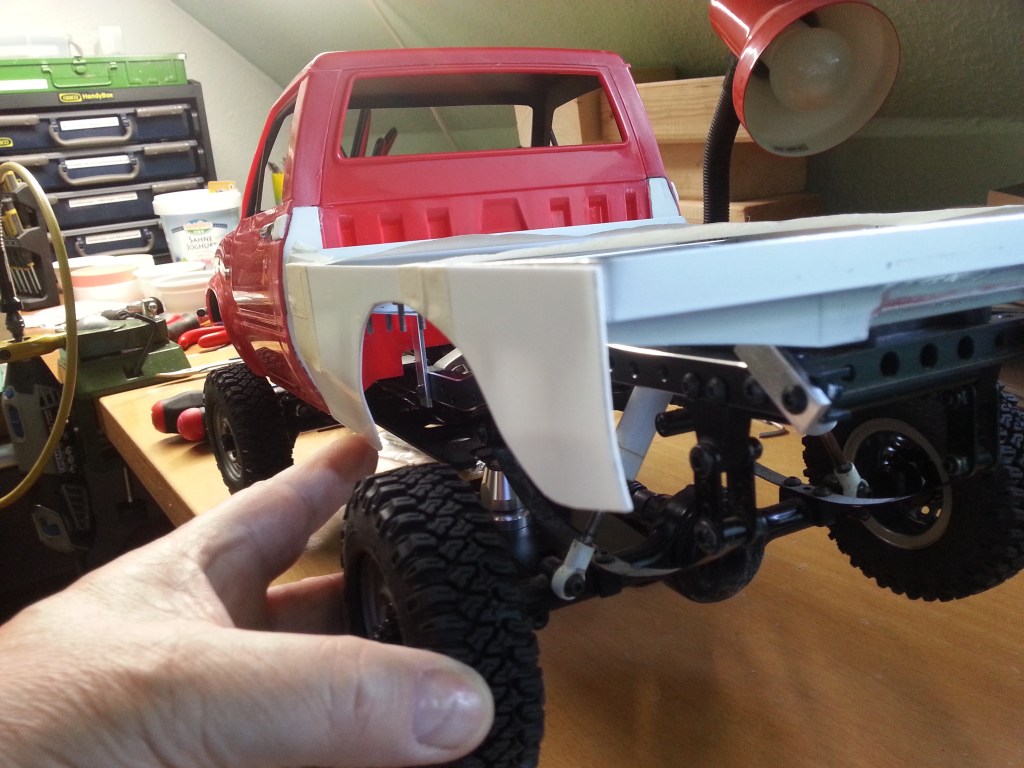
Ursprünglich war die Fixierungen der Ladefläche, auf dem vorderen Auflager, weit außen angebracht. Durch die nach unten zulaufende Seitenschürze, wurde hier aber eine Änderung erforderlich. Der Auflieger war zu breit und musste gekürzt werden. Gesagt, getan, hier die Vorher-Nachher-Bilder. Einen Zentimeter beiderseits gekürzt und es klappte.

Mit beiderseitigen Bohrungen… 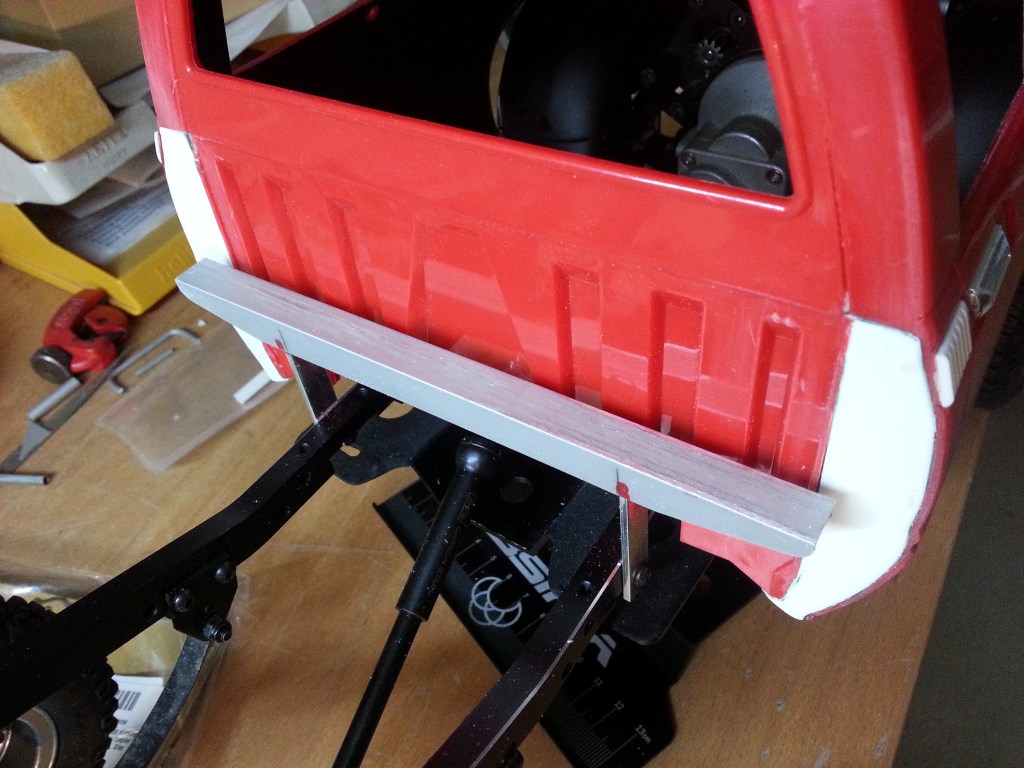
… und vorläufig gekürzt!
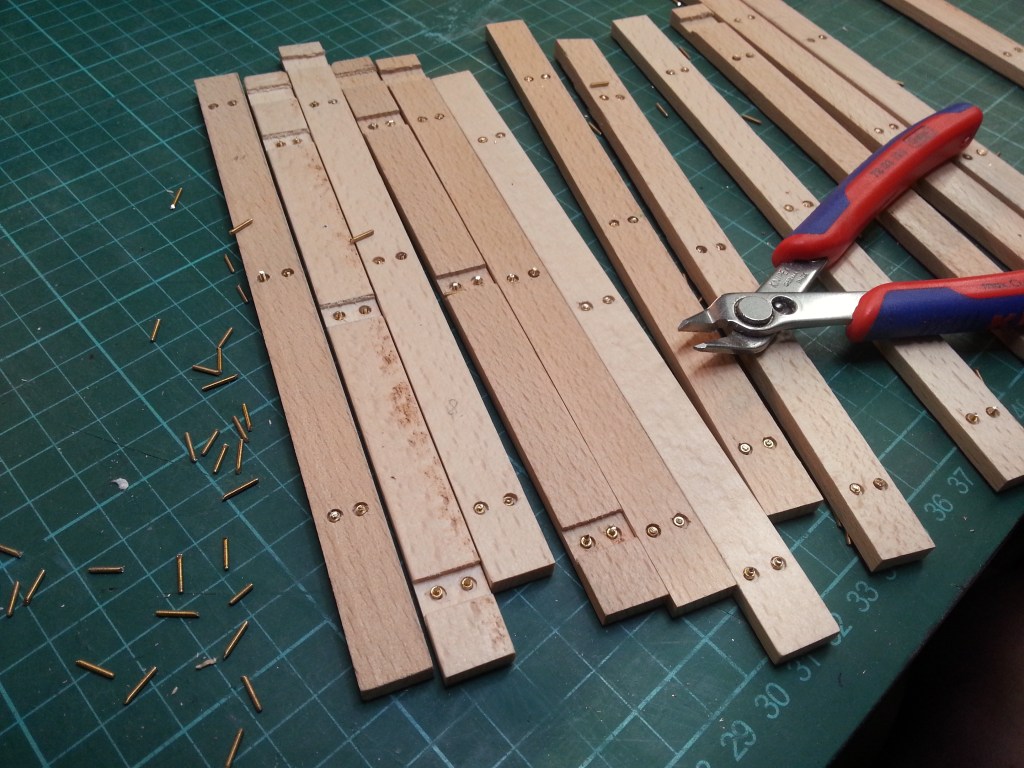
Weitere Teile zur Stabilisierung der Seitenverkleidungen und des Akkufaches, entstanden wieder auf dem Koordinatentisch. Alles noch mit Materialreserven, um einen möglichst passgenauen Sitz, durch einschleifen, zu schaffen.
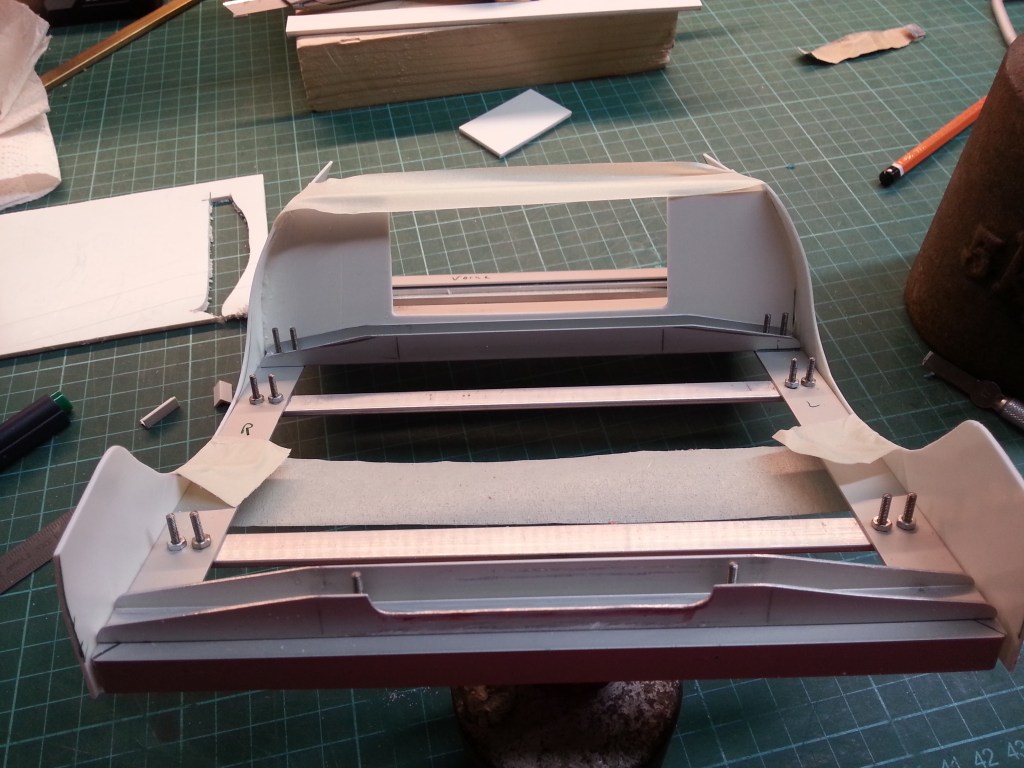
So sehen die Teile dann nach dem Einbau aus. Das große 4200 mAh-Akku passt somit perfekt in den Hohlraum, gesichert mit Bändern. Dazu wurde aber die Rückwand des Akkufachs noch einmal ausgefräst, damit die Kabel nach hinten geführt werden können, bzw. sogar müssen.
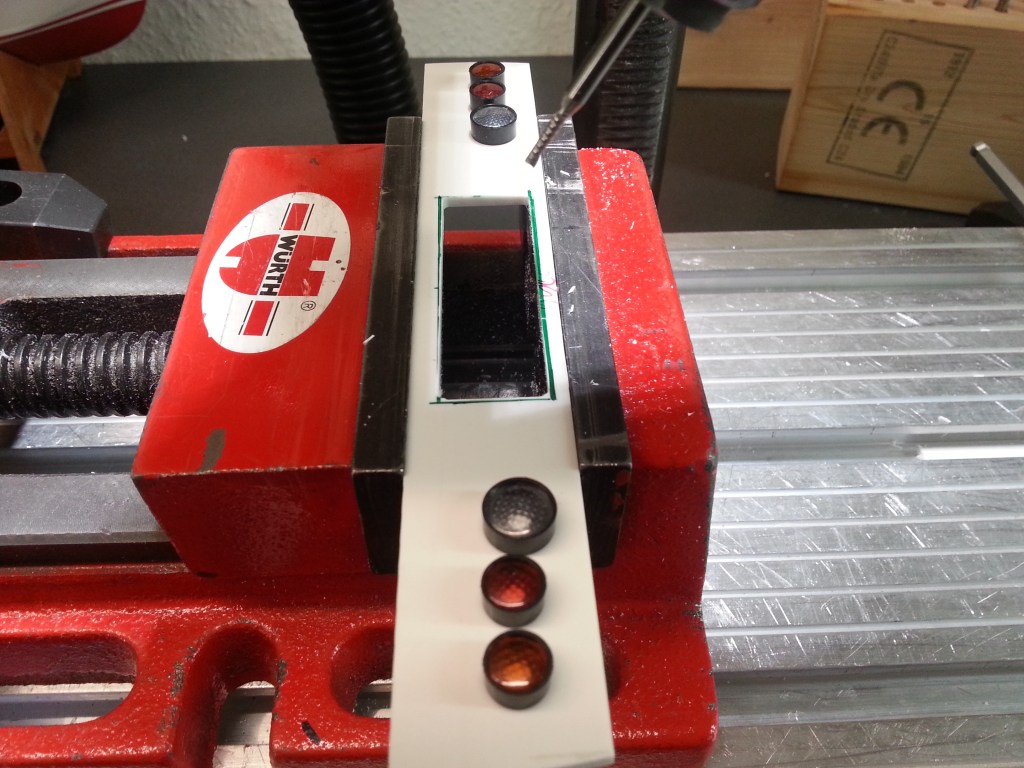
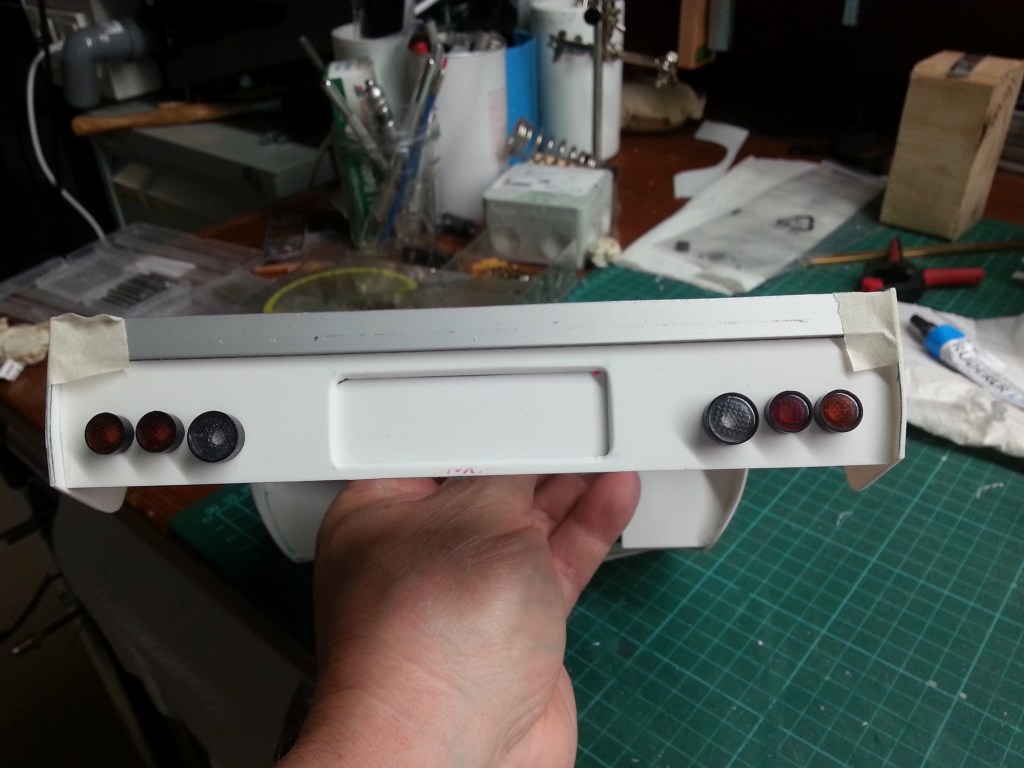
Vorab aber einen Sprung zur Rückseite der Ladefläche. Oben war ja schon das Rohteil des Heckabschlusses zu sehen. In dreistündiger Filigranarbeit wurden die Lampengehäuse vermessen, auf dem Heck angeordnet und befestigt. Dabei durfte auch der Koordinatentisch wieder seine Leistungsfähigkeit zeigen. Eine Aussparung für das Kennzeichen wurde ausgefräst und eine Fase angelegt.
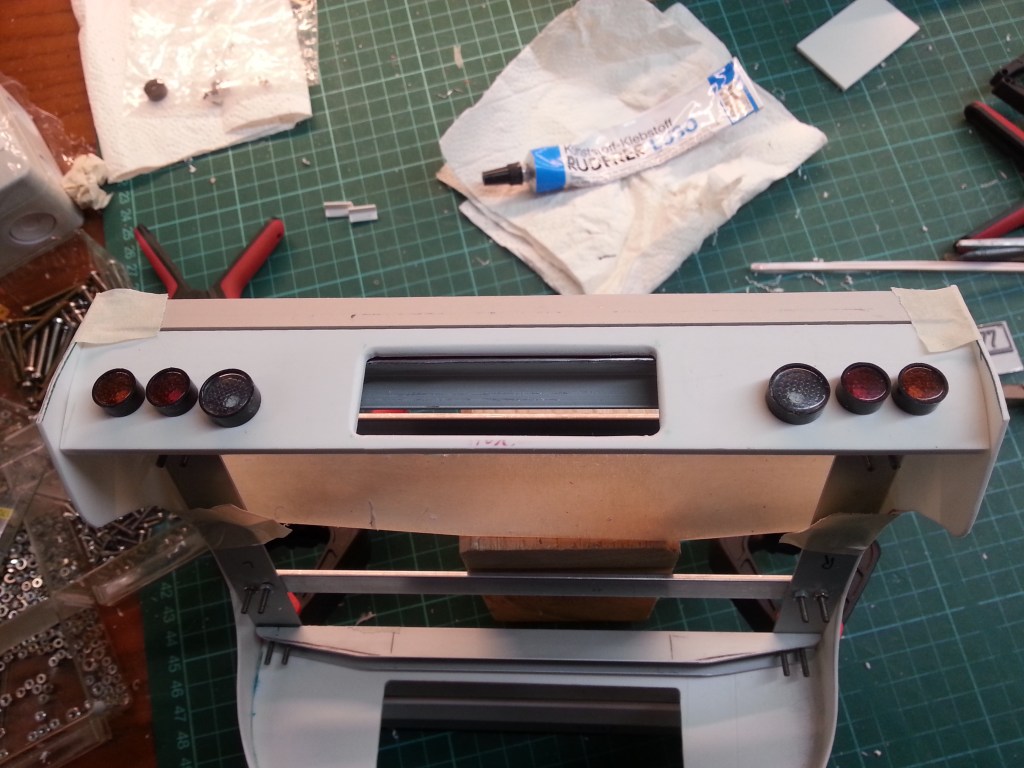
Damit auch eine Befestigungsmöglichkeit für das Nummernschild vorhanden ist, gab es noch den passenden Hintergrund. Darunter kommt noch, am Fahrzeugrahmen befestigt, eine gerade Stoßstange aus robustem Aluminiumrohr.
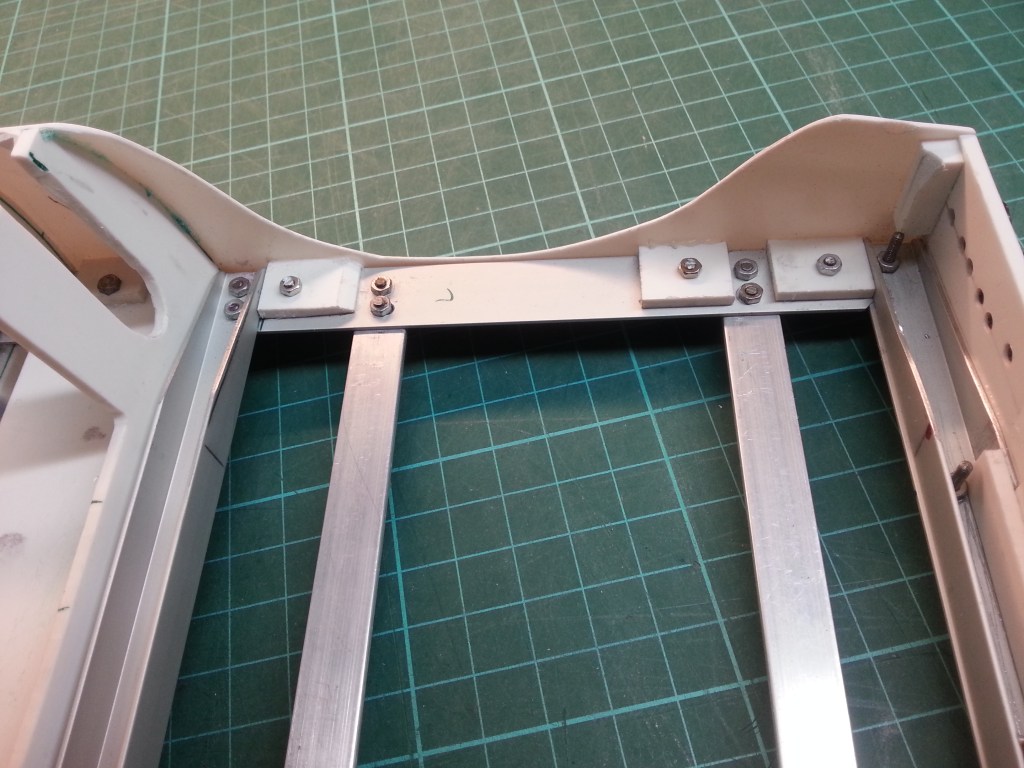
Zur Befestigung von Heckabschluss und den Seitenteilen habe ich wieder einmal PS-Reste aufeinander geklebt. Der so entstandene Block wurde auf Maß gebracht und zur Stabilisierung der Ecken an der Innenseite verklebt (Linkes Foto). Schlussendlich wurde noch der obere Aluminiumrand der Ladefläche verkleidet. So ergibt sich ein umlaufender Abschluss. Was jetzt noch fehlt sind die beiden seitlichen Kennzeichenbeleuchtungen. Das muss aber warten, wie auch die Radinnenverkleidungen und die hinteren Radabdeckungen. Am Wochenende ist nämlich der Termin in Nürnberg!
Rahmen und die Verkleidungen sind beidseitig mit jeweils 4 Schrauben verbunden. So ist alles für Reparaturen und weitere Modifikationen wieder demontierbar.
Die Rücklichter sind schon einmal befestigt, aber noch sind keine Bohrungen für die LEDs vorhanden. Auch bis auf weiteres zurückgestellt.

Die erste Stufe der Holzalterung wurde ebenfalls bewerkstelligt. Eine gebrauchte Messingbürste, einige Hammerschlägen und etwas Kantenbearbeitung, haben das Holz sichtbar verändert. Aus dem Gartengrill werde ich noch etwas Holzkohlenstaub einreiben. Sicher werden auch noch einige Ölflecken und Farbe den Weg auf das Holz finden. Es wird also noch weiter gealtert.
Das Ganze auf einen Blick.
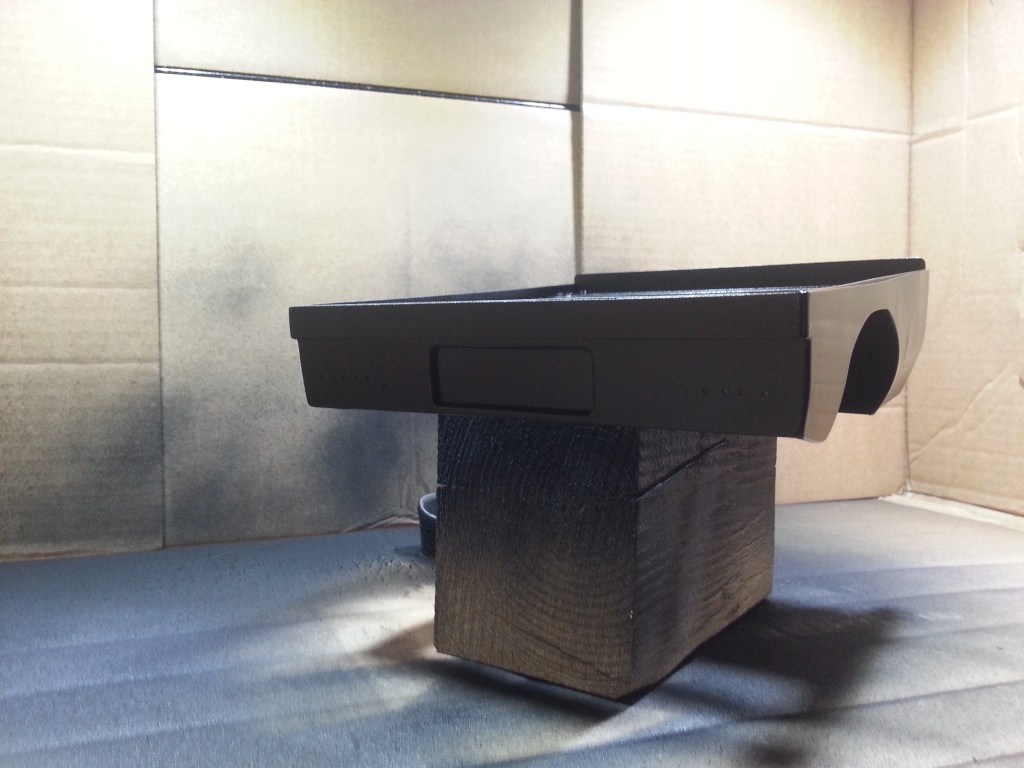
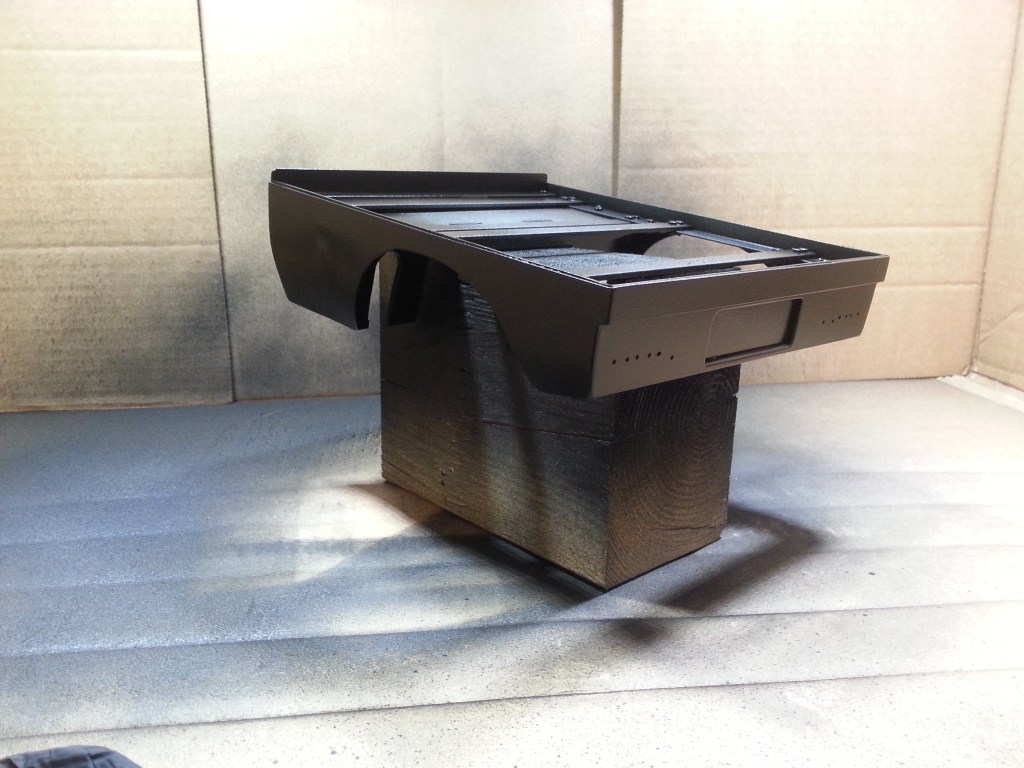
Nach dem finalen Feinschliff, der Reinigung und Entfettung ging es dann in die selbstgebaute Lackierkabine. Ein passender Karton wurde oben mit zwei Löchern versehen, in denen zwei meiner Akkuleuchten, Licht spenden. Mein Werkstattsauger diente als Absaugung für den Sprühnebel und hat sich als mehr als wacker geschlagen. Jetzt muss alles trocknen…

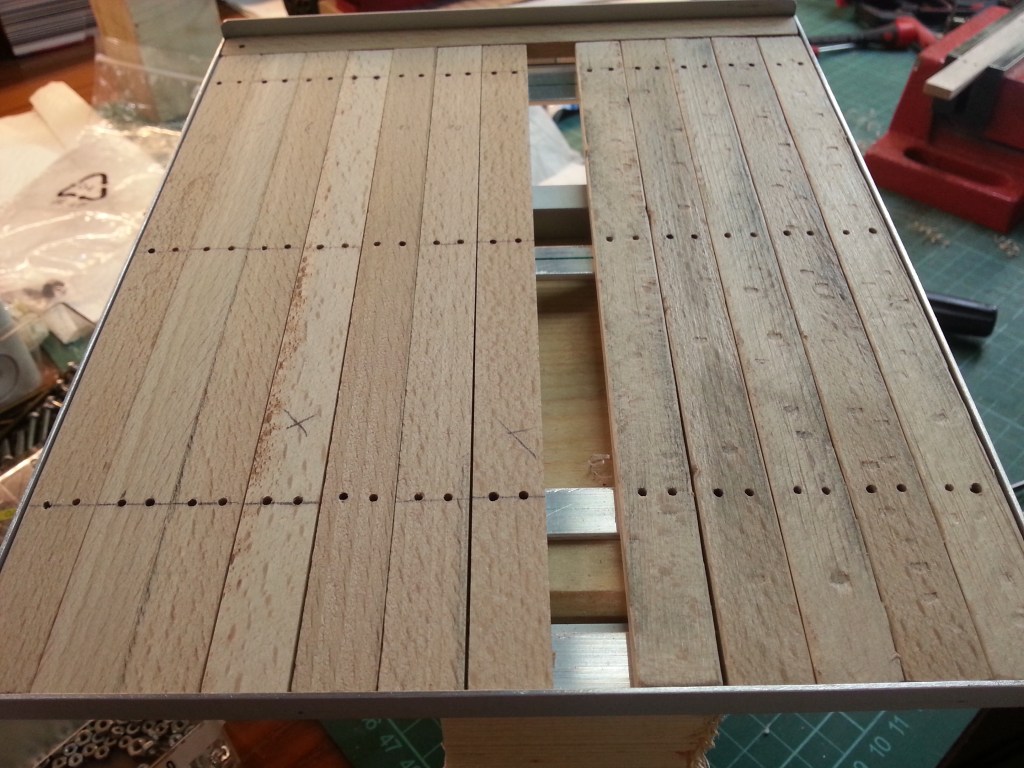
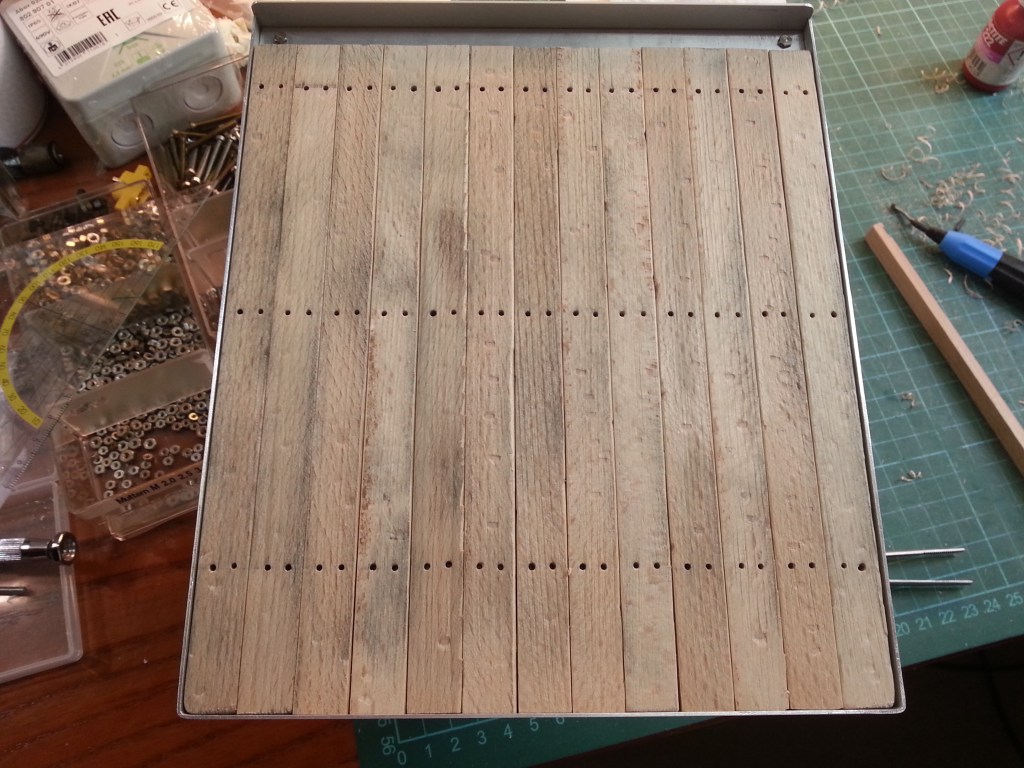
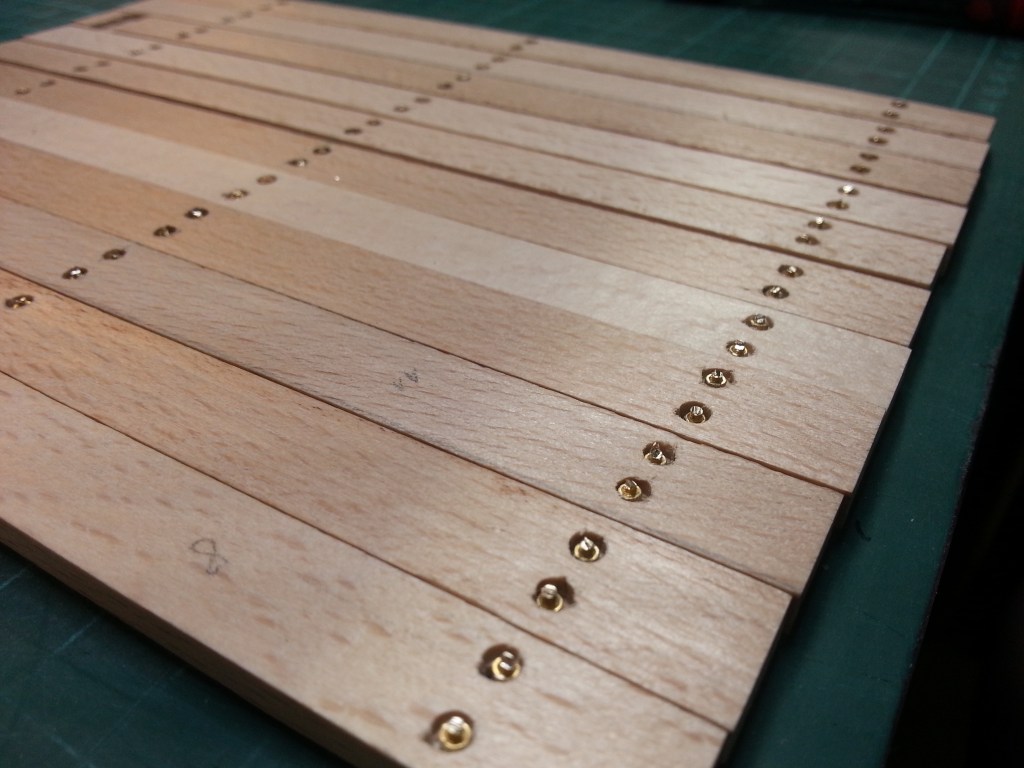
Parallel wurde am Ladeflächenboden weitergearbeitet. Eine sehr anstrengende Arbeit, aber der Reihe nach. Vom ursprünglichen Plan, die Bohlen direkt auf dem Rahmen zu verschrauben, bin ich abgekommen. Mit diesen kleinen Muttern in beengten Verhältnissen, wollte ich nicht arbeiten. Die Optik sollte aber unverändert bleiben. Also wurden auf der Unterseite 3 mm Sacklöcher gebohrt. So groß eben, dass der Steckschlüssel noch hineinpasst und die Mutter darin bündig verschwindet.
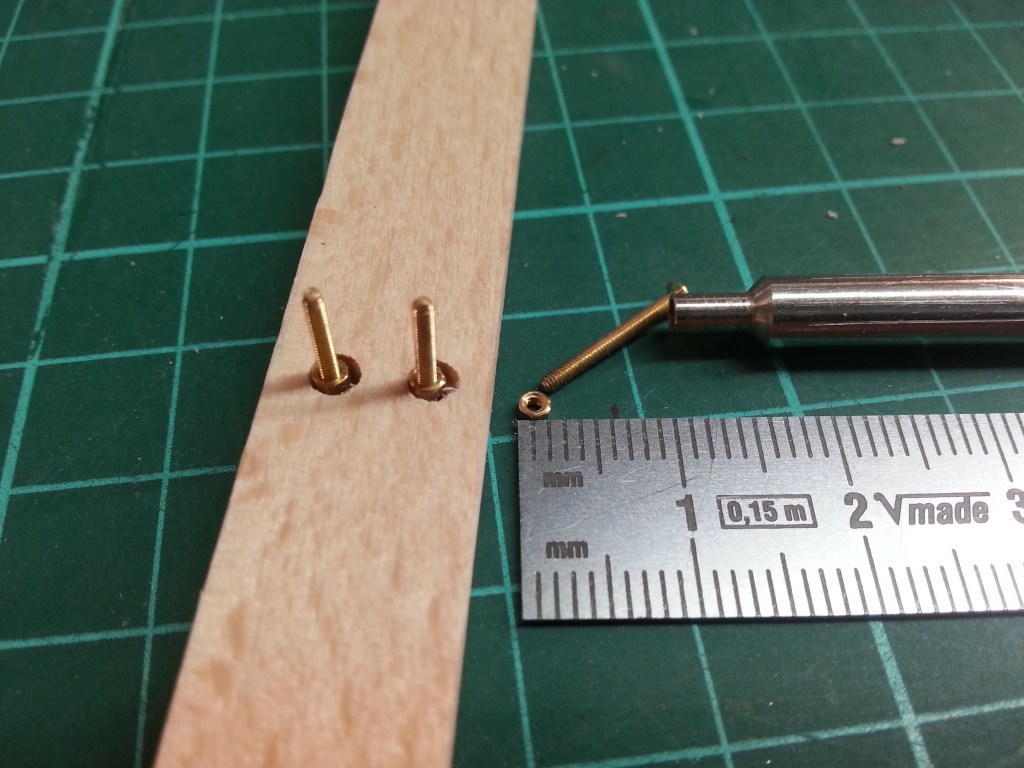
Dann die überstehenden Gewindestangen bündig am Holz abschneiden. Die kleinen Gewindestücke werde ich wohl noch einige Zeit in meiner Werkstatt auffinden. Hervorragende Flugeigenschaften! 😏
Dann nur noch alles plan schleifen. Das Ergebnis hat ganze 2 Stunden gedauert. Zu sehen ist die Unterseite.
Von oben dann diese Bild…

Das alles wird nun von unten mit Holzschrauben an der Ladefläche verschraubt. Die bestellten Schrauben von GHW Modellbau sind bereits angekündigt…
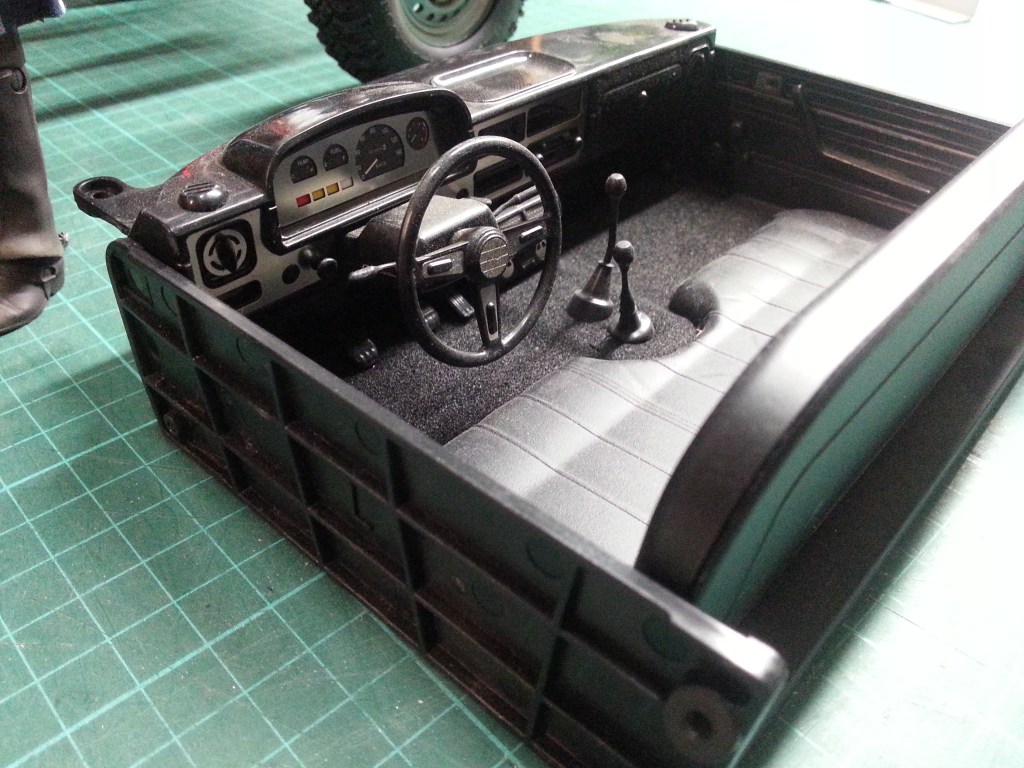
Letztlich wurde auch noch ein Fahrer an Bord geholt. Bis auf den Bart sind wir uns optisch ähnlich und das passt doch! Die schicke Oberbekleidung ist ein ehemaliges Hemd von mir. Meine Tochter hatte es leicht geschrumpft und mir zu Weihnachten geschenkt. 😀

Es passt im Großen und Ganzen recht gut, lediglich über den Rücken spannt es etwas. Beim nächsten Balkenschleppen gibt es hier sicher einen Luftspalt. Vielleicht bekomme ich noch vor Weihnachten einen Termin bei meiner Änderungsschneiderei…😂
Weil es so schön ist, noch einige Posen.
Etwas Zubehör ist auch dabei, für alle Fälle.
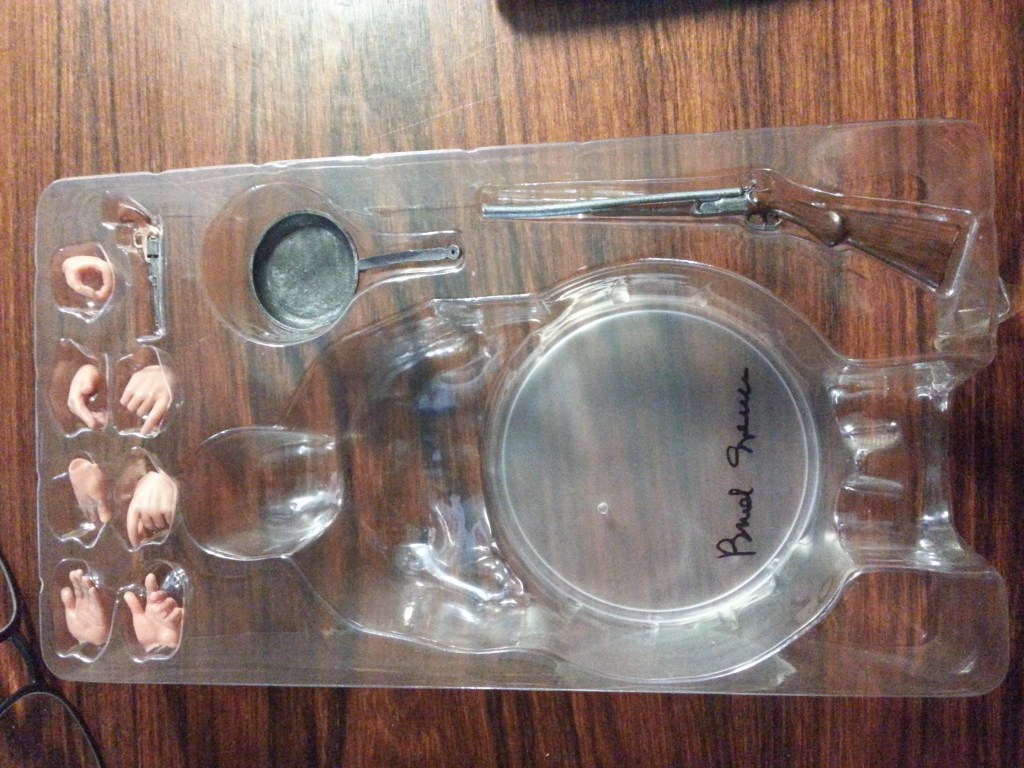
Wie er hier allerdings hineinpassen soll, weiß ich noch nicht so recht. Operative Eingriffe an einigen Teilen werden wohl unvermeidlich sein. 😯
Zum Schluss ein Foto des aktuellen Baustandes. Es sieht einem Produkt des Herstellers RC4WD nun sehr ähnlich, ist aber ein kompletter Eigenbau.

Wird nach Montage schnellstmöglich fortgesetzt…
English Version
The loading area on the home stretch
Sources: GHW Modellbau, Action movie figures, MonsterHopups
After my time out, things are running smoothly again. Once the low point was overcome, I immediately got back to the construction site. Even a short vacation in Cologne fell flat for that. The side and rear shooters, with battery compartment, were next on the construction plan. Of course, everything had to be connected to the loading area. Enough with theory, on to practice.
The side panels were shaped and fixed to the frame with masking tape. This way, the contours for the interior reinforcements, the battery compartment and the rear end could be picked up.
In front of the wheel housings, a partition will delimit the battery compartment. Initially still continuous. Next to it, the unfinished rear end with only the lighting elements applied.
Because of the frame, the partition wall could not stay like that. Therefore, a corresponding field was milled out. For the laterally identical structure, the profile was determined so that it could be transferred to the opposite side.
After further fine work, the element was finally fixed with angles to the first side wall. Quickly written and built in a good 5 hours. The first view into the battery compartment and its surroundings.
Originally, the fixings of the loading area, on the front support, were mounted far to the outside. Due to the downward tapering side skirt, however, a change was necessary here. The trailer was too wide and had to be shortened. No sooner said than done, here are the before and after pictures. One centimeter shortened on both sides and it worked.
With holes on both sides… … and shortened for the time being!
More parts to stabilize the side panels and the battery compartment were made again on the coordinate table. Everything still with material reserves, in order to create a fit as exact as possible by grinding in.
This is what the parts look like after installation. The large 4200 mAh battery thus fits perfectly into the cavity, secured with straps. For this, the back wall of the battery compartment was milled out again, so that the cables can, or must, be routed to the back.
But first a jump to the back of the loading area. Above you could already see the raw part of the rear end. In three hours of filigree work, the lamp housings were measured, arranged on the rear and fixed. The coordinate table was allowed to show its capabilities again. A recess for the license plate was milled out and a chamfer created.
So that also a fastening possibility for the license plate is present, there was still the suitable background. Underneath, attached to the vehicle frame, is a straight bumper made of sturdy aluminum tubing.
To fix the rear end and the side parts, I once again glued PS remnants on top of each other. The resulting block was brought to size and glued to stabilize the corners, the inside, left photo. Finally, the upper aluminum edge of the loading area was covered. This results in an all-round finish. What is missing now are the two side license plate lights. But that has to wait, as well as the inner wheel covers and the rear wheel covers. This weekend is the appointment in Nuremberg!
Frame and fairings are connected on both sides with 4 screws each. So everything can be disassembled again for repairs and further modifications.
The taillights are already attached, but there are no holes for the LEDs yet. Also put back until further notice.
The first stage of wood aging has also been accomplished. A used brass brush, some hammer blows and some edge work have visibly changed the wood. I will rub in some more charcoal dust from the backyard grill. I’m sure some oil stains and paint will find their way onto the wood as well. So it will continue to age.
The whole thing at a glance.
After the final fine sanding, cleaning and degreasing, it was off to the self-built paint booth. A suitable cardboard box was provided at the top with two holes, in which two of my accumulator lights, light donate. My workshop vacuum cleaner served as an extractor for the spray mist and more than held its own. Now everything has to dry…
At the same time, work continued on the loading area floor. A very exhausting job, but one after the other. From the original plan to screw the planks directly to the frame, I got away. I didn’t want to work with these small nuts in cramped conditions. But the optics should remain unchanged. So on the underside 3 mm blind holes were drilled. So big that the socket wrench still fits in and the nut disappears flush in it.
Then cut off the protruding threaded rods flush with the wood. I will probably find the small threaded pieces in my workshop for some time. Excellent flight characteristics! 😏
Then just sand everything flat. The result took a whole 2 hours. You can see the underside.
From above then this picture…
All this is now screwed to the loading area from below with wood screws. The ordered screws from GHW Modell making are already announced…
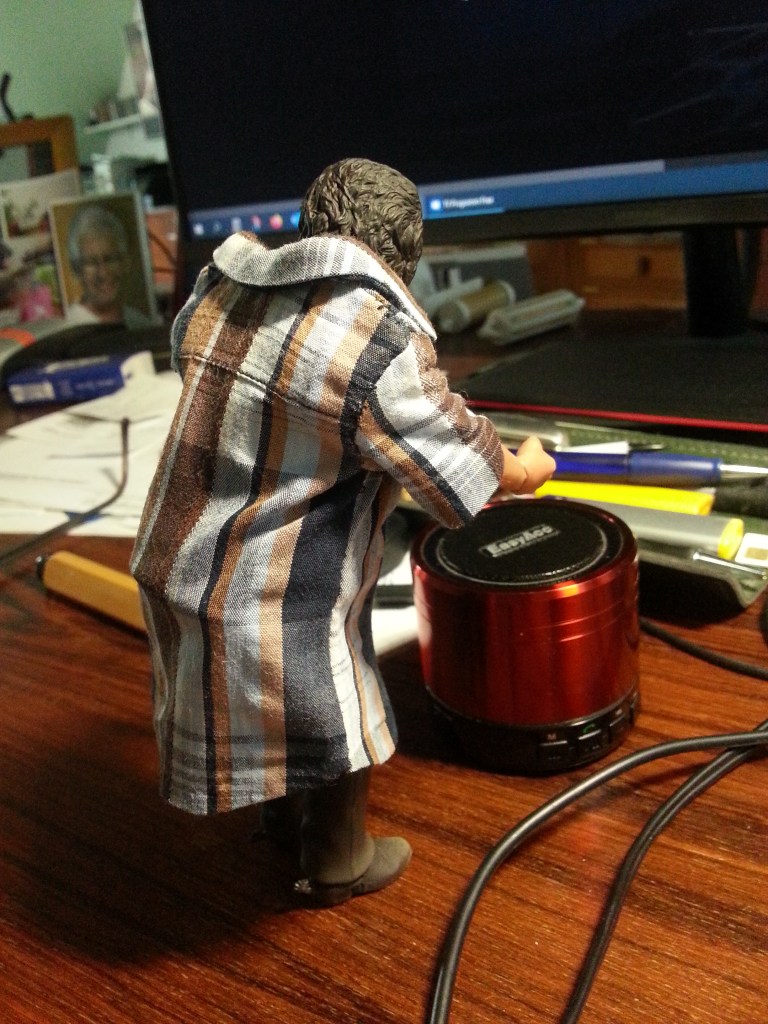
Finally a driver was brought on board. Except for the beard, we are one weight class and that fits! The fancy outerwear is a former shirt of mine. My daughter shrunk it slightly and gave it to me for Christmas 😀.
It fits pretty well on the whole, only stretching a bit across the back. I’m sure there will be an air gap here the next time I haul beams. Maybe I’ll get an appointment with my alteration tailor before Christmas…😂
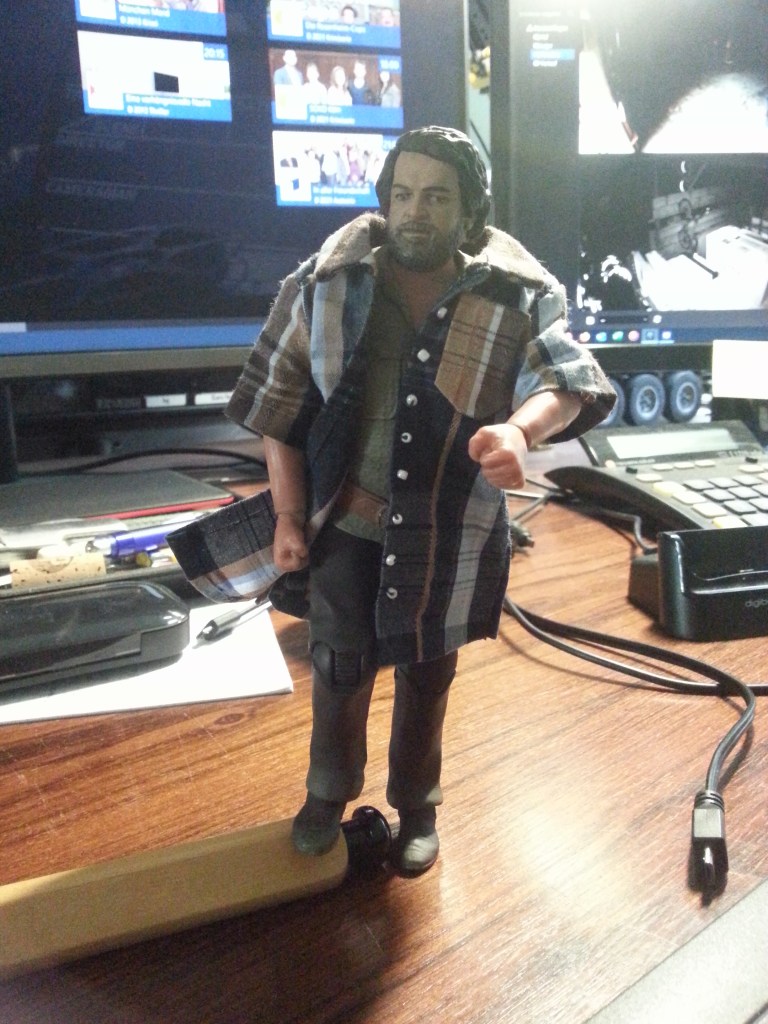
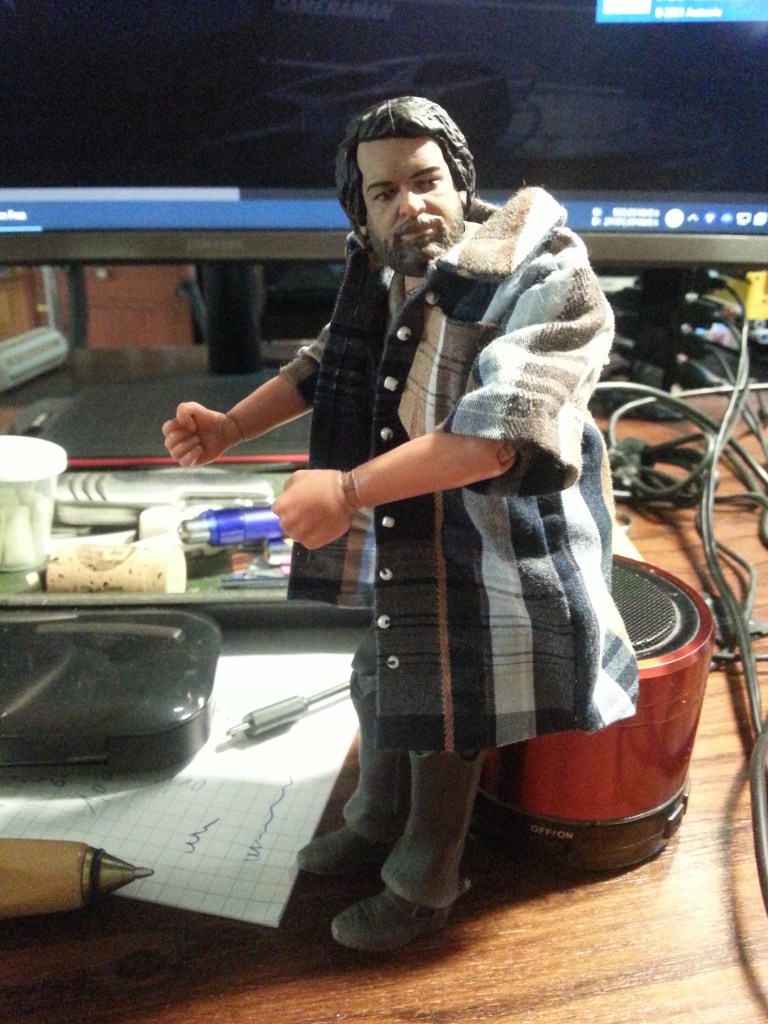
Because it is so beautiful still some poses.
Some accessories are also included, just in case.
How it should fit in here, I don’t know yet. Surgical interventions, on some parts will probably be unavoidable. 😯
Finally, a photo of the current state of construction. It now looks very similar to a product of the manufacturer RC4WD, but is a complete self-built.
Will be continued as soon as possible after assembly…
Translation, with the kind support of deepl.com

Ich falle ja aus allen Wolken, dass das Mini-Hemd der Figur tatsächlich zumindest irgendwie passt! Dafür, dass ich es ohne jegliche Maße einfach nach Gefühl gemacht habe, passt es bis auf die Länge erstaunlich gut! 😀
LikeLike
Zumindest irgendwie, ist nicht exakt zutreffend. Es ist lediglich zu lang. Das untenherum zu lange Teil, gehört wohl so in die Hose. 😊
Ich bekomme die Hose aber nicht von den Hüften. Es war also ein fast perfektes Augenmaß!
LikeLike