English Version
Ein weiteres Jahr nähert sich seinem Ende. In wenigen Tagen ist Weihnachten. Ein Zeitpunkt, um auch einige persönliche Worte niederzuschreiben.
Die Welt außer Rand und Band. Einsicht, Zusammenhalt und insbesondere die Bereitschaft akute Probleme zu lösen, sind leider nur vereinzelt erkennbar. In einem Maß, indem die Welt wirtschaftlich mehr und mehr voneinander anhängig wird, entwickelt sich zunehmend Egoismus und Nationalstaatlichkeit.
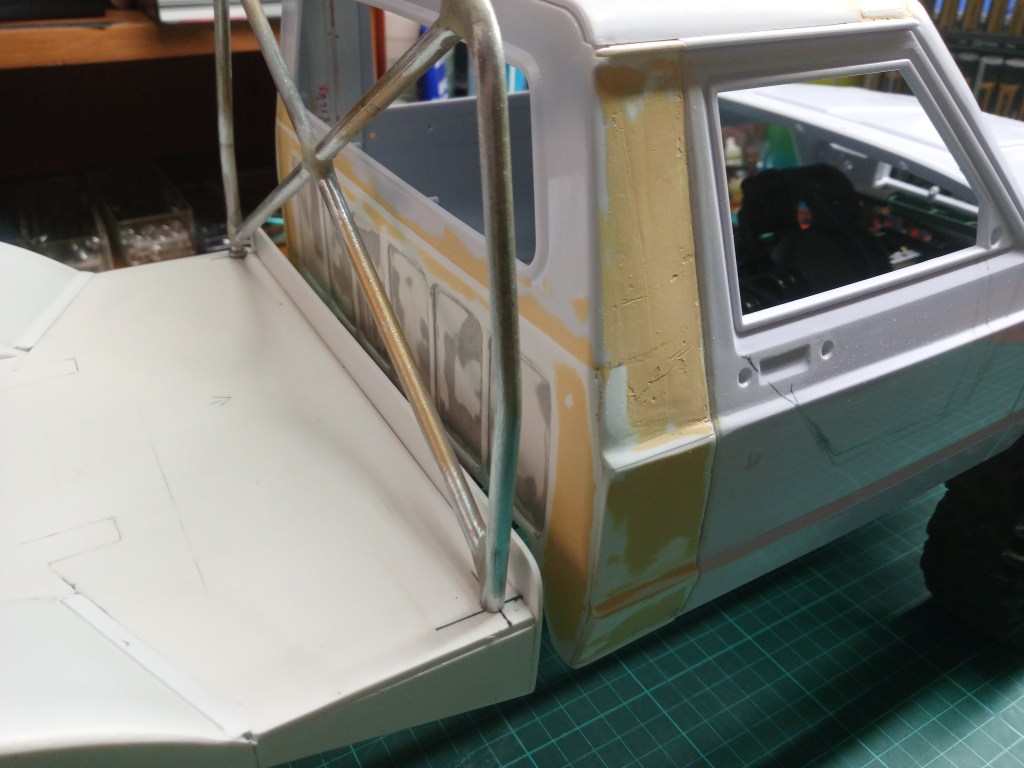
Als Modellbauer erinnere ich mich noch an lange zurückliegende Zeiten, wo in jedem größeren Ort ein Modellbauladen war. Jeder mit wenigen, ausgewählten Marken und Sortiment. Einige davon vermisse ich wirklich, aber Zeit und auch die Möglichkeiten verändern die Welt. So sind sie nahezu alle verschwunden, die kleinen Läden mit den versteckten Schätzen, verborgen in hölzernen Schubladen und ausrangierten Kartons. Alles weit entfernt von den heutigen Möglichkeiten, Preisgefüge, Ausführung und Anspruch. Internationale und kreative Hersteller haben uns Modellbau-Enthusiasten, atemberaubende Möglichkeiten geschaffen. Das lässt sich auf fast alle Wirtschaftsbereiche ausdehnen, Warum die Welt also nicht hochleben lassen, statt mit Isolation und Drohungen zu diskreditieren.
Allen Leserinnen und Lesern, auf diesem Weg die besten Weihnachtsgrüße, verbunden mit dem Wunsch nach Gesundheit, Frieden und einem guten Neuen Jahr.
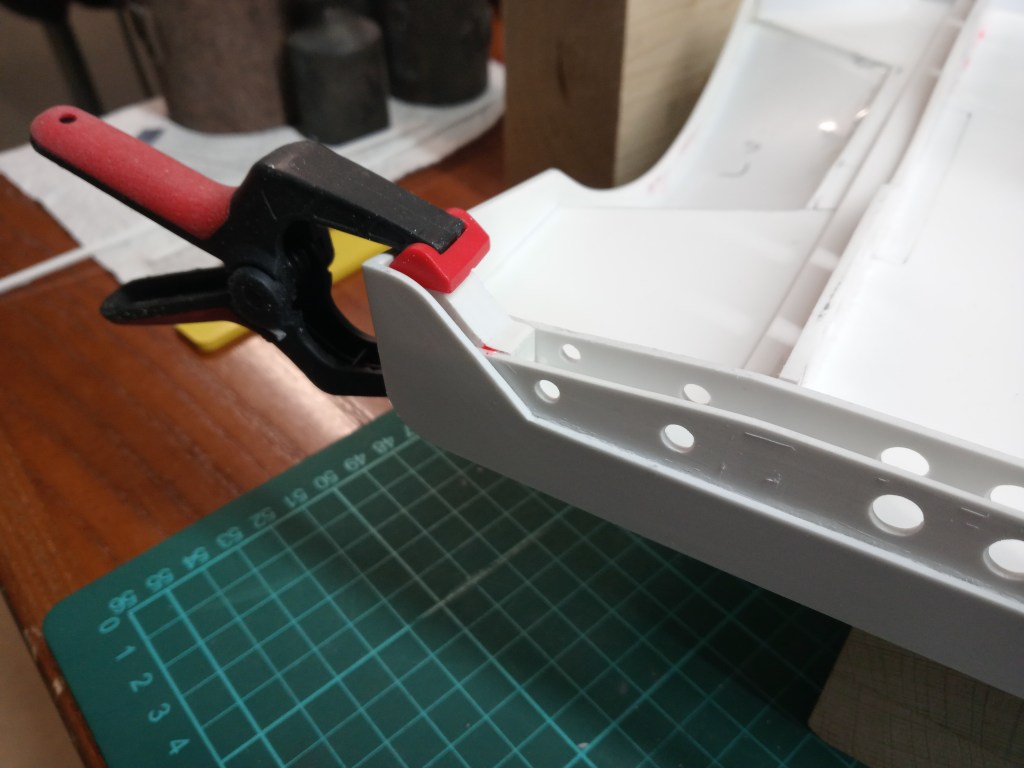
Nun aber zu den Fortschritten am Truggy Heck. Der Überrollbügel hat seinen Platz eingenommen. Ich wollte den Bügel nicht einfach irgendwie befestigen. Der Wunsch ihn eventuell für eine Reparatur wieder zu entfernen, war das Ziel. Der verwendete 2-Komponenten-Metallkleber, hat noch nicht mein volles Vertrauen, zumindest im Hinblick auf Haltbarkeit. Einmal mit der Ladefläche verklebt, bestünde im Fall der Fälle, die Gefahr eines Totalschadens.
An den Befestigungspunkten des Bügels wurden die Bohrlöcher angezeichnet.
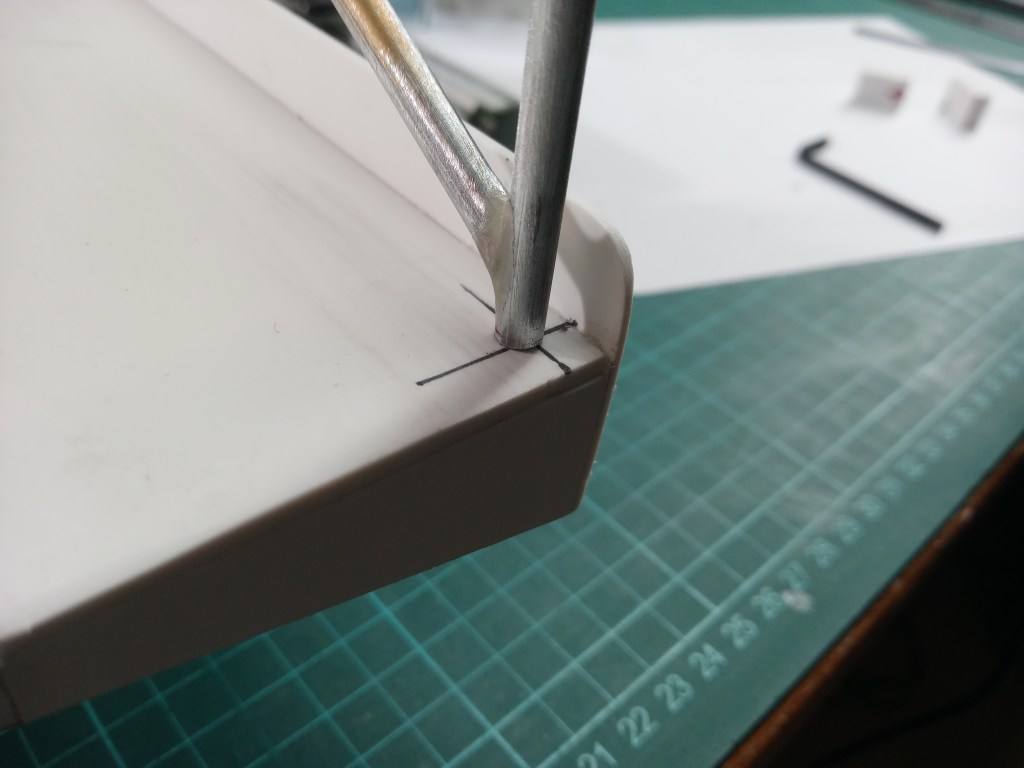
Der Innendurchmesser der Bremsleitung ist etwas größer als 3 mm. Ein 3 mm starker Aluminiumstab passt somit problemlos hinein, auch mit Kleber. Zum exakten anreißen der erforderlichen Bohrungen, wurde der Stab etwas angespitzt. Auch ohne Drehbank kein Problem. Den abgelängten Stift in die Bohrmaschine einspannen und mit einer Feile die Spitze herausarbeiten. Nachfolgend, noch ohne Gegenlager und ungekürzt, ragen sie aus den Bohrungen.

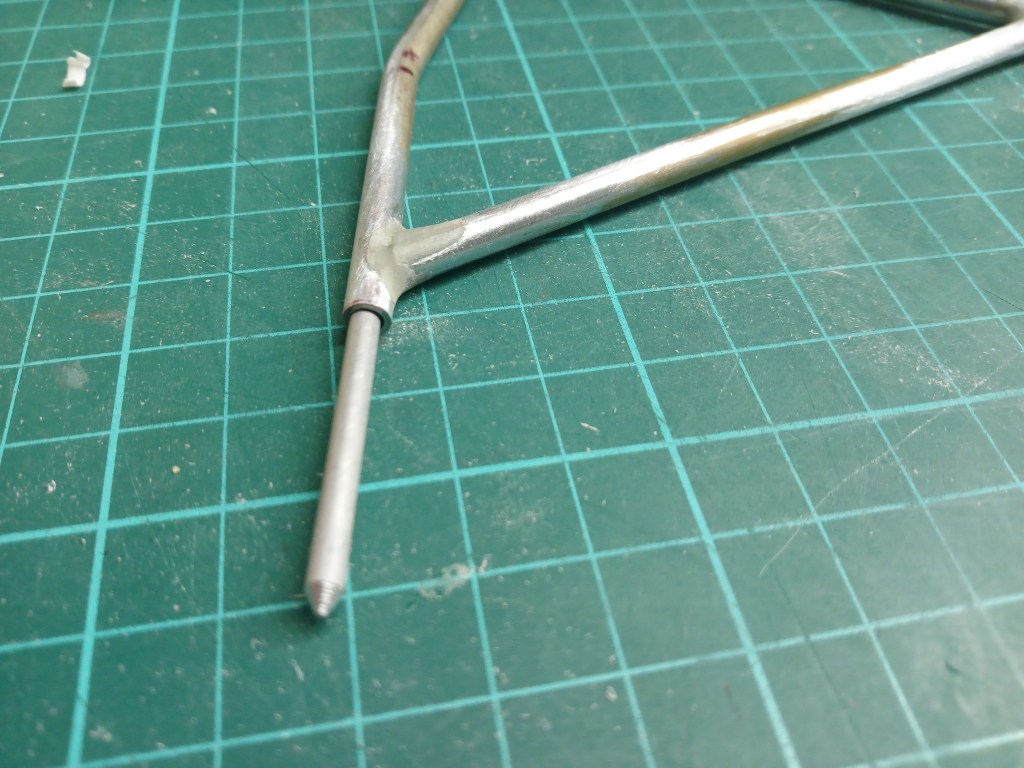
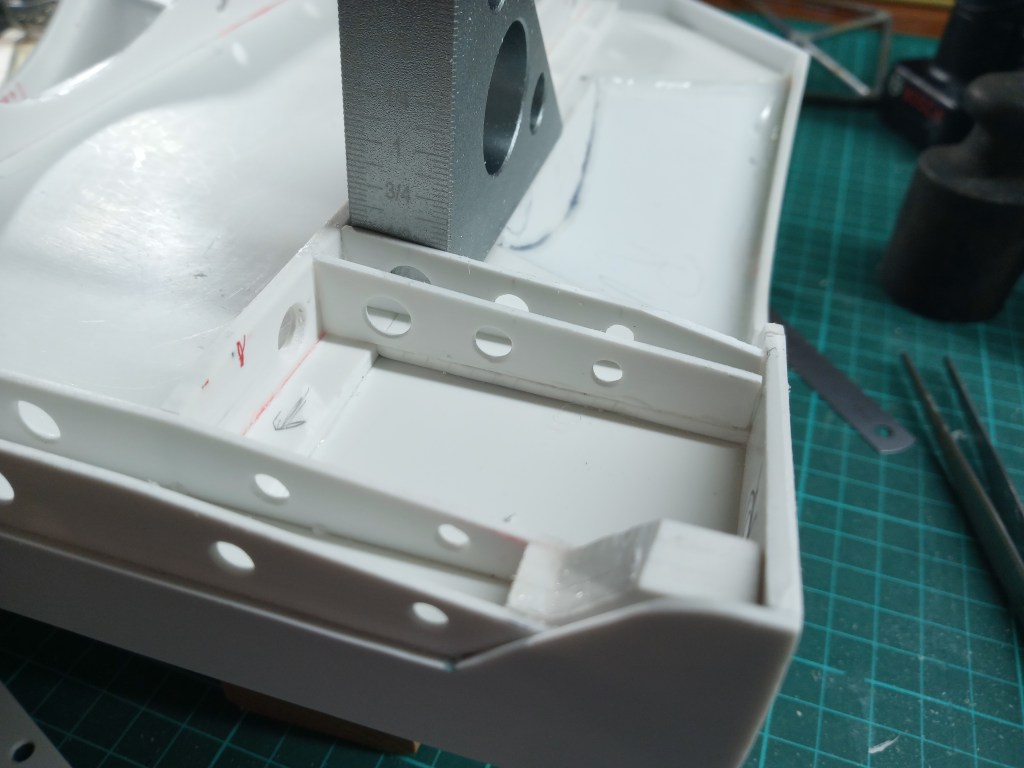
So sieht die Konstruktion der Bügelbefestigung im Detail aus. Der aus der Ladefläche ragende Aluminiumstab, wird aus Stabilitätsgründen soweit wie möglich ins Rohr eingeschoben. Am unteren Ende des Bügels kommt eine Befestigungsplatte. Diese wird mit mindestens 4 Schrauben M 1,5 in der Ladefläche verschraubt. Ich hoffe, dass es so ausreichend stabil wird. In Verbindung mit den beiden nach hinten laufenden Stützstreben, sollte das aber möglich sein.
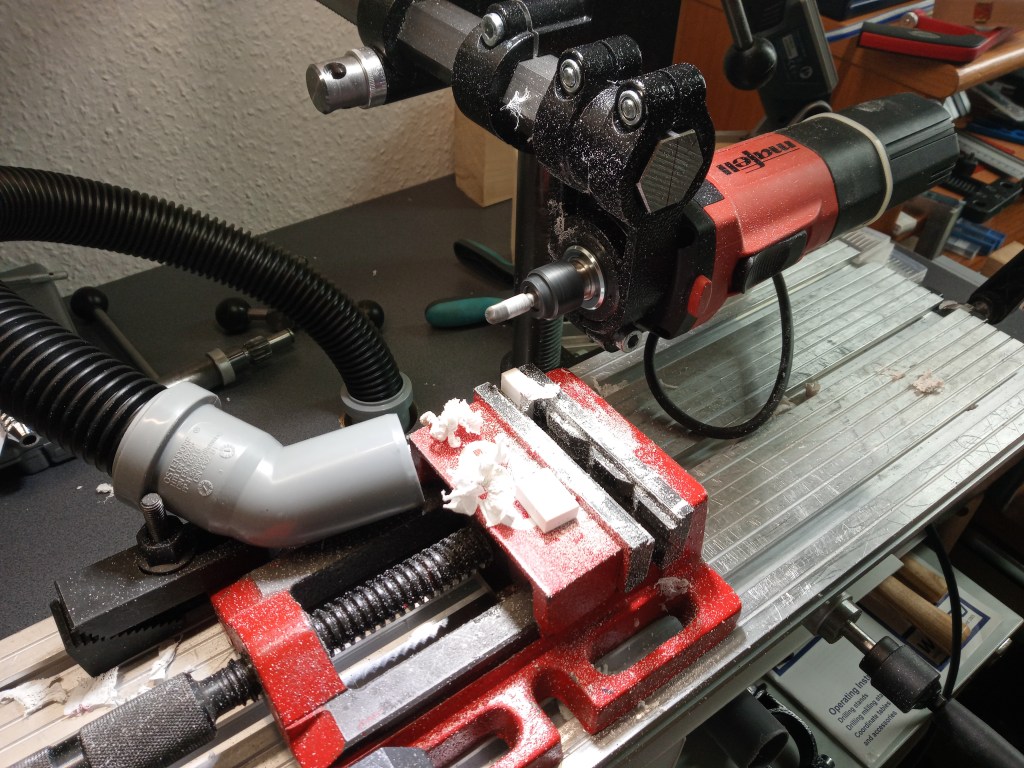
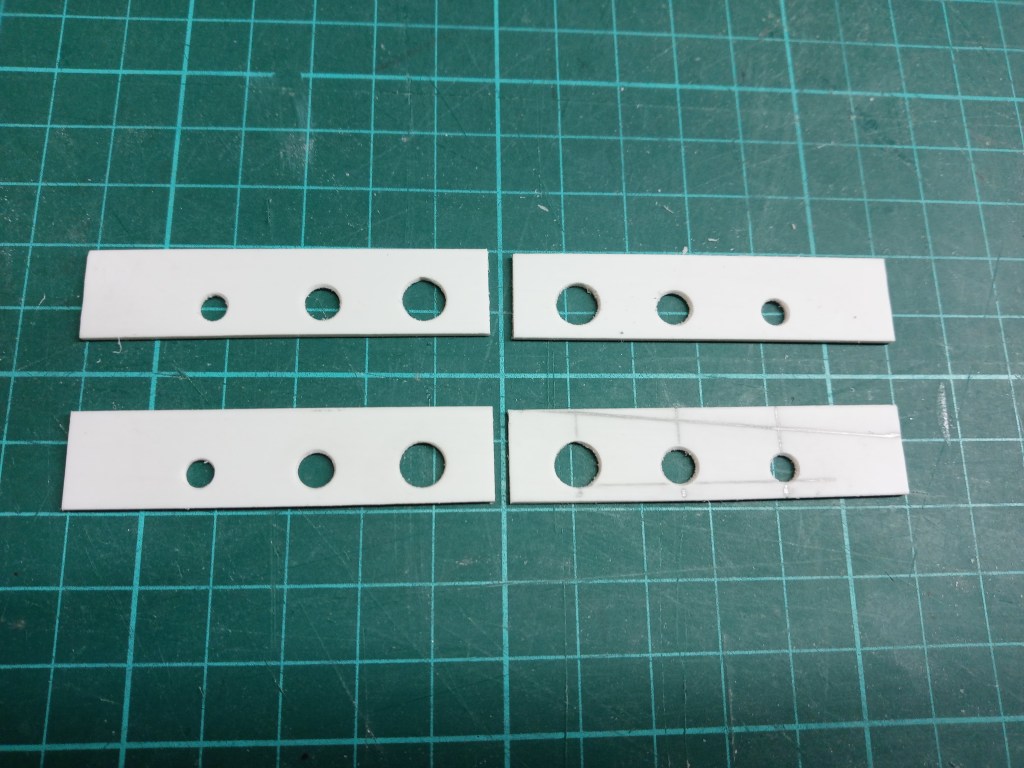
Das alles ergibt aber noch keinen richtigen Halt. Etwas massivere Kunststoffteile mussten also her. Mehrlagig verklebte Reste gab es genug. Am Koordinatentisch wurde fleißig gewerkelt. Die Bauteile winklig, auf Stärke und Länge anpassen. Immer wieder ein unvergleichliches Erlebnis, wenn der Kunststoffspann hauchdünn abgetragen wird.
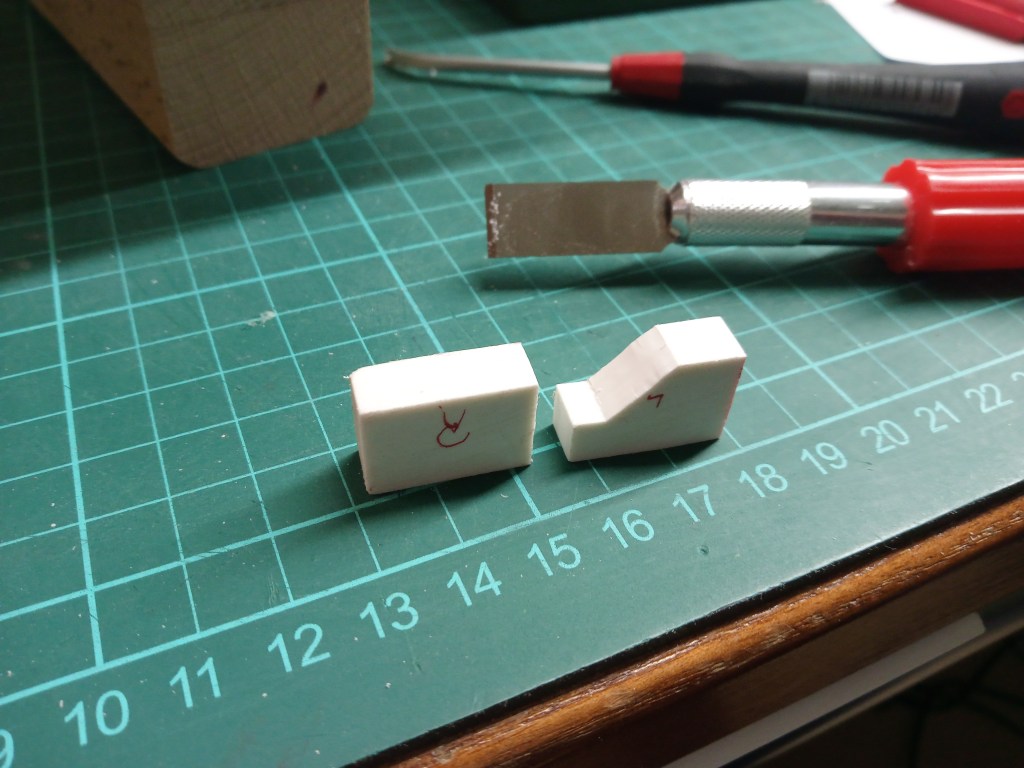
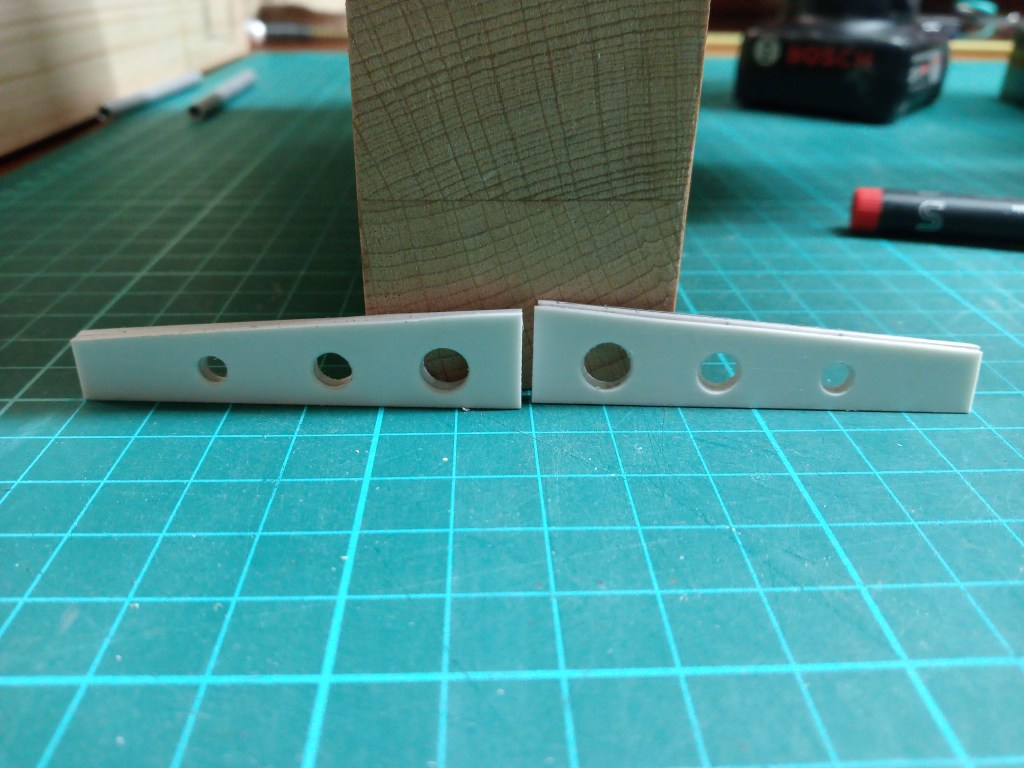
Zurück bleiben zwei kleine, rechteckige Bauteile. Die dann noch an die Kontur des Trägers angepasst…
… und jeweils beidseitig verklebt wurden.
Die Bohrung auf der Oberseite wurde nun bis in den bereits verklebten Block, fortgeführt. Der Bügel steht nun fest fixiert, bis auf die Bodenbefestigungsplatten.
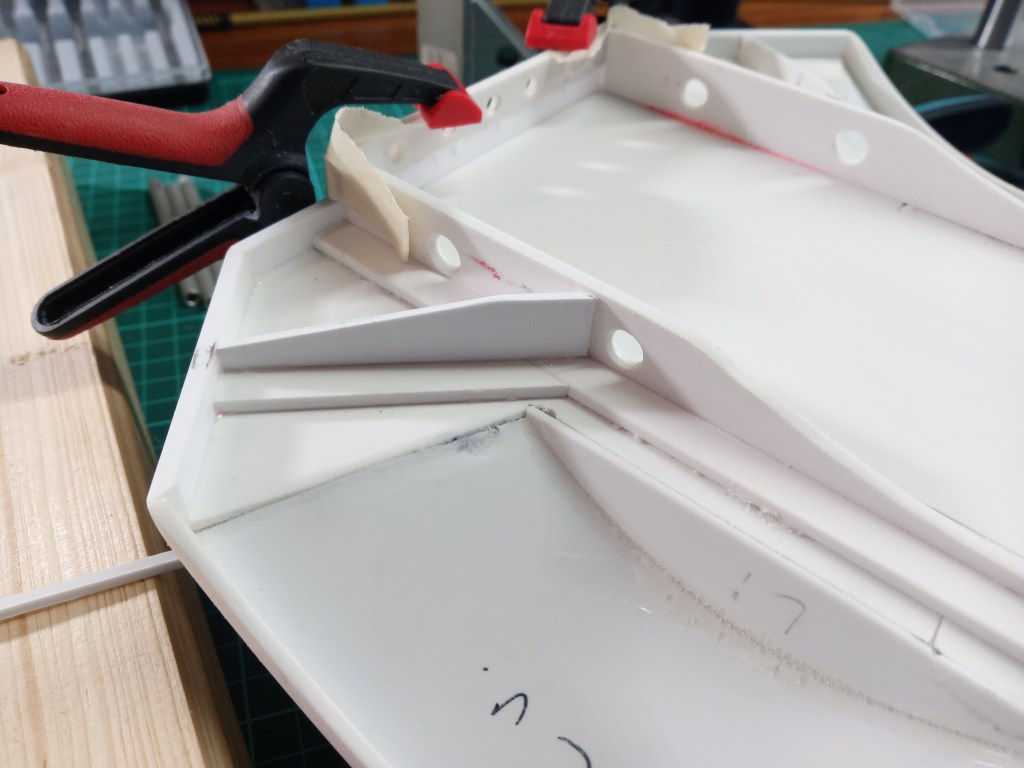
Die Stabilisierung des Ladeflächenbodens schreitet indessen weiter voran. Vor den Radkästen wurden die ersten Elemente angefertigt. Die seitlichen Stege sind schon gebohrt und eine Kontur ist vorgezeichnet.
Anpassung an die spätere Form und Abmessungen…
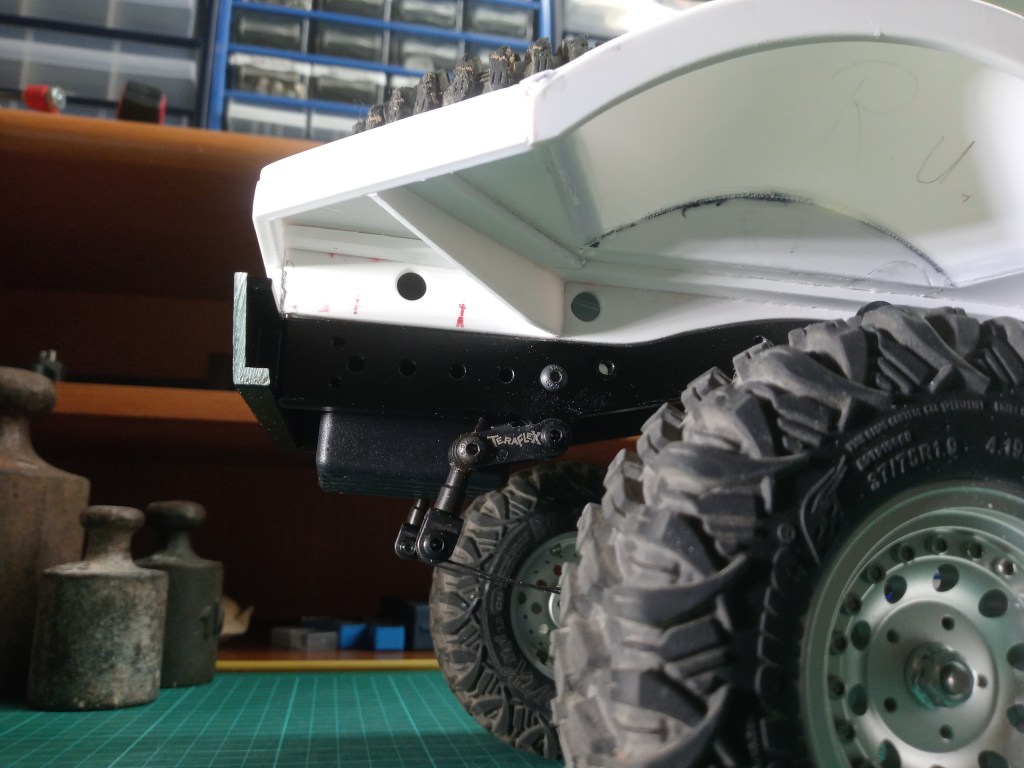
… und hier rechts vorne eingebaut.
Die vorderen Traversen im Endzustand.
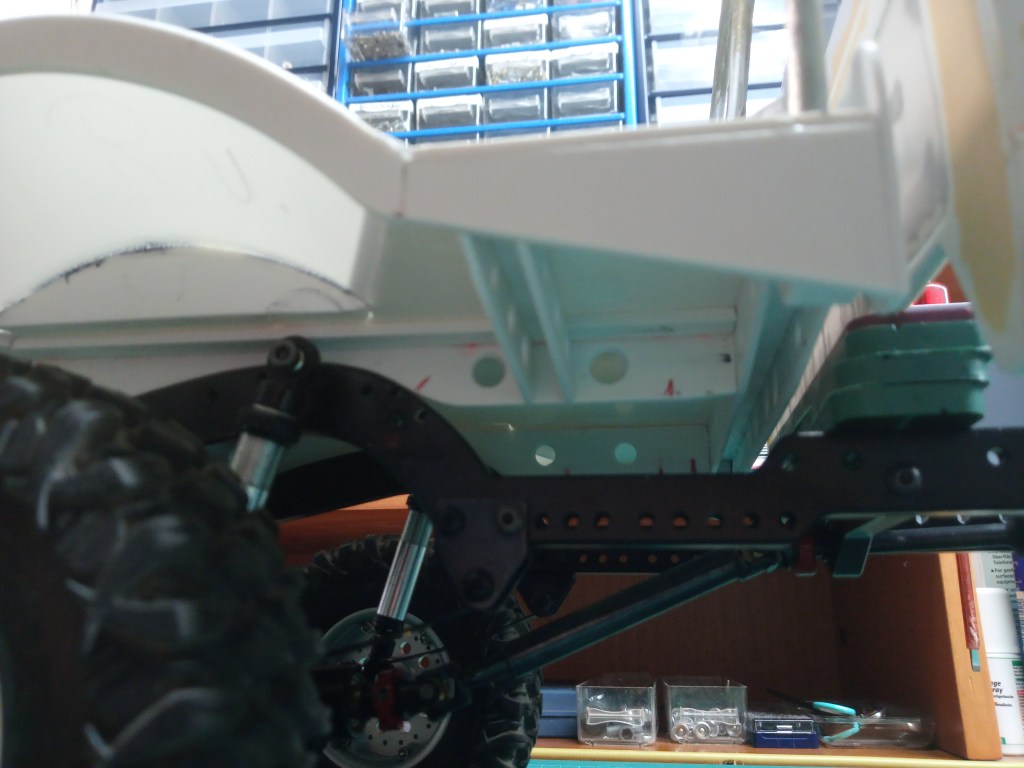
Zum Abschluss der Stabilisierungsarbeiten, das Ganze noch einmal am Heck, nach bewährtem Muster. Die Basis…
verklebt…
und fertigestellt. Wenn auch nicht ganz so wie geplant. Demnach sollte auch hier ein U-Profil verbaut werden. Wie auf dem Bild erkennbar, würde das Bauteil aber im Bereich der Rahmenbohrung enden. Das war natürlich ausgeschlossen und so muss ich meinen Fehler auf andere Art lösen. Ich überlege schon und habe auch etwas im Sinn. Das Ergebnis demnächst…
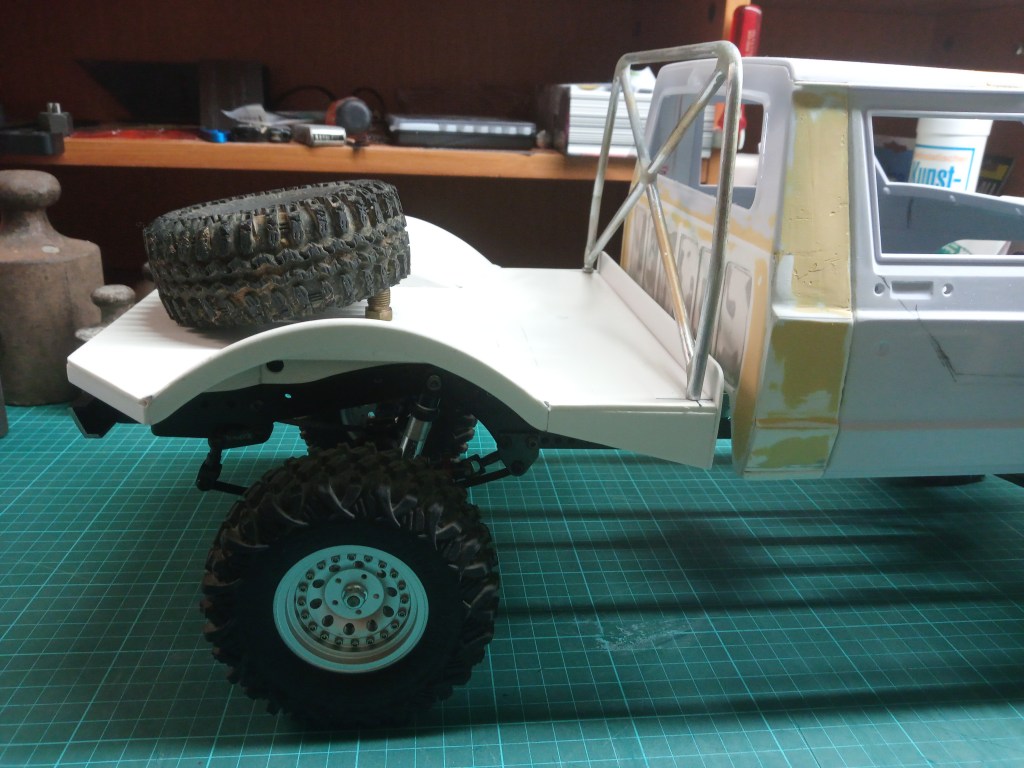
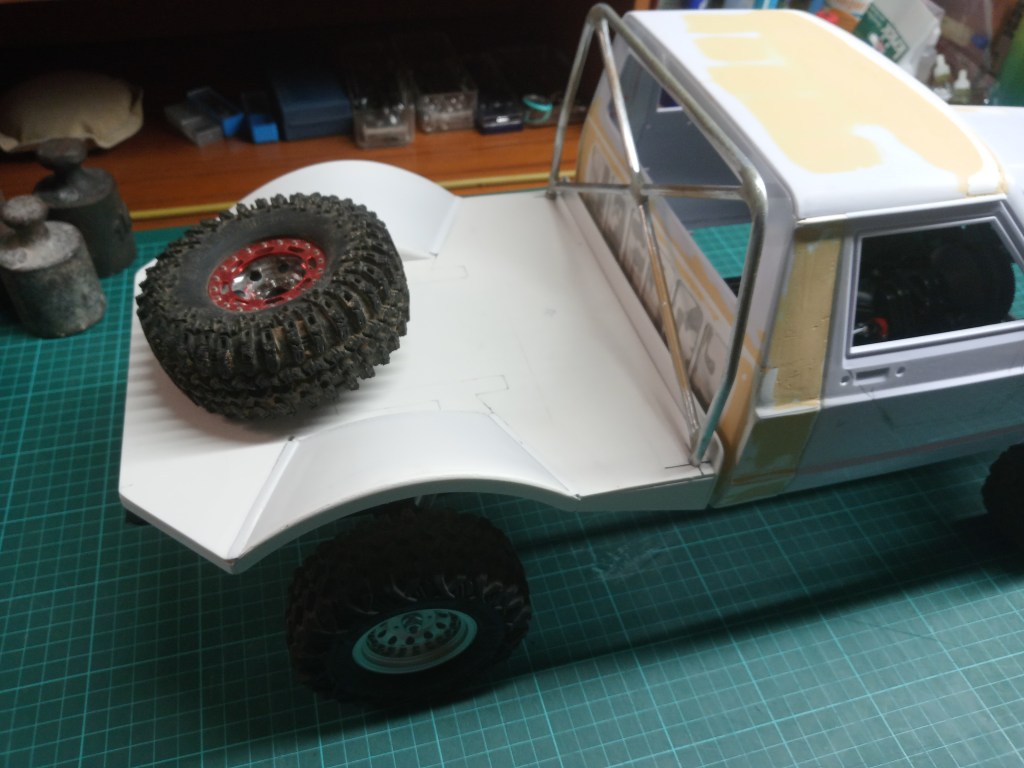
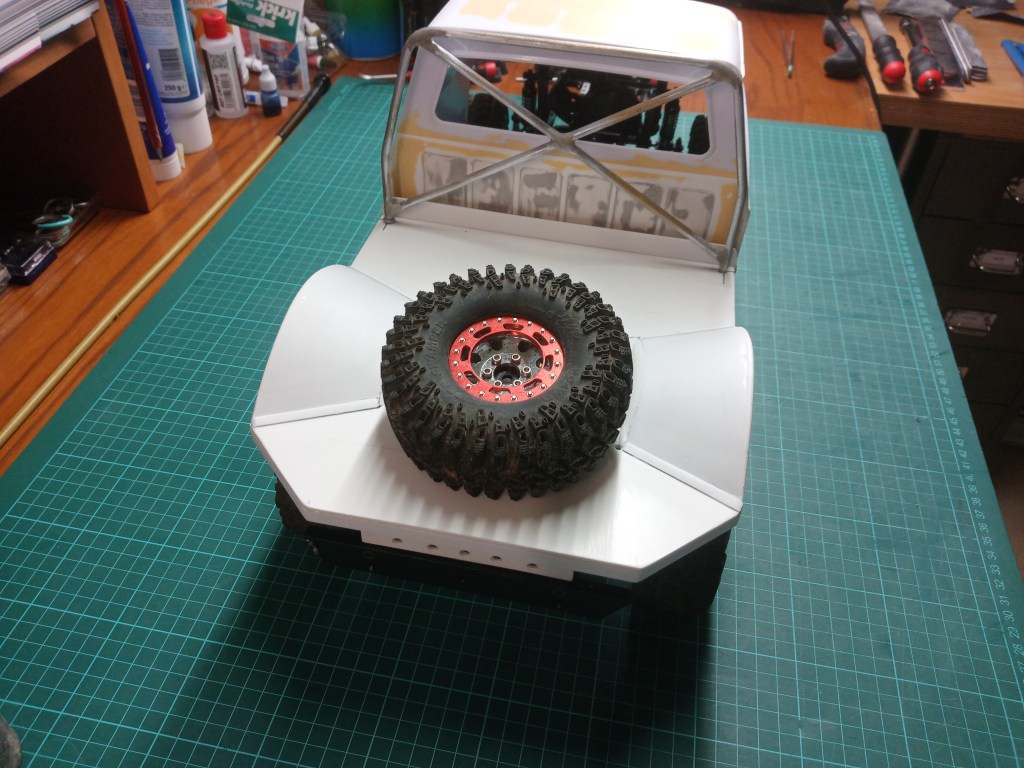
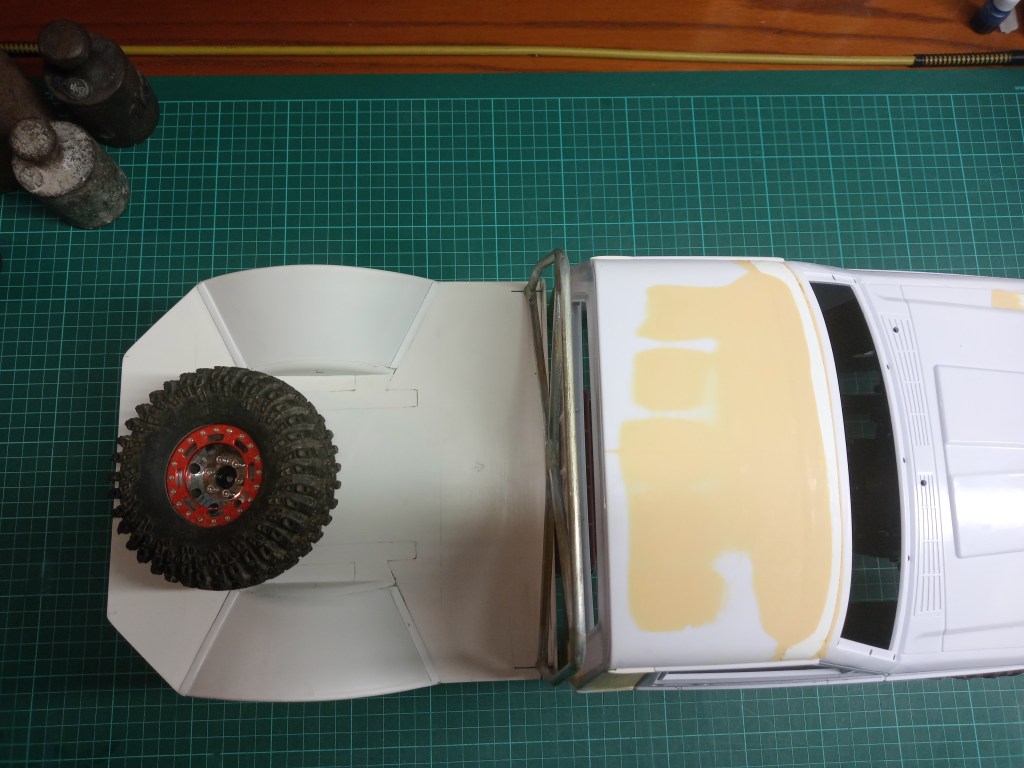
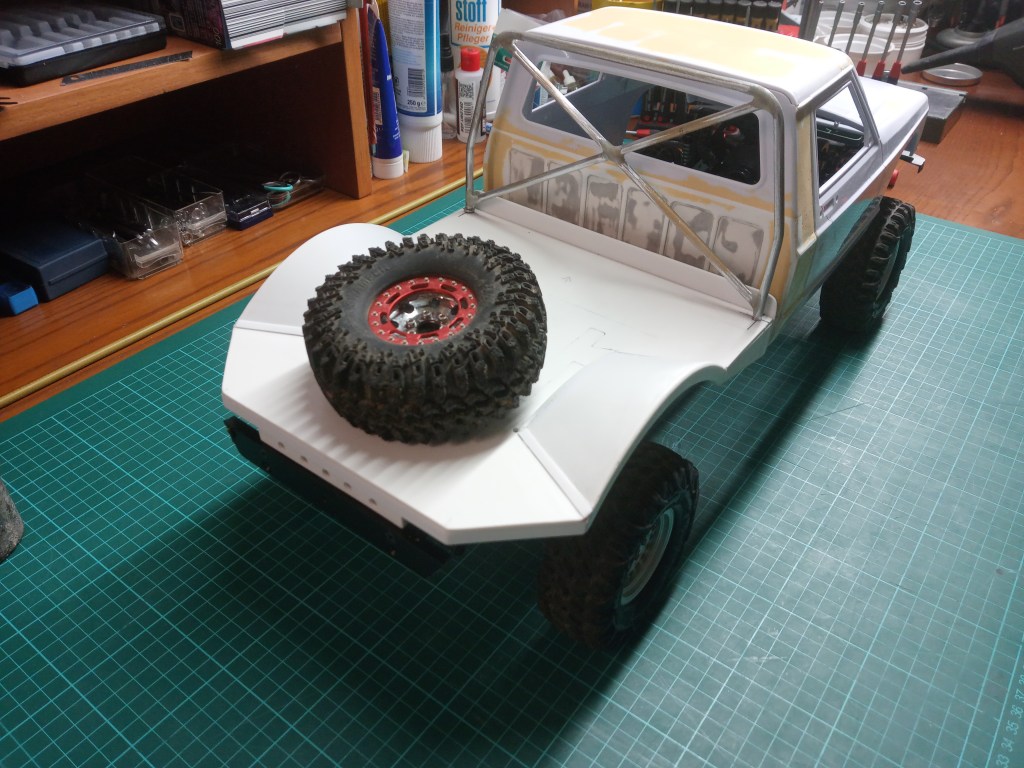
Zum Jahresabschluss noch einige Perspektiven vom gegenwärtigen Baustand.
Wird schnellstmöglich fortgesetzt…
English Version
Merry Christmas, all the best and health in the New Year!
Another year is coming to an end. In a few days it will be Christmas. A time to write down some personal words as well.
The world is out of control. Insight, cohesion and especially the willingness to solve acute problems are unfortunately only recognizable in isolated cases. As the world becomes more and more dependent on each other economically, egoism and nation-statehood are developing more and more.
As a model builder, I remember long ago when there was a model store in every larger town. Each with a few select brands and assortment. I really miss some of them, but time and also opportunities change the world. So they are almost all gone, the small stores with hidden treasures, hidden in wooden drawers and discarded boxes. All far from today’s possibilities, price structure, execution and demand. International and creative manufacturers have created us modeling enthusiasts, breathtaking opportunities. This can be extended to almost all sectors of the economy, so why not let the world live high, instead of discrediting with isolation and threats.
To all readers, on this way the best Christmas greetings, combined with the wish for health, peace and a good New Year.
But now to the progress on the Truggy tail. The roll bar has taken its place. I didn’t want to just fix the bar somehow. The desire to eventually remove it for repair was the goal. The 2-component metal adhesive used, does not yet have my full confidence, at least in terms of durability. Once glued to the loading area, there would be in the event, the risk of a total loss.
The drill holes were marked at the mounting points of the bracket.
The inner diameter of the brake line is slightly larger than 3 mm. A 3 mm thick aluminum rod therefore fits in without any problems, even with glue. For exact marking of the required holes, the rod was sharpened a bit. No problem even without a lathe. Clamp the cut-to-length pin in the drill and work out the tip with a file. In the following, still without counter bearing and untrimmed, they protrude from the bores.
This is how the construction of the bracket fastening looks in detail. The aluminum rod protruding from the loading area is pushed into the tube as far as possible for stability reasons. A fastening plate is placed at the lower end of the stirrup. This is screwed into the loading area with at least 4 M 1.5 screws. I hope that it will be sufficiently stable this way. In conjunction with the two support struts running to the rear, however, it should be possible.
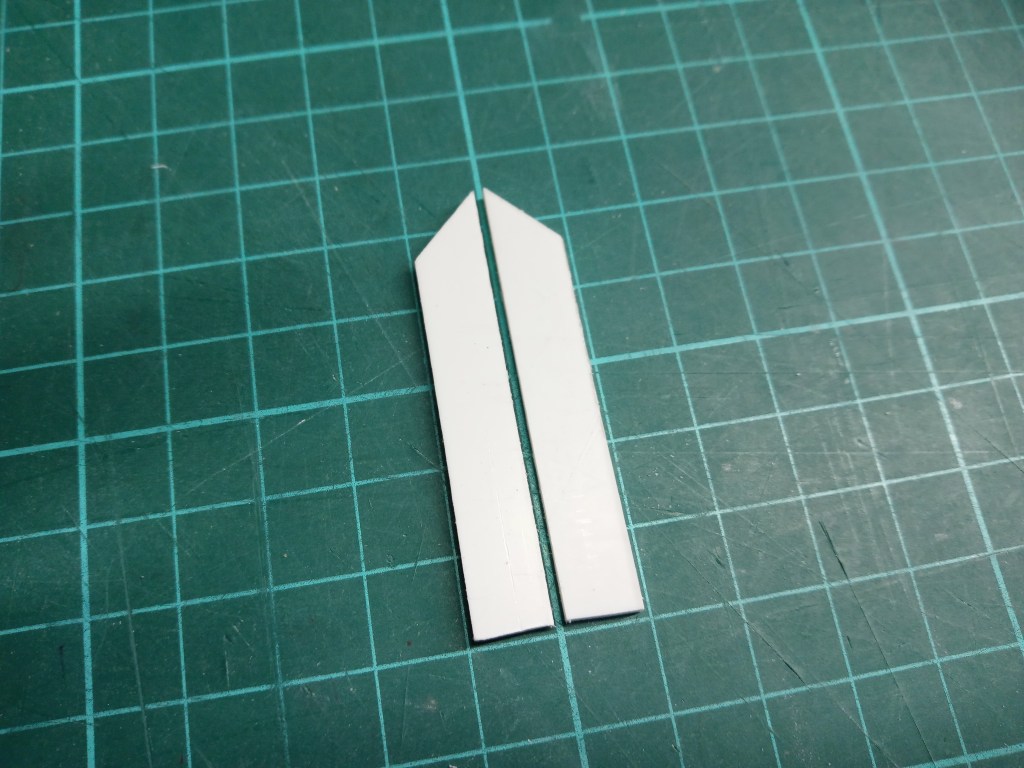
But all this does not give a proper hold yet. More solid plastic parts had to be used. There were enough glued multi-layer remnants. At the coordinate table we worked diligently. The parts were angled, adjusted to thickness and length. It is always an incomparable experience to see the plastic chip being removed in wafer-thin layers.
Two small, rectangular components remain. These are then adapted to the contour of the carrier…
… and glued on both sides.
The drilling on the top side was now continued into the already glued block. The bracket is now firmly fixed, except for the bottom mounting plates.
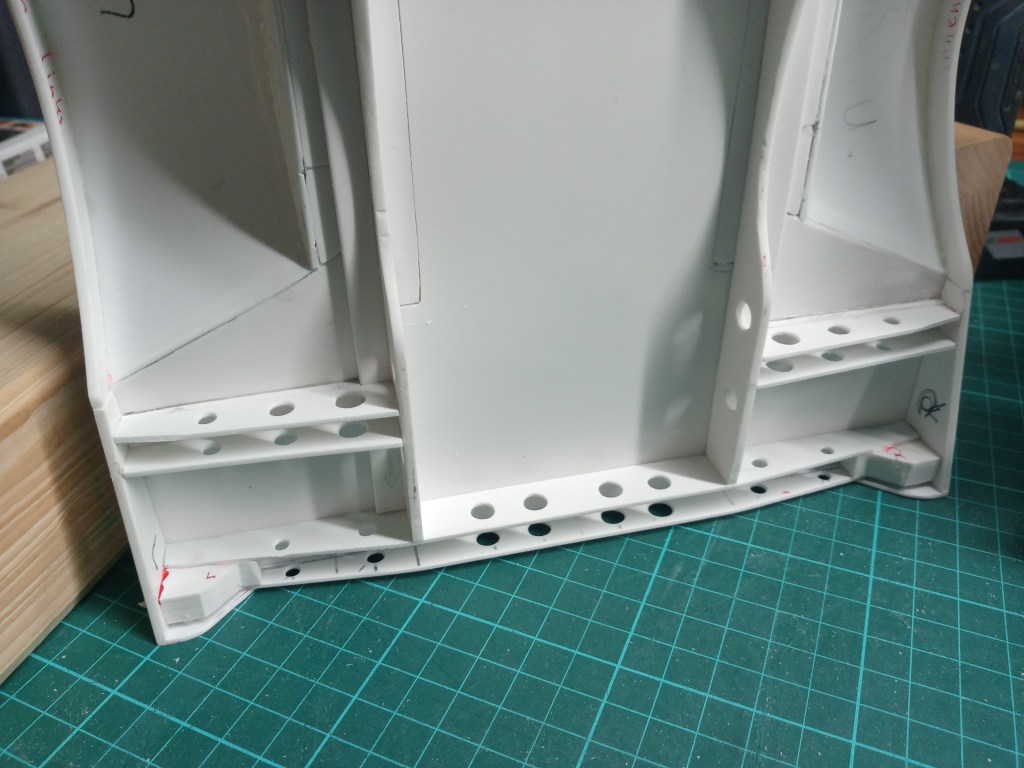
Meanwhile, stabilization of the loading area floor continues to progress. The first elements have been made in front of the wheel housings. The lateral webs have already been drilled and a contour has been drawn.
Adjustment to the later shape and dimensions…
… and here right front installed.
The front trusses in their final state.
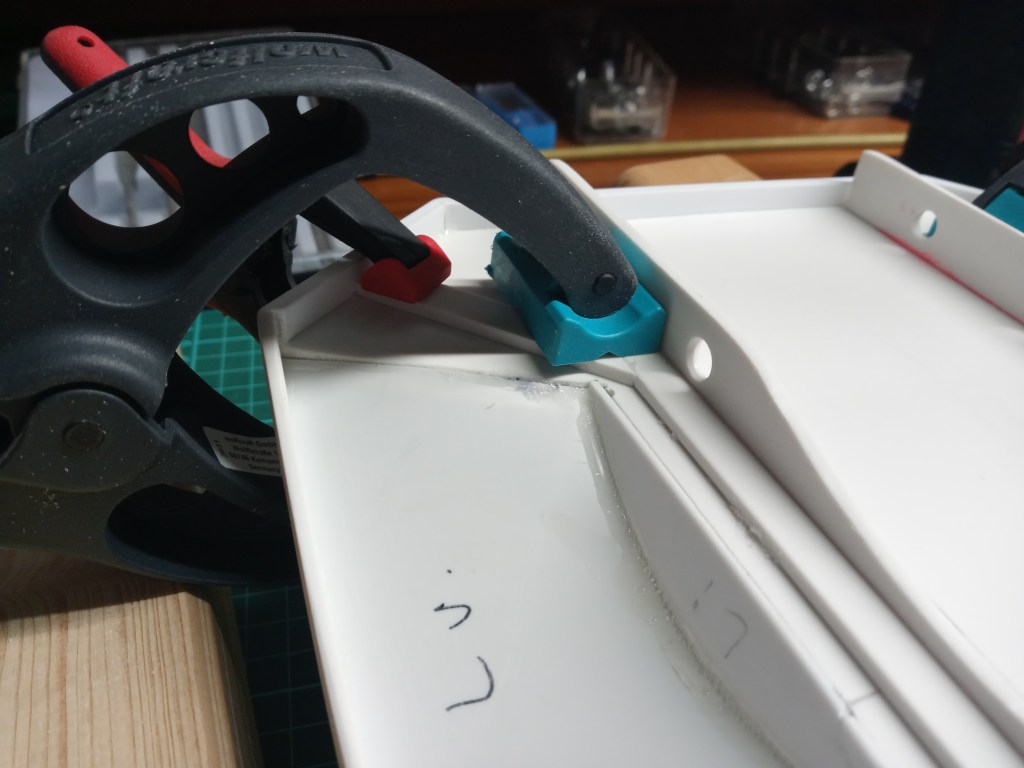
At the end of the stabilization work, the whole thing again at the rear, following the proven pattern. The base…
glued…
and finished. Even if not quite as planned. According to this, a U-profile should also be installed here. But as you can see on the picture, the component would end in the area of the frame hole. This was of course impossible and so I have to solve my mistake in another way. I am already thinking about it and also have something in mind. The result soon…
At the end of the year some perspectives of the current state of construction.
Will be continued as soon as possible…
Translation, with the kind support of deepl.com
