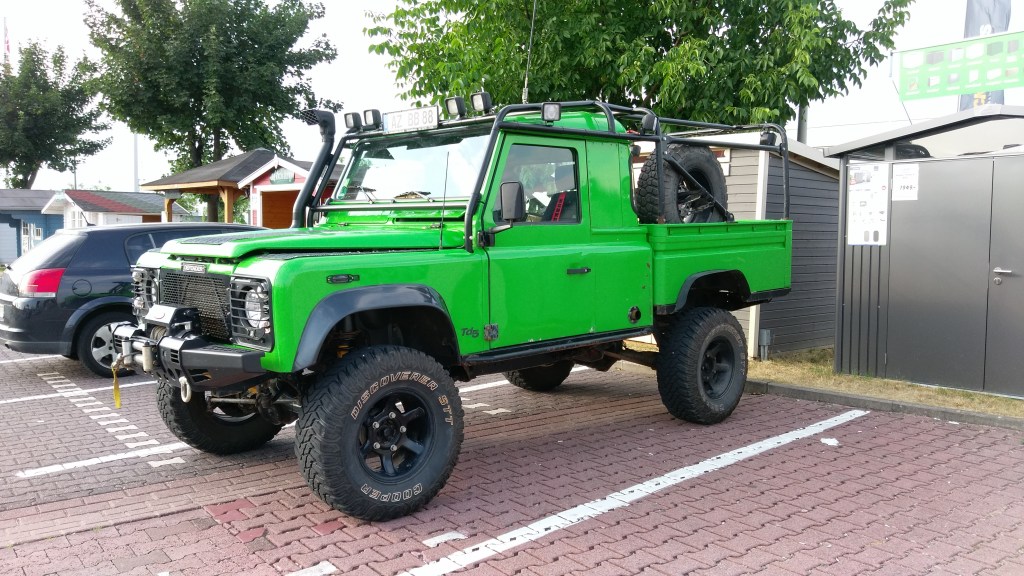
Seit meinem Entschluss, den Wiedereinstieg in den RC-Modellbau zu starten, ist einiges geschehen. Mit dem Kauf eines Boom Racing-Chassis auf Defender-Basis hatte es begonnen. Entstehen sollte ursprünglich ein Defender Pickup, nach dem folgenden Vorbild.
Beim Suchen und Recherchieren kam dann ein Modell dazwischen, das alle Planungen komplett über den Haufen warf. Ein sehr seltener Jeep Pickup fuhr über meinen Bildschirm. Einige faszinierende Videos folgen…
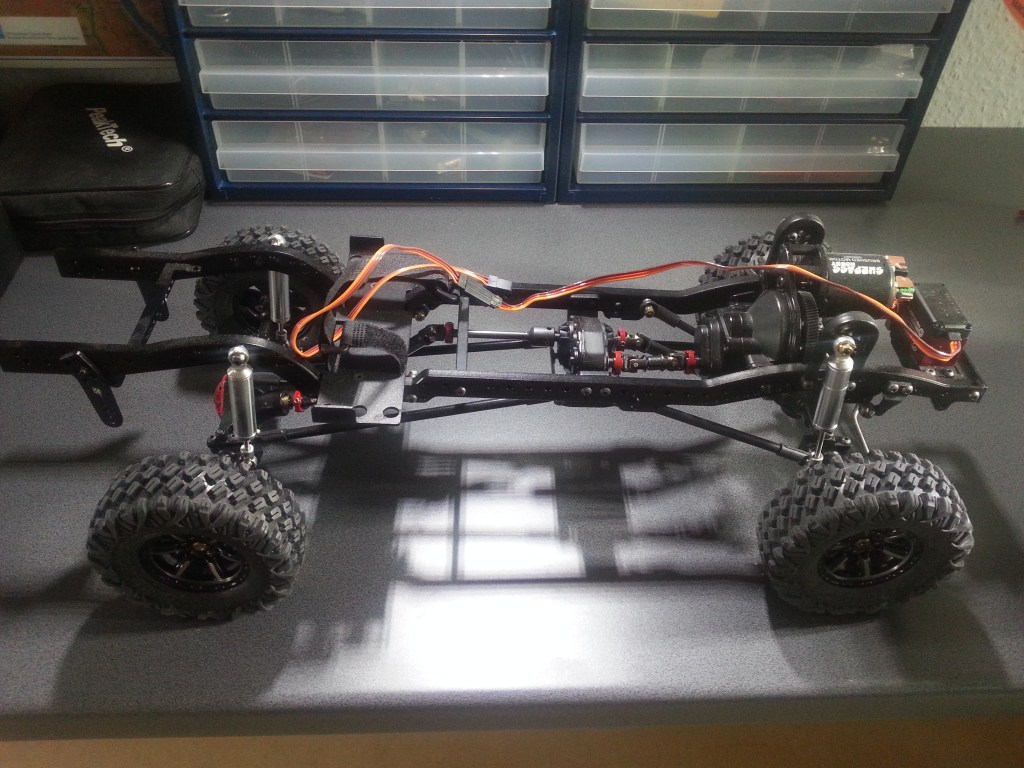
Angesichts dieser Bilder befiel mich eine fast grenzenlose Begeisterung. Mir war damals aber noch nicht bewusst, welcher Weg damit vor mir lag. Der Comanche im Video fuhr auf einem Axial SCX10 II Fahrwerk, ausgelegt auf 313 mm Radstand. Das Original hatte ich bis dahin noch nie gesehen, von den technischen Daten ganz zu schweigen. Die Comanche Karosserie wurde auf jeden Fall schon einmal begeistert angeschafft. Der Startschuss für einen schwer nachvollziehbaren Weg, aus heutiger Sicht auch für mich. Nichts passte zusammen. Mein Boom Racing-Fahrgestell war für diese Karosserie schlicht zu lang.
Daher herrschte erst einmal Ratlosigkeit. Als Tüftler hatte ich aber auch erkannt, dass gekürzte Fahrwerksstreben, die Achsen und Räder in den Radkästen zentrieren. Also doch alles kein Problem!?
Als Liebhaber realistischer Fahrzeugoptik, wurden im Anschluss die technischen Daten des Comanche recherechiert. Jetzt kam das Kartenhaus gehörig ins Wanken. Das Ergebnis meiner Recherchen, auch am Comanche Modell passte ein großer Teil nicht zum Original. Das Ausmaß der Baustelle wuchs in einem nicht geplanten Umfang. Damaliges Fazit; der Rahmen ist für die Karosserie zu lang, der Radstand ebenso. Die Karosserie hingegen war zu kurz. Als Lösungsschritt wurde ein Conversion Kit dazu gekauft. Es sollte den Radstand auf 313 mm verkürzen. Nach Herstellerangeben konnten alle Teile des Defender-Chassis weiter verwendet werden. Um den Berichtsumfang nicht zu sprengen und auch die Vielzahl, der mit dieser Kombination verbundenen Probleme nicht noch einmal zu wiederholen, eine Kurzfassung. Wer es gerne einfach mag, sollte besser die Finger von dieser Kombination lassen… 🤐
Nachdem meine erfolglosen Umbauversuche gescheitert waren, wurde das Boom Racing-Chassis wieder in den Ursprungszustand zurück gebaut. Sein Radstand lag somit wieder bei 331 mm. Die technischen Daten des Comanche, intern auch als Typ MJ bezeichnet, ergaben einen Radstand von 2.870 mm. Eine weitere wichtige Erkenntnis meiner Recherchen, das Comanche Modell hat einen Maßstab von etwa 1:8,3. Daraus leitet sich der Modellradstand ab, 2.870 / 8,3 = 346 mm. Mathematisch also das nächste Problem. Jetzt ist der bis dahin zu lange Rahmen, schlicht zu kurz. Meine Konfusion war auf einem vorläufigen Tiefpunkt…😥
Das bildschöne Boom Racing-Fahrgestell war seit diesem Zeitpunkt nahezu fahrfertig montiert, im Regal geparkt.
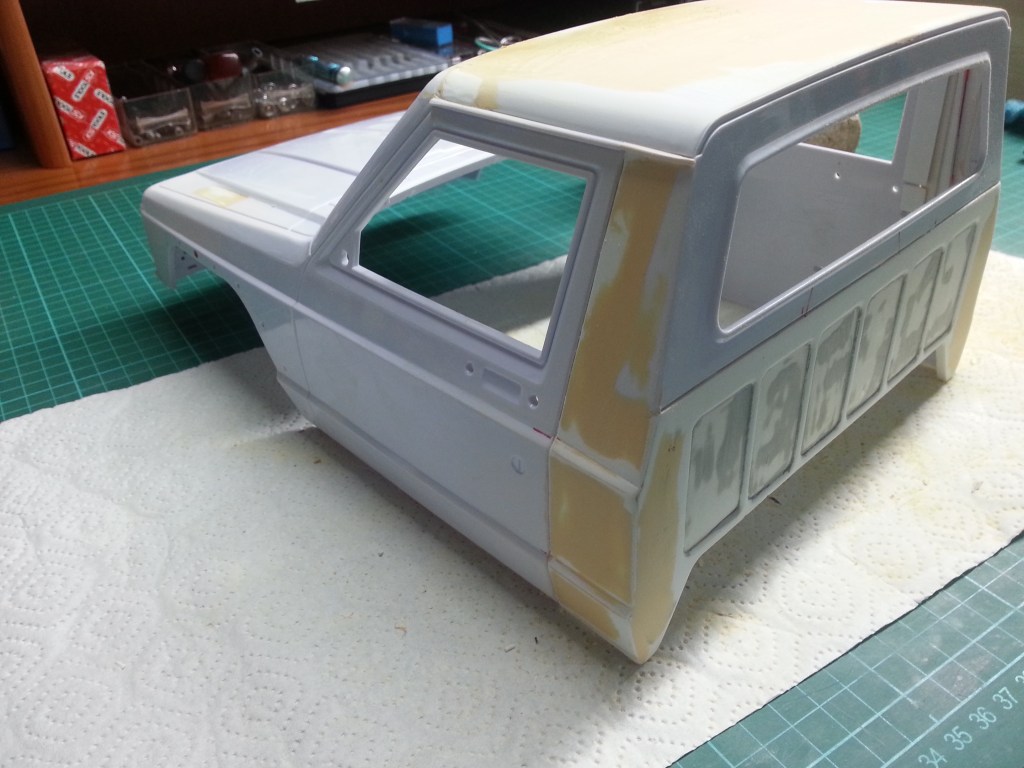
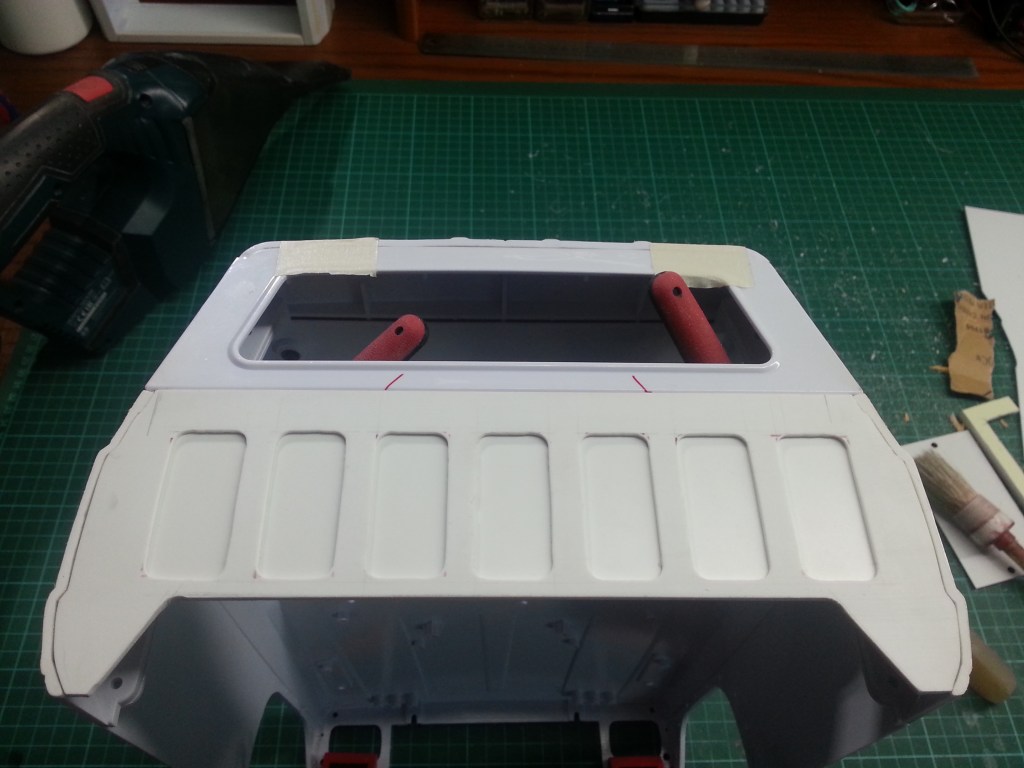
Mein Augenmerk galt ab diesem Zeitpunkt für lange Zeit dem Fahrerhaus. Da es im Vergleich zum Original zu kurz ist, wurde es kurzerhand verlängert. Am Dach und den beiden Seitenteilen. Das daraus entstandene Ergebnis, ein Fahrerhaus für einen Comanche Truggy, wurde im letzten Beitrag vorgestellt. Der Weg zu diesem Fahrerhaus war kein einfacher Weg. Für mich zumindest, da ich mit der Verarbeitung von Polystyrol und ABS, bis zu diesem Zeitpunkt keinerlei Erfahrungen hatte. Dazu kammen auch die vielen Fragen, wie eine Karosserie überhaupt zu bauen ist. Angesichts des inzwischen von mir gewählten Weges und fortgeschrittenen Baustandes, eine auch weiterhin offene Frage. Die unvermeidlichen Härten des Geländefahrens werden irgendwann diese Frage beantworten. Und so sieht das Truggy-Fahrerhaus im Moment aus.
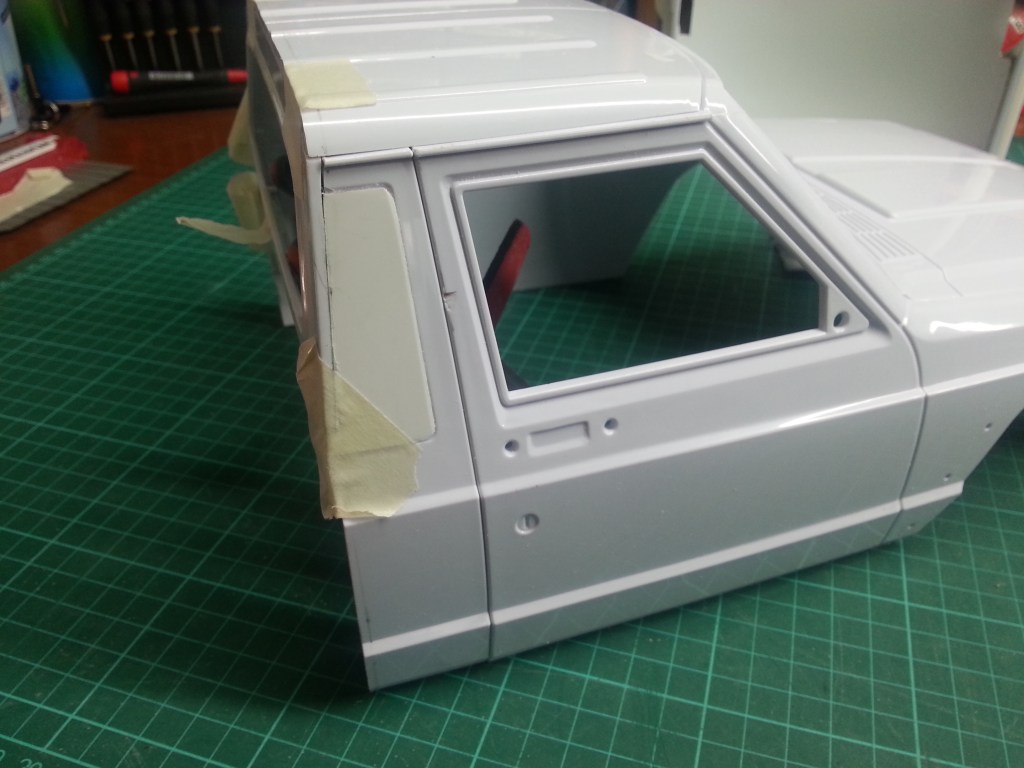
Genau die bei meinem Umbau entstandenen Probleme, haben mich schliesslich zu einem Versuch veranlasst. Ziel war es eine möglichst realistische Karosserie, mit geringerem Aufwand zu bauen. Das führte schliesslich zum Modell des Cherokee. Dessen Fahrerhausgrundlagen sind nahezu identisch. Meine Annahme, den Cherokee im Bereich der hinteren Türen abzuschneiden und die Reste der Fensteröffnungen zu verschliessen, waren eine empfehlenswerte Variante. In Verbindung mit einem zweiten Comanche, wurde dessen Rückwandoberteil eingepasst. Das Rückwandunterteil war dann wieder ein kompletter Eigenbau. Als Ergebnis entstand ein zweiter Comanche. Jetzt mit einem Fahrerhaus, nahe am Original und deutlich einfacher umzubauen. Auf dem Foto mit Ladefläche und in fast aktueller Konfiguration abgebildet.

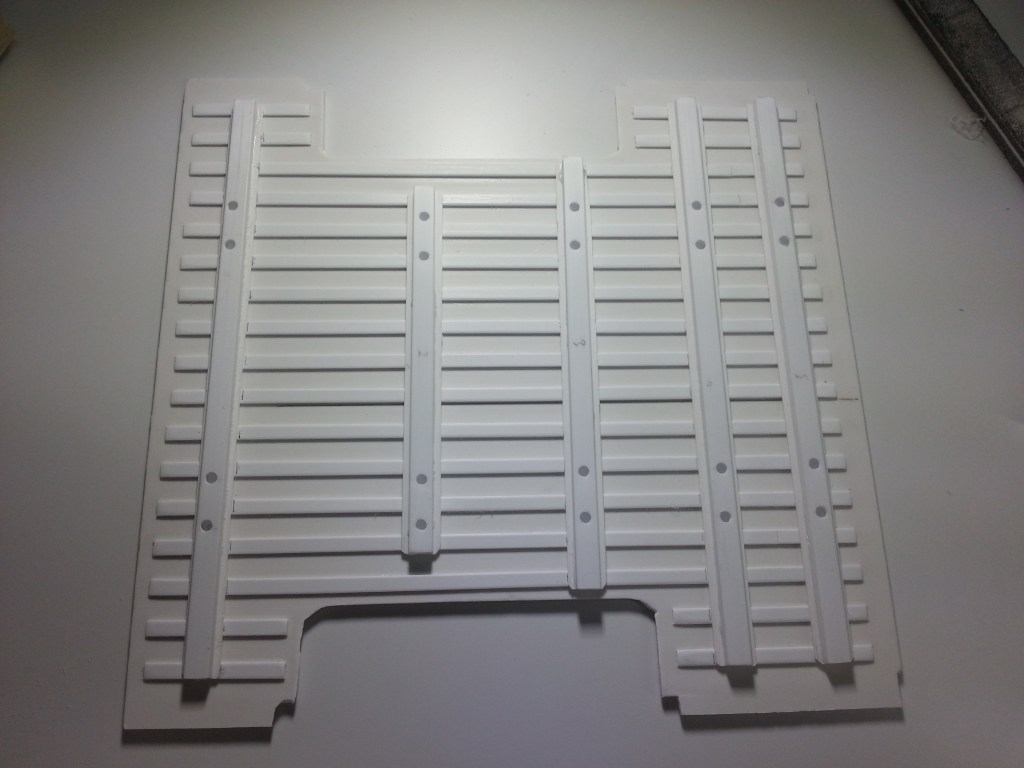
Eine Großbaustelle wurde schliesslich die Ladefläche. Sie wurde restlos zersägt. Stirnseite- und Ladebordwand wurden entfernt und ebenso die komplette Ladefläche. Hier ist der Baustand relativ zeitnah, aus den letzten Beiträgen ersichtlich. Sie ist schon im Rohbau ein echter Blickfang geworden. Von oben …
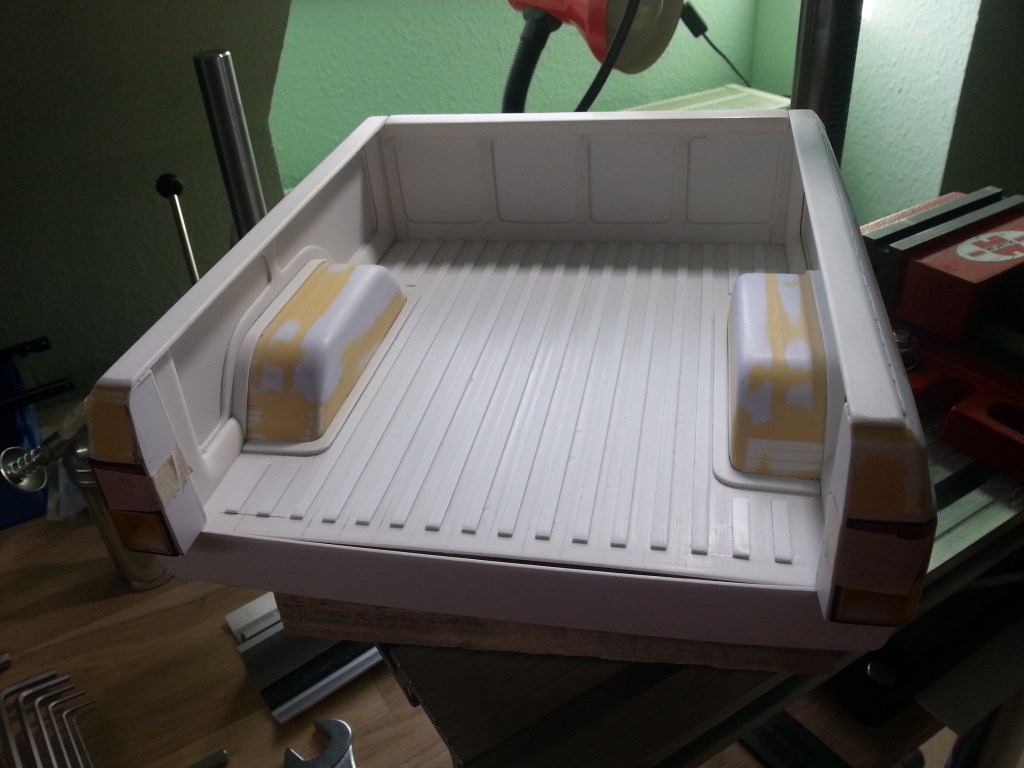
…und auch von unten.
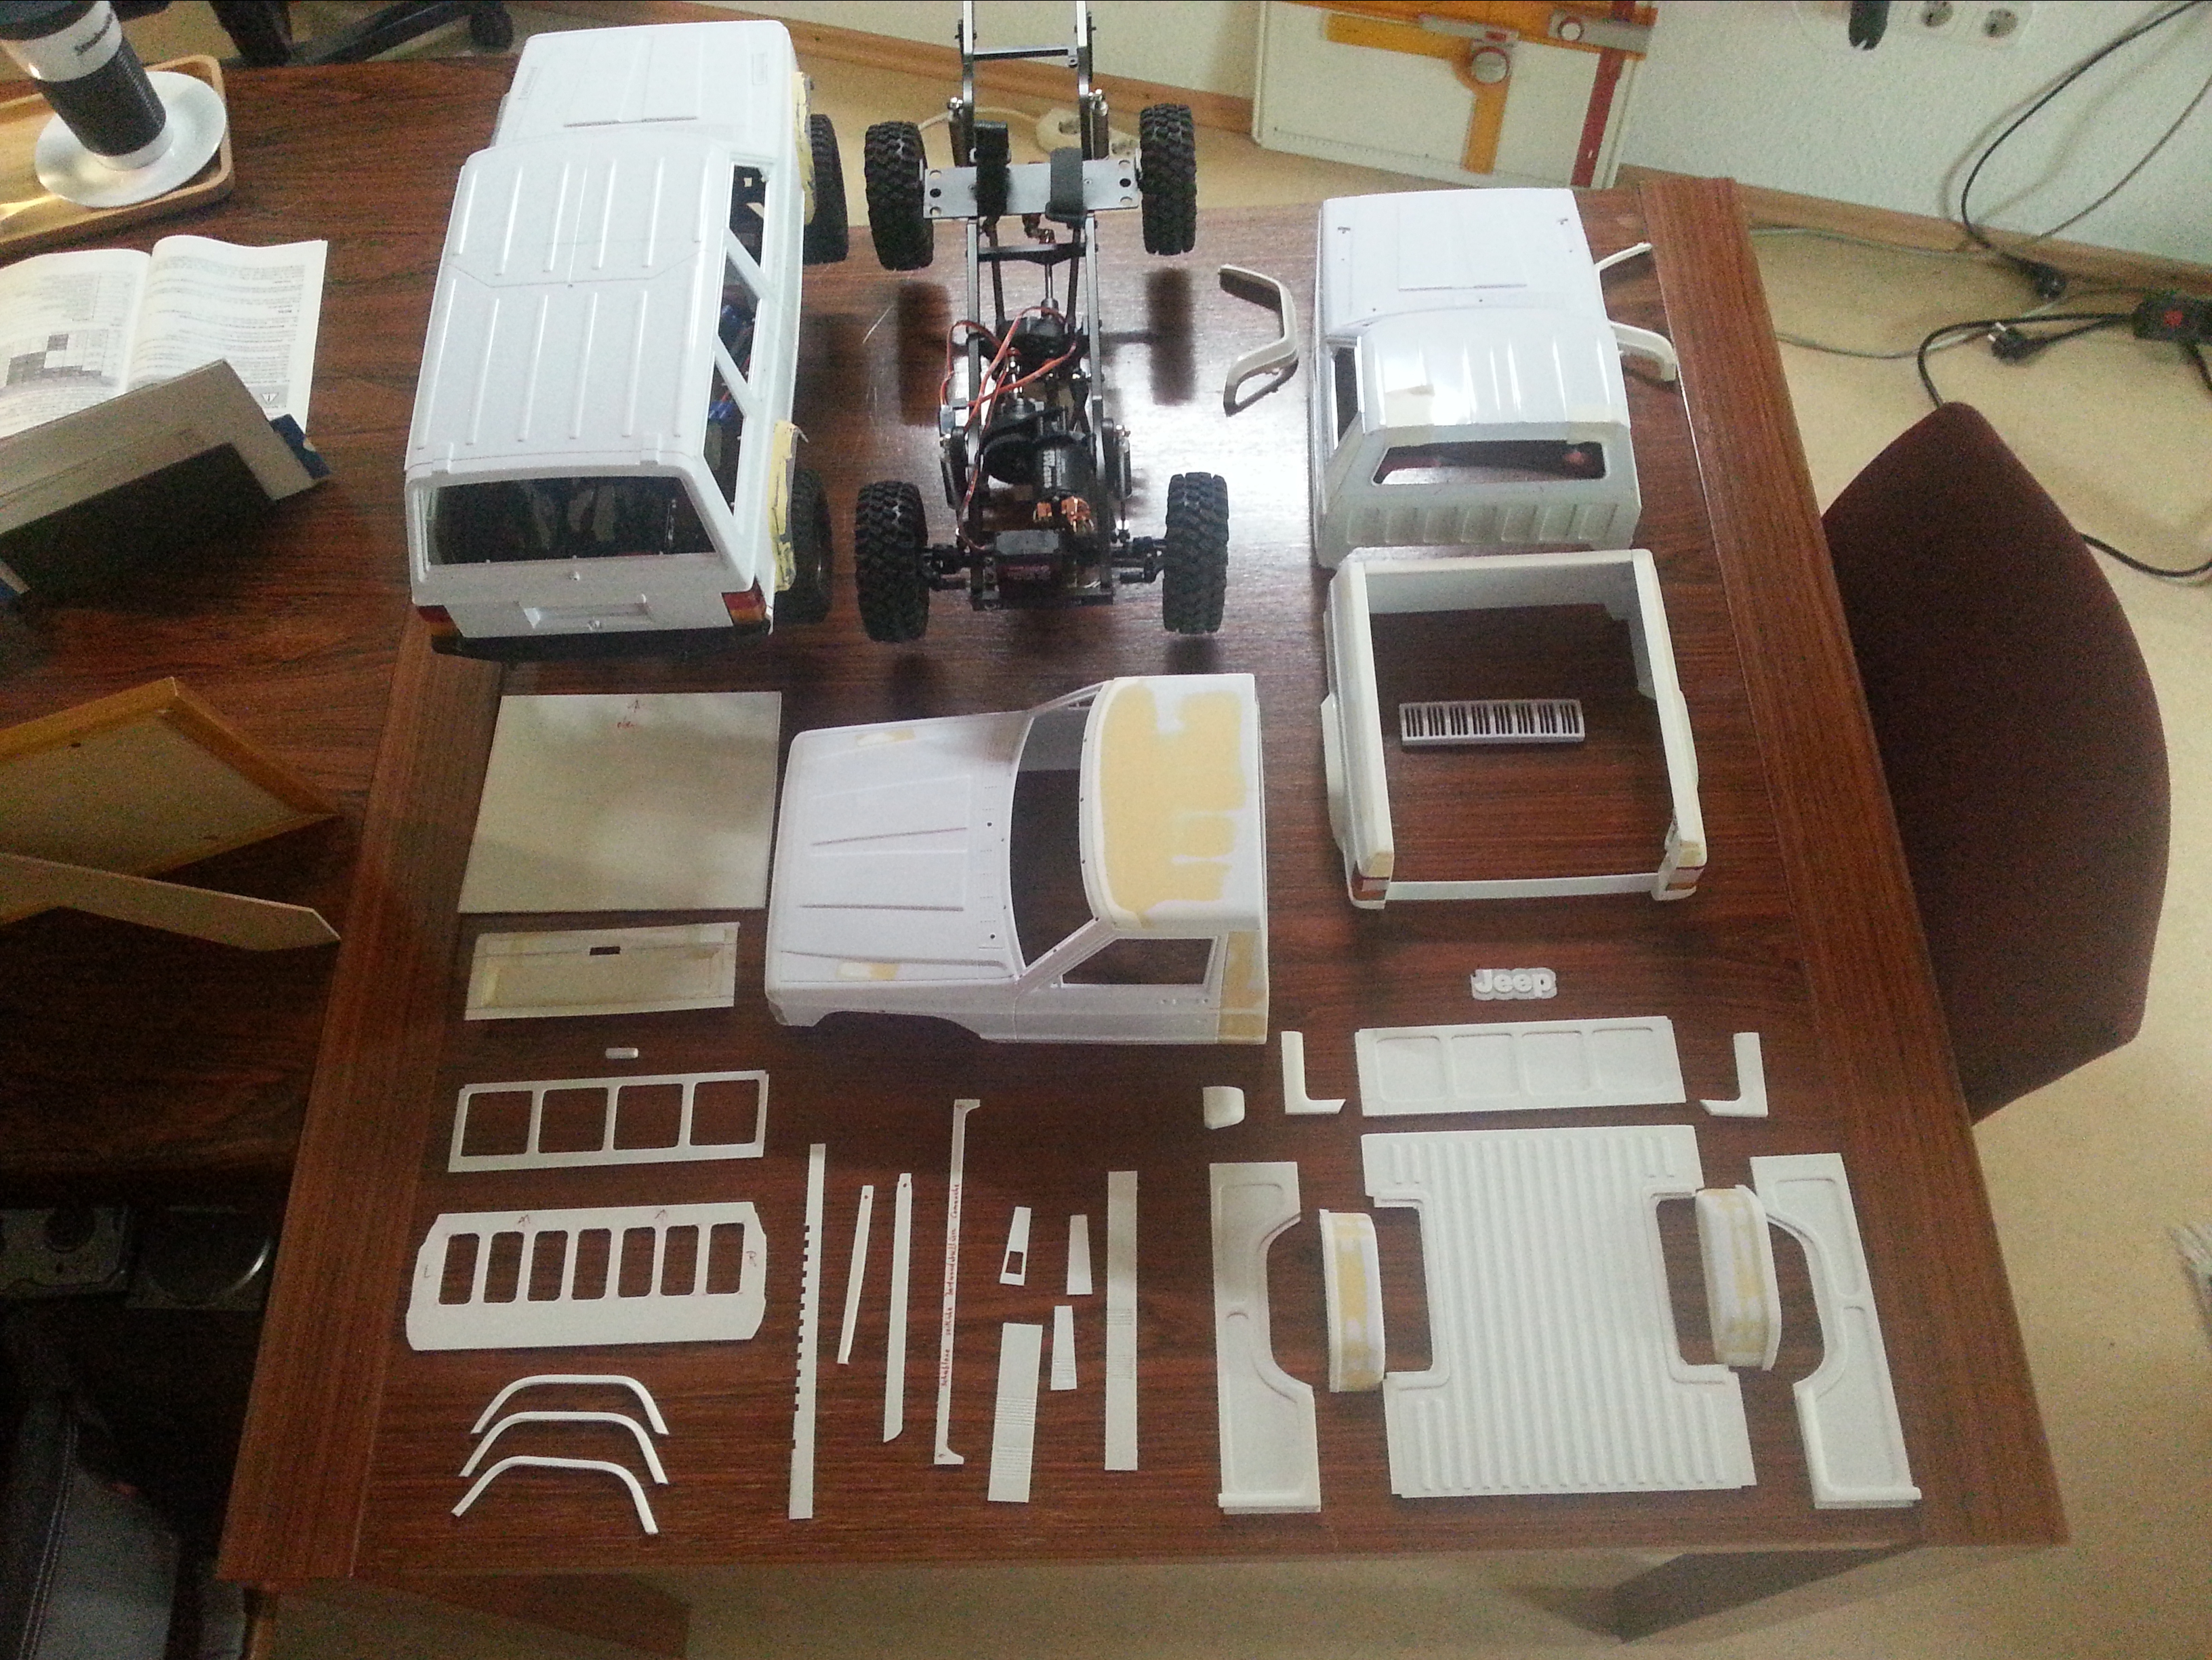
Auch interessant sind die bisher produzierten Teile, um den Weg bis heute einmal in Form der entstandenen Bauteile und Hilfsmitteln aufzuzeigen. Und selbst diese Darstellung ist nicht mehr vollständig. Einiges wurde zwischenzeitlich wieder in Form neuer Bauteile recycelt.
Wird schnellstmöglich fortgesetzt …
English Version
An interim balance sheet
A lot has happened since I decided to return to RC model making. It all started with the purchase of a Defender-based Boom Racing chassis. Originally a Defender Pickup should be developed, after the following model.
While searching and researching, a model came up which completely threw all plans to the wind. A very rare Jeep Pickup drove over my screen. Some fascinating videos follow…
In view of these pictures I was filled with an almost boundless enthusiasm. But at that time, I was not yet aware of the path that lay ahead of me. The Comanche in the video drove on an Axial SCX10 II chassis, designed for a wheelbase of 313 mm. I had never seen the original before, not to mention the technical data. The Comanche body was definitely purchased with enthusiasm. The starting signal for a path that is difficult to follow, from today’s point of view also for me. Nothing fitted together. My Boom Racing chassis was simply too long for this body.
Therefore there was a lot of perplexity at first. As a tinkerer, however, I had also realized that shortened chassis struts center the axles and wheels in the wheel arches. No problem after all!?
As a lover of realistic vehicle looks, the technical data of the Comanche were then calculated. Now the house of cards started to totter. The result of my research, also on the Comanche model, did not fit the original. The size of the construction site grew to an unplanned extent. Conclusion at that time; the frame is too long for the body, the wheelbase as well. The body, however, was too short. As a solution step a conversion kit was bought. It should shorten the wheelbase to 313 mm. According to the manufacturer all parts of the Defender chassis could be used. In order not to go beyond the scope of this report and also not to repeat the multitude of problems associated with this combination, a summary. Who likes it simple, should better leave the fingers of this combination…🤐
After my unsuccessful conversion attempts had failed, the Boom Racing chassis was rebuilt back to its original state. Its wheelbase was 331 mm again. The technical data of the Comanche, internally also called type MJ, resulted in a wheelbase of 2.870 mm. Another important finding of my research, the Comanche model has a scale of about 1:8.3 from which the model wheelbase is derived, 2,870 / 8.3 = 346 mm. Mathematically therefore the next problem. Now the frame is too long, simply too short. My confusion was at a temporary low point…😥
The beautiful Boom Racing chassis was mounted almost ready to drive, parked on the shelf.
My attention was focused on the cab for a long time. Since it is too short compared to the original, it was extended without further ado. At the roof and the two side parts. The result, a cab for a Comanche Truggy, was presented in the last article. The way to this cab was not an easy one. For me at least, because I had no experience with the processing of polystyrene and ABS until that time. In addition, there were the many questions how to build a body at all. In view of the way I have chosen in the meantime and the advanced state of construction, a question that is still open. The inevitable hardships of off-road driving will eventually answer this question. And this is what the Truggy cab looks like at the moment.
Exactly the problems that arose during my conversion finally prompted me to give it a try. The goal was to build a body as realistic as possible with less effort. This finally led to the model of the Cherokee. Its cab bases are nearly identical. My assumption to cut off the Cherokee in the area of the rear doors and close the remains of the window openings was a recommendable variant. In combination with a second Comanche, its rear wall top was fitted. The back wall lower part was then again, a complete self-construction. The result was a second Comanche. Now with a cab, close to the original and much easier to convert. On the photo it is shown with loading area and in almost actual configuration.
A large construction site became finally the loading area. It was sawed up completely. Front side and tail lift were removed as well as the complete loading area. Here you can see the state of construction relatively soon, from the last contributions. It has already become a real eye-catcher in the carcass. From above …
…and also from below.
Also interesting are the parts produced so far, to show the way up to now once in form of the developed components and aids. And even this representation is no longer complete. Some of them have been recycled in the form of new components in the meantime.
Will continue as soon as possible…
.
